How to Set Up Mainsail Web Interface for Your Klipper Printer
This guide provides a comprehensive walkthrough on setting up the Mainsail web interface for your Klipper 3D printer. Gain full remote control and monitoring capabilities for your print jobs.

Unleash the Beast: How Mainsail and Klipper Transformed My 3D Printing Business (and Can Transform Yours!)
Look, if you're still running your 3D printer on stock firmware, honestly, bless your heart. You're probably tearing your hair out with slow print speeds, ugly artifacts, and a general feeling of "there *has* to be a better way." And guess what? There absolutely is! I was there, printing away on my souped-up Ender 3 Pro and an Anycubic Kobra, thinking I'd hit the ceiling for what FDM could do. Print times were long, quality was… decent, but not mind-blowing. Then Klipper came along, and then Mainsail, and let me tell you, it wasn't just an upgrade; it was a revolution for Artopia Collections. It literally transformed how my small business operates, letting me take on more complex projects, deliver faster, and offer a quality I simply couldn't achieve before. So, if you're ready to say goodbye to the dark ages of firmware and embrace speed, precision, and a silky-smooth web interface, let's talk about setting up Mainsail for your Klipper printer.
Why Klipper? Why Mainsail? Because Life's Too Short for Slow Prints!
The thing is, most budget 3D printers come with pretty underpowered mainboards. They're basically doing all the complex calculations for motion planning right on the board itself, and they just can't keep up with high speeds and intricate details. Klipper changes that by offloading all those heavy computations to a more powerful single-board computer (SBC) like a Raspberry Pi. It sends highly precise movement commands to your printer's mainboard, which then just executes them. The result? You can push your printer *way* harder, get much smoother motion, and achieve incredible print quality at speeds that'll make your jaw drop. I'm talking about easily doubling or even tripling your print speeds without sacrificing quality. Seriously!
And Mainsail? Well, Klipper is the powerful engine, but Mainsail is the beautiful, intuitive dashboard that lets you control everything with ease from your web browser. It's clean, responsive, and gives you real-time feedback on your printer's status, temperatures, print progress, and even lets you adjust settings on the fly. No more messing with tiny LCD screens or awkwardly formatted G-code files. It's a game-changer for remote monitoring, which is crucial for me when I'm running multiple machines for client orders. I can be sipping chai, checking on my prints from anywhere in the house, or even from my phone if I'm out picking up some more eSun PLA+ from the local supplier (which, let's be honest, happens almost daily).
What You'll Need Before We Dive In (The Shopping List, Indian Style!)
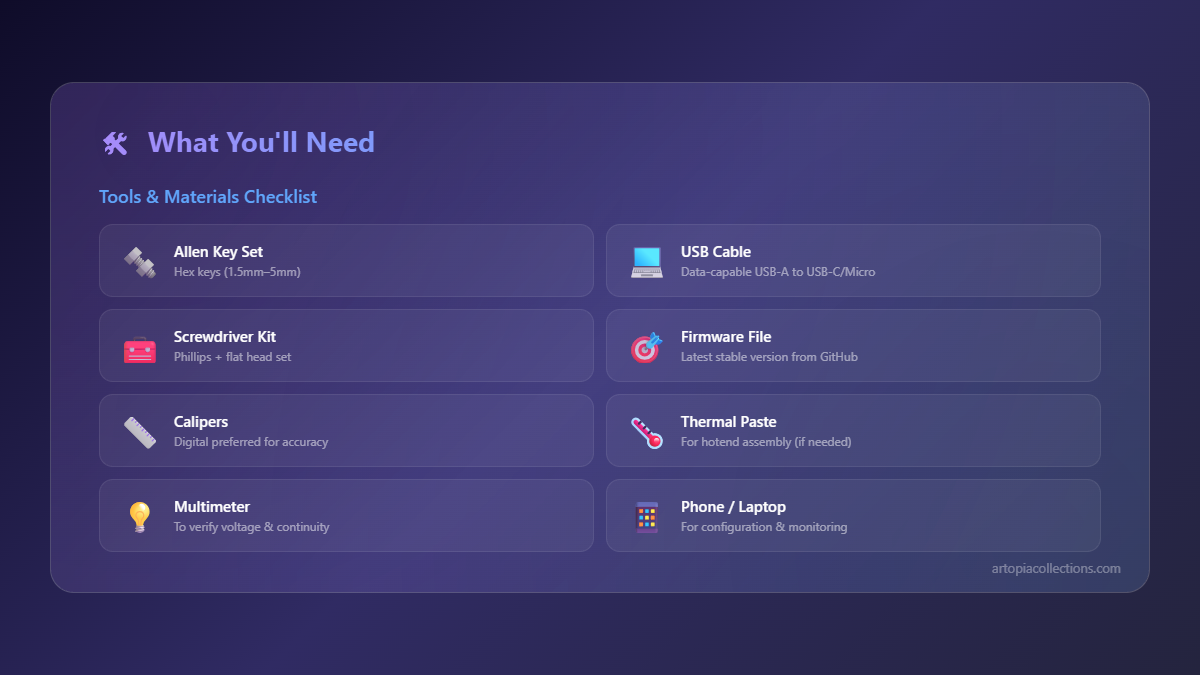
Alright, before we start tinkering, let's get our ducks in a row. You'll need a few bits and bobs. Don't worry, it's not too expensive, and the investment pays off quickly:
- A Single-Board Computer (SBC): The most common choice is a Raspberry Pi. A Pi 3B+ or Pi 4 (2GB or 4GB) is ideal. Honestly, Pi 4 is best for future-proofing, especially if you plan on adding a camera or multiple printers. Availability in India can be a bit spotty sometimes, and prices fluctuate. Expect to pay anywhere from ₹4,000-₹7,000 for a Pi 4, depending on the RAM and where you source it. You can find them on Amazon or local electronics stores. If you're looking for one, a good starting point for a Raspberry Pi 4 is right here.
- A MicroSD Card: At least 16GB, Class 10 or higher. You want something reliable because this is where your operating system and Klipper live. A good quality SanDisk or Samsung card is perfect. Don't cheap out here; a flaky SD card is a recipe for headaches. I've personally had a few bad ones, and troubleshooting them is just a waste of time.
- A Power Supply for Your Pi: A proper 5V, 3A USB-C power supply for a Pi 4, or a 5V, 2.5A micro-USB for a Pi 3B+. This is critical. Undervoltage issues will cause all sorts of mysterious problems.
- A USB Cable: To connect your Pi to your 3D printer's mainboard. Make sure it's a good quality data cable, not just a charging cable.
- A Computer with Internet Access: For downloading software and accessing your Pi via SSH.
- Basic Linux Terminal Comfort (Optional but helpful): If you're new to Linux commands, don't sweat it. I'll walk you through the basics. You'll be a terminal wizard in no time, or at least you'll feel like one.
- Your 3D Printer: Obviously! Make sure it's in good working condition.
Step 1: Flashing the OS onto Your Pi – Let's Get Digital!
First things first, we need an operating system on that Raspberry Pi. We'll use Raspberry Pi OS Lite (64-bit recommended if your Pi supports it) because it's lightweight and perfect for our needs. We don't need a fancy desktop environment; we just need the bare bones.
- Download Raspberry Pi Imager: Go to the official Raspberry Pi website and download the Imager tool for your computer's OS (Windows, macOS, Linux).
- Prepare Your SD Card: Insert your microSD card into your computer's card reader.
- Flash the OS:
- Open Raspberry Pi Imager.
- Click "Choose OS" and select "Raspberry Pi OS (other)" then "Raspberry Pi OS Lite (64-bit)" or (32-bit if 64-bit isn't an option for your Pi).
- Click "Choose Storage" and select your microSD card. *DOUBLE-CHECK this step! Selecting the wrong drive can wipe your computer's hard drive!*
- Now, here's a neat trick in the Imager: click the cog icon (Advanced Options) before you hit "Write".
- Enable SSH (set username `pi` and password `raspberry` for now, but change it later!).
- Configure Wi-Fi (enter your SSID and password). This will save you a headache later!
- Set your locale settings.
- Click "Write" and wait for it to finish. It'll take a few minutes.
Once it's done, eject the SD card, pop it into your Raspberry Pi, connect your USB cable from the Pi to your printer, and power on the Pi. Give it a minute or two to boot up.
Step 2: Installing Klipper and Mainsail OS – The Easy Way with KIAUH!
Now, we need to access your Pi. Since we enabled SSH and Wi-Fi, it should be connected to your network. You'll need its IP address. You can usually find this by checking your router's connected devices list or by using a network scanner app on your phone (like Fing, which I use a lot). Once you have the IP (e.g., 192.168.1.100), open a terminal (Linux/macOS) or PuTTY (Windows) and connect via SSH:
ssh pi@your_pi_ip_address
Enter the password you set (default `raspberry`). You're in! Welcome to the command line, my friend. Now for the magic: KIAUH (Klipper Installation And Update Helper).
- Get KIAUH:
git clone https://github.com/th33xitus/kiauh.git - Run KIAUH:
./kiauh/kiauh.sh
A blue menu will pop up. This tool is brilliant because it automates a lot. Navigate with the arrow keys and press Enter:
From the main menu:
1) Install
Then, select:
1) Klipper (Let it install. You'll be asked about how many instances; usually just 1 unless you're running multiple printers from one Pi.)
2) Mainsail (Again, let it do its thing.)
KIAUH will handle all the dependencies and configurations. It's truly a lifesaver. This process might take 10-20 minutes, depending on your internet speed and Pi model. Go grab a cup of chai, or maybe check out some of the cool custom designs and functional prints we offer at Artopia Collections while you wait!
Step 3: Building Your Klipper Firmware – The Brains for Your Printer
This is where we tailor Klipper for *your* specific printer's mainboard. Every board is a little different, and Klipper needs to know what it's talking to. We're essentially compiling a custom firmware file that you'll flash to your printer's mainboard. This sounds scary, but it's not too bad.
- Configure Klipper Firmware:
In your SSH terminal, navigate to the Klipper directory:
cd klipperThen, start the configuration menu:
make menuconfigA blue configuration menu will appear. This is where you tell Klipper about your board. You'll need to know your printer's mainboard microcontroller. Common ones include:
- Creality 4.2.2/4.2.7: Usually an STM32F103 or STM32F401.
- SKR Mini E3 V1.2/V2.0/V3.0: STM32G0B1.
- Anycubic Kobra/Vyper: Might use a different STM32 chip or something like an Nuvoton M484.
If you're unsure, search online for "[your printer model] mainboard microcontroller" or physically inspect your board if you're comfortable. Pay close attention to the `Micro-controller architecture` and `Processor model` options. For Creality boards, for instance, you'll often select `STM32F103` and then the correct bootloader offset (usually `28KiB bootloader`). For other boards, it might be `USB (on PA11/PA12)` for communication instead of `Serial`. Save and Exit.
- Compile the Firmware:
Once configured, compile it:
makeThis creates a `klipper.bin` file in the `klipper/out/` directory.
- Transfer and Flash to Your Printer:
- Get the .bin file: You can use `scp` (Secure Copy Protocol) in the terminal, or a tool like WinSCP (Windows) or Cyberduck (macOS) to transfer the `klipper.bin` file from your Pi's `~/klipper/out/` directory to your computer.
- Flash the .bin file: This step is *critical* and varies by board.
- For most Creality and BTT SKR boards: Rename `klipper.bin` to `firmware.bin` (or sometimes `GD32FXXX_firmware.bin` for certain Creality boards) and copy it to an empty (FAT32 formatted) SD card. Insert the SD card into your printer's mainboard slot (not the screen slot!), power cycle the printer, and it should flash automatically. The `.bin` file usually disappears or renames to `.cur` after a successful flash.
- For some boards (like older Anet boards or custom setups): You might need a more involved method like DFU flashing. Consult Klipper's official documentation or your board's specific instructions.
IMPORTANT: Always back up your original printer firmware and config files if possible before flashing Klipper. And remember to remove the SD card after flashing, or it might try to reflash every time you power on!
Step 4: Initial Mainsail Configuration – Bringing it All to Life!
Okay, your printer now has Klipper firmware. Your Pi has Klipper and Mainsail installed. Now we need to connect them and tell Klipper about your printer's specific hardware (endstops, thermistors, stepper motors, etc.).
- Access Mainsail: Open a web browser on your computer and type in your Pi's IP address (the same one you used for SSH). You should see the beautiful Mainsail interface! At first, it'll probably show an error saying Klipper isn't connected. That's normal.
- Create/Upload `printer.cfg` (The Brains of Klipper):
- Klipper uses a `printer.cfg` file to define everything about your printer. Luckily, the Klipper project provides example config files for many popular printers. You can find them in the Klipper GitHub repository (`klipper/config/` directory).
- Download the example config that's closest to your printer (e.g., `creality_ender3_pro_v4.2.2.cfg`).
- Open this file in a text editor (like Notepad++ or VS Code). You'll need to customize it! This is the most crucial part. You need to verify things like:
- The serial port of your printer (usually `/dev/serial/by-id/usb-Klipper_stm32g0b1_...` or similar). You can find this by running `ls /dev/serial/by-id/*` in your Pi's SSH terminal after connecting the printer to the Pi.
- Your thermistor types (NTC 100K usually).
- Endstop pins.
- Stepper motor directions (
!inverts direction). - E-steps (
rotation_distancein Klipper).
- Save your customized file as `printer.cfg`.
- In Mainsail, go to the "Machine" tab, then "Config Files." Click "Upload" and upload your `printer.cfg` file.
- Click the "Restart Klipper" button (usually a little power icon) in Mainsail.
- Initial Checks:
If all goes well, Mainsail should show your printer connected! You'll see temperature readings, and you should be able to home your axes (carefully!). If you get errors, don't panic. Check the console in Mainsail; it'll tell you what's wrong (e.g., "MCU 'mcu' shutdown: Timer too close"). This usually means an incorrect pin definition in your `printer.cfg`.
Step 5: The First Print and Beyond – Tuning for Perfection!
You're almost there! Once Klipper is connected and your printer homes correctly, it's time for some initial tuning. This is where the real fun (and a bit of patience) begins. I recommend starting with basic calibration:
- PID Tuning: For your hotend and heated bed. Mainsail has a handy "Tuning" tab for this. Run `PID_CALIBRATE HEATER=extruder TARGET=200` and `PID_CALIBRATE HEATER=heater_bed TARGET=60` and follow the instructions to save.
- Z-Offset: Absolutely crucial for first layer adhesion. Use the Z-offset wizard in Mainsail, or manually adjust while printing a skirt.
- Input Shaping & Pressure Advance: These are Klipper's superpowers! Input Shaping drastically reduces ghosting (ringing) at high speeds, and Pressure Advance ensures consistent extrusion. They require a bit more setup (like an accelerometer for Input Shaping), but they are *so* worth it. Honestly, this is where you really unlock the speed and quality.
Once you've done the basics, try a small test print. Start slow, then gradually increase your speeds. You'll be amazed at the difference!
How Klipper and Mainsail Transformed Artopia Collections
Honestly, installing Klipper was the best decision I made for my business. Before, I was limited by how fast I could print without sacrificing quality. Now, with Klipper's precision and Mainsail's intuitive control, I can literally churn out custom prints – be it intricate architectural models for a client in Bengaluru, or fun, personalized gifts – in a fraction of the time. This means I can take on more orders, deliver faster, and offer a level of quality that stands out. I even upgraded my main workhorse, an Ender 3 Pro, with a new all-metal hotend and some better stepper drivers, and it flies now, churning out perfect prints consistently. The speed allows me to experiment with new filaments too, like those fancy silk PLAs or tough PETGs, without worrying about wasted hours on failed prints. And for keeping a consistent supply, I always make sure to stock up on good quality filament. If you're looking for reliable options, check out some great PLA filaments on Amazon.in.
The remote monitoring capabilities of Mainsail are also invaluable. I can start a print, head out to meet a client, and check its progress from my phone. If there's an issue, I get alerts, and I can pause or cancel the print. It's truly liberating. It’s helped me grow from just a hobbyist to someone who's confidently running a small, thriving 3D printing business right here in India.
Wrapping Up – Your Klipper Journey Begins!
So, there you have it. Setting up Mainsail with Klipper might seem a bit daunting at first, especially if you're not used to the command line, but trust me, it's incredibly rewarding. The boost in performance, the enhanced control, and the sheer joy of seeing your printer spit out beautiful, fast prints are absolutely worth the effort. It's a journey, not a destination, and there's always more to learn and optimize. But once you take that first step, you'll wonder how you ever lived without it. Go forth, tinker, and unleash the true potential of your 3D printer!


