
Ever yank a print off the build plate, feeling that rush of accomplishment, only to then spend the next hour painstakingly chiseling away at a forest of supports? And after all that effort, you're left with ugly scars or a surface finish that looks like a badger took a bite out of your beautiful model? Ugh. Honestly, itâs one of the most frustrating parts of 3D printing, especially when youâre trying to make a living out of it like I am with Artopia Collections. Those supports, man, theyâre basically just wasted filament, wasted time, and a real pain in the neck to clean up.
Here in India, every rupee counts, right? We're always looking for ways to optimize, to make our prints faster, cleaner, and more cost-effective. So, for my business, successfully printing without supports isn't just a "nice-to-have"; it's a "must-have." It means better profit margins, happier customers, and frankly, a lot less headache for me. That's why I've spent countless hours â probably more than I care to admit â tweaking settings, testing different filaments, and pulling my hair out trying to master the dark arts of overhangs and bridging. And you know what? It's totally doable! It's not magic; itâs just understanding your machine and your materials a little better.
So, pull up a chair, grab a chai, and let's talk about how we can conquer those gravity-defying challenges: overhangs and bridging, so you can ditch those pesky supports for good. Or at least, for a lot of prints!
Overhangs: When Gravity is NOT Your Friend
Let's start with overhangs. Basically, an overhang is any part of your print that extends outwards, horizontally or at an angle, without anything directly beneath it to support it during printing. Think of the underside of an arm sticking out from a figurine, or the lip of a bowl. As your printer lays down a new layer, that fresh, molten plastic needs a solid foundation to stick to. When it's an overhang, it's trying to print into thin air, and gravity, being the ever-present bully, tries to pull it down before it has a chance to cool and solidify. The result? Sagging, curling, or those awful spaghetti-like droops that ruin an otherwise perfect print.
In my workshop here in Bangalore, on my trusty Ender 3 V2 (and more recently, a speedy Creality K1), I've learned a few tricks to tackle these.
1. The Angle Game: Respect the 45-Degree Rule (and then push it!)
Most FDM printers, like my Creality Ender 3 V3 KE (a fantastic machine for its price, usually around â¹25,000-â¹30,000, you can check it out here on Amazon.in), can typically handle overhangs up to about 45 degrees without any supports. This means if a feature slopes out at 45 degrees or less from the vertical, it should print fine. The previous layer provides enough overlap for the new layer to adhere to. But here's the deal: with proper tuning, you can often push this limit. I've successfully printed 60-degree overhangs, sometimes even a bit more, especially with PLA.
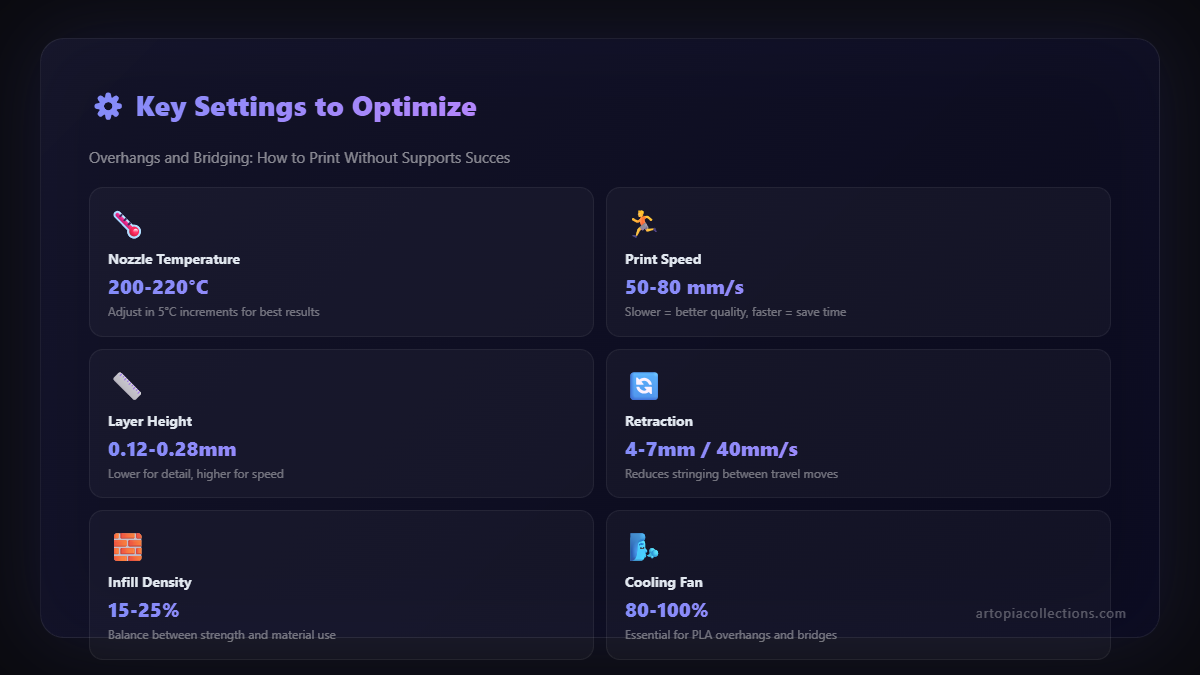
How? It's all about precision. The better your printer's calibration, the more accurately it can place that tiny bit of plastic just barely overlapping the previous layer. If your printer's e-steps are spot on, your belts are tight, and there's no slop in your print head, you're already halfway there.
2. Cooling, Cooling, Cooling!
This is probably the single most important factor for good overhangs. The faster that freshly extruded plastic cools and solidifies, the less time gravity has to pull it down. Think of it like a tightrope walker â the faster they cross, the less chance they have to wobble and fall. Your part cooling fan is your best friend here.
- Max it Out: For overhangs, especially steep ones, crank that part cooling fan to 100%. Seriously.
- Direction Matters: Make sure your fan duct directs air precisely at the nozzle's output, from all sides if possible. Stock fan ducts aren't always great, and a simple printed upgrade (like a Satsana or Hero Me duct) can make a world of difference. I personally printed one for my Ender 3 years ago, and it was a game-changer.
- Slicer Settings: Most slicers (Cura, PrusaSlicer) have specific "Overhang fan speed" settings. You can tell your printer to run the fan at a lower speed for normal printing but then blast it to 100% when it detects an overhang. Utilize this!
3. Print Speed and Layer Height: A Delicate Dance
For overhangs, you actually want to slow down the speed for those specific layers. This gives the plastic more time to cool before the next layer comes along and applies more heat. I typically drop the speed for overhangs to about 30-40 mm/s, sometimes even lower for very tricky angles. It's a balance though; too slow, and heat can build up and deform the layer below. Experimentation is key!
Layer height plays a role too. Thinner layers mean less material to sag per layer, and also more layers to overlap with the one before it. So, if you're struggling with a stubborn overhang, try reducing your layer height (e.g., from 0.2mm to 0.12mm). It'll add to print time, but it might save the print.
4. Filament Choice
PLA is generally the easiest material to print overhangs with. It cools quickly and solidifies fast, making it much more forgiving than, say, PETG, which stays molten for longer and tends to droop more. When I'm pushing the limits, I almost always reach for a good quality PLA. Brands like eSUN, Overture, or even some of the decent Indian brands like Think3D or 3D Print Zone (you can usually find good PLA filament on Amazon.in for around â¹1200-â¹1800 per kg) are my go-to. ABS is even tougher than PETG for overhangs due to its high-temperature requirements and tendency to warp.
Bridging: The Tightrope Walk of 3D Printing
Bridging is a specific type of overhang where your printer has to print a complete span of material over an empty space, connecting two existing points. Imagine the top of an archway, or the roof of a small building model. The first layer of that bridge is entirely unsupported, and itâs basically a tightrope walk for your printer.
If you don't get bridging right, you end up with strings, spaghetti, or a severely sagged, ugly mess that just screams "failed support." Hereâs how I tackle it.
1. Again, Cooling is King! (But with a Twist)
Just like overhangs, maximum part cooling fan speed is non-negotiable for bridging. We want that plastic to solidify mid-air as quickly as possible, creating a taut, strong span. Set your fan to 100% for bridging layers.
2. The Counter-Intuitive Speed Trick
Now, this is where it gets interesting, and it's a common misconception. For bridging, slowing down isn't always the answer. In fact, for the actual bridge lines, a slightly faster speed can sometimes work better! Why? Because a faster, consistent extrusion can stretch the molten plastic across the gap with more tension, allowing it to solidify as a straighter line before it has a chance to sag. Think of it like pulling a string taut. If you go too slow, it sags. If you pull it quickly and firmly, it stays straight.
I've found a sweet spot for PLA bridging on my Ender 3 V2 to be around 20-35 mm/s. It's not lightning fast, but it's often a bit faster than the super slow speeds some people try. You'll need to experiment with your specific printer and filament to find its happy place.
3. Extrusion Magic: Slightly Less is More
For bridging, sometimes a slight underextrusion can help. If you extrude too much plastic, it has more mass, and gravity has more to pull on, leading to more sagging. By slightly reducing the extrusion flow for bridging specific lines (most slicers have a "Bridge flow ratio" setting), you lay down a thinner, lighter line that's easier to keep straight. I usually set my bridge flow to 90-95% in PrusaSlicer.
4. Line Width and Pattern
A slightly wider extrusion width for bridge lines can sometimes provide a stronger, more cohesive bond. Instead of multiple thin lines, one slightly wider line might bridge better. Also, slicers often have different bridging patterns (e.g., straight lines across the shortest distance). Make sure your slicer is set to optimize for bridging.
5. Slicer Specific Bridge Settings
Modern slicers are incredibly powerful. Look for settings like:
- Bridge Speed: Directly controls the speed for bridge layers.
- Bridge Flow Ratio: Adjusts the amount of plastic extruded for bridges.
- Bridge Fan Speed: Ensure it's 100%.
- Bridge Voids Filling: How the slicer handles filling in the bridge area after the initial lines.
Experiment with these in your slicer. Make small changes and test!
General Tips for Success (For Both!)
1. Start with a Calibrated Machine
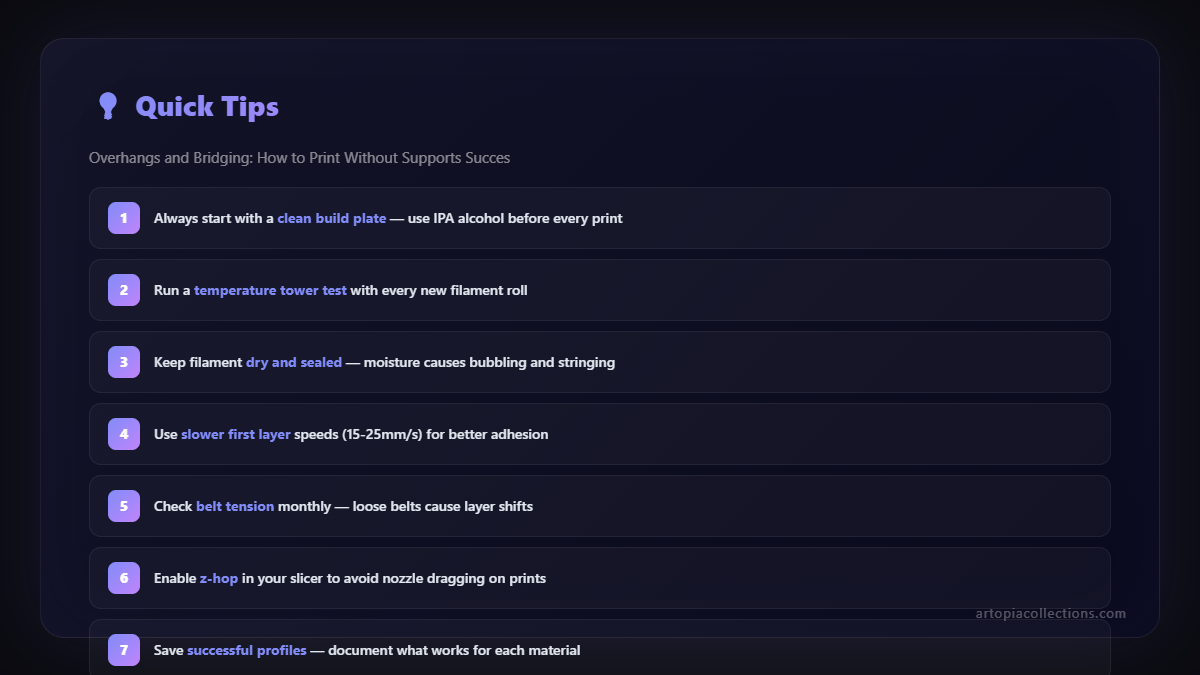
Seriously, this is non-negotiable. If your E-steps aren't calibrated, your temperature isn't PID tuned, your belts are loose, or your bed isn't level, you're fighting an uphill battle. A well-tuned machine is the foundation for successful support-free printing. Take the time to calibrate it properly.
2. Quality Filament Matters (and Dry Filament!)
Using cheap, inconsistent filament will make your life miserable. Even from local brands, I try to stick to ones that have good reviews for consistency. And critically, keep your filament dry! Humid conditions here in India can wreak havoc on filament. Wet filament bubbles and creates inconsistent extrusion, which is death for overhangs and bridges. I keep my filament in sealed boxes with desiccant, and sometimes even dry it out in a food dehydrator before use.
3. Nozzle Condition
A worn-out nozzle or one with gunk inside will cause inconsistent extrusion. If you're struggling, a fresh, clean nozzle can often work wonders. I usually stock up on nozzles on Amazon.in â a pack of brass nozzles is pretty affordable, usually around â¹300-â¹500 for a set.
4. Design for Success!
Sometimes, the best solution is to adjust your model. If you're designing something yourself, try to:
- Add Chamfers or Fillets: Instead of sharp 90-degree corners, add a small chamfer (a slight angle) or a fillet (a rounded edge). This reduces the severity of the overhang.
- Break it Up: If a model has a truly impossible overhang or bridge, consider cutting it into multiple pieces in your CAD software and printing them separately, then assembling them later.
- Orient Thoughtfully: How you orient your model on the build plate can dramatically affect how many supports you need. Spend some time playing with the rotation in your slicer.
5. Print Test Models
There are tons of great overhang and bridging test models available on Thingiverse or Printables. Print these with different settings. Keep a log of what works and what doesn't. This iterative testing is how you truly dial in your machine.
Why Bother? The Business Angle
I know, I've thrown a lot of technical stuff at you. But honestly, mastering this saves me so much time and money for Artopia Collections. Supports aren't just wasted filament (which, even at â¹1200/kg, adds up quickly when you're printing a lot); they add significant post-processing time. Scraping, sanding, filing â thatâs hours that I could be using to design new products, manage orders, or, you know, actually relax! And let's not forget the aesthetic. A clean, support-free print looks infinitely better and commands a better price. When I can deliver models with smooth undersides and crisp details because I didn't need any supports, my customers are happier, and my brand reputation grows.
It's not about never using supports again; sometimes, they're unavoidable for really complex geometries. But by understanding overhangs and bridging, you can dramatically reduce your reliance on them, save resources, and improve the quality of your prints. Trust me, the effort you put into learning these techniques will pay dividends, whether youâre printing for fun or running a small business like mine.
So, give these tips a try! Don't get discouraged if your first few attempts aren't perfect. It's a journey, and every failed print is a lesson learned. Keep tweaking, keep experimenting, and soon you'll be printing gravity-defying wonders like a pro. And hey, if you crack a new secret, do let me know â I'm still learning new tricks myself, believe me!


