How to Use Voronoi Patterns in Blender for Decorative 3D Prints
Discover how to leverage Blender to generate intricate Voronoi patterns. Learn to transform these designs into eye-catching decorative objects perfect for 3D printing.
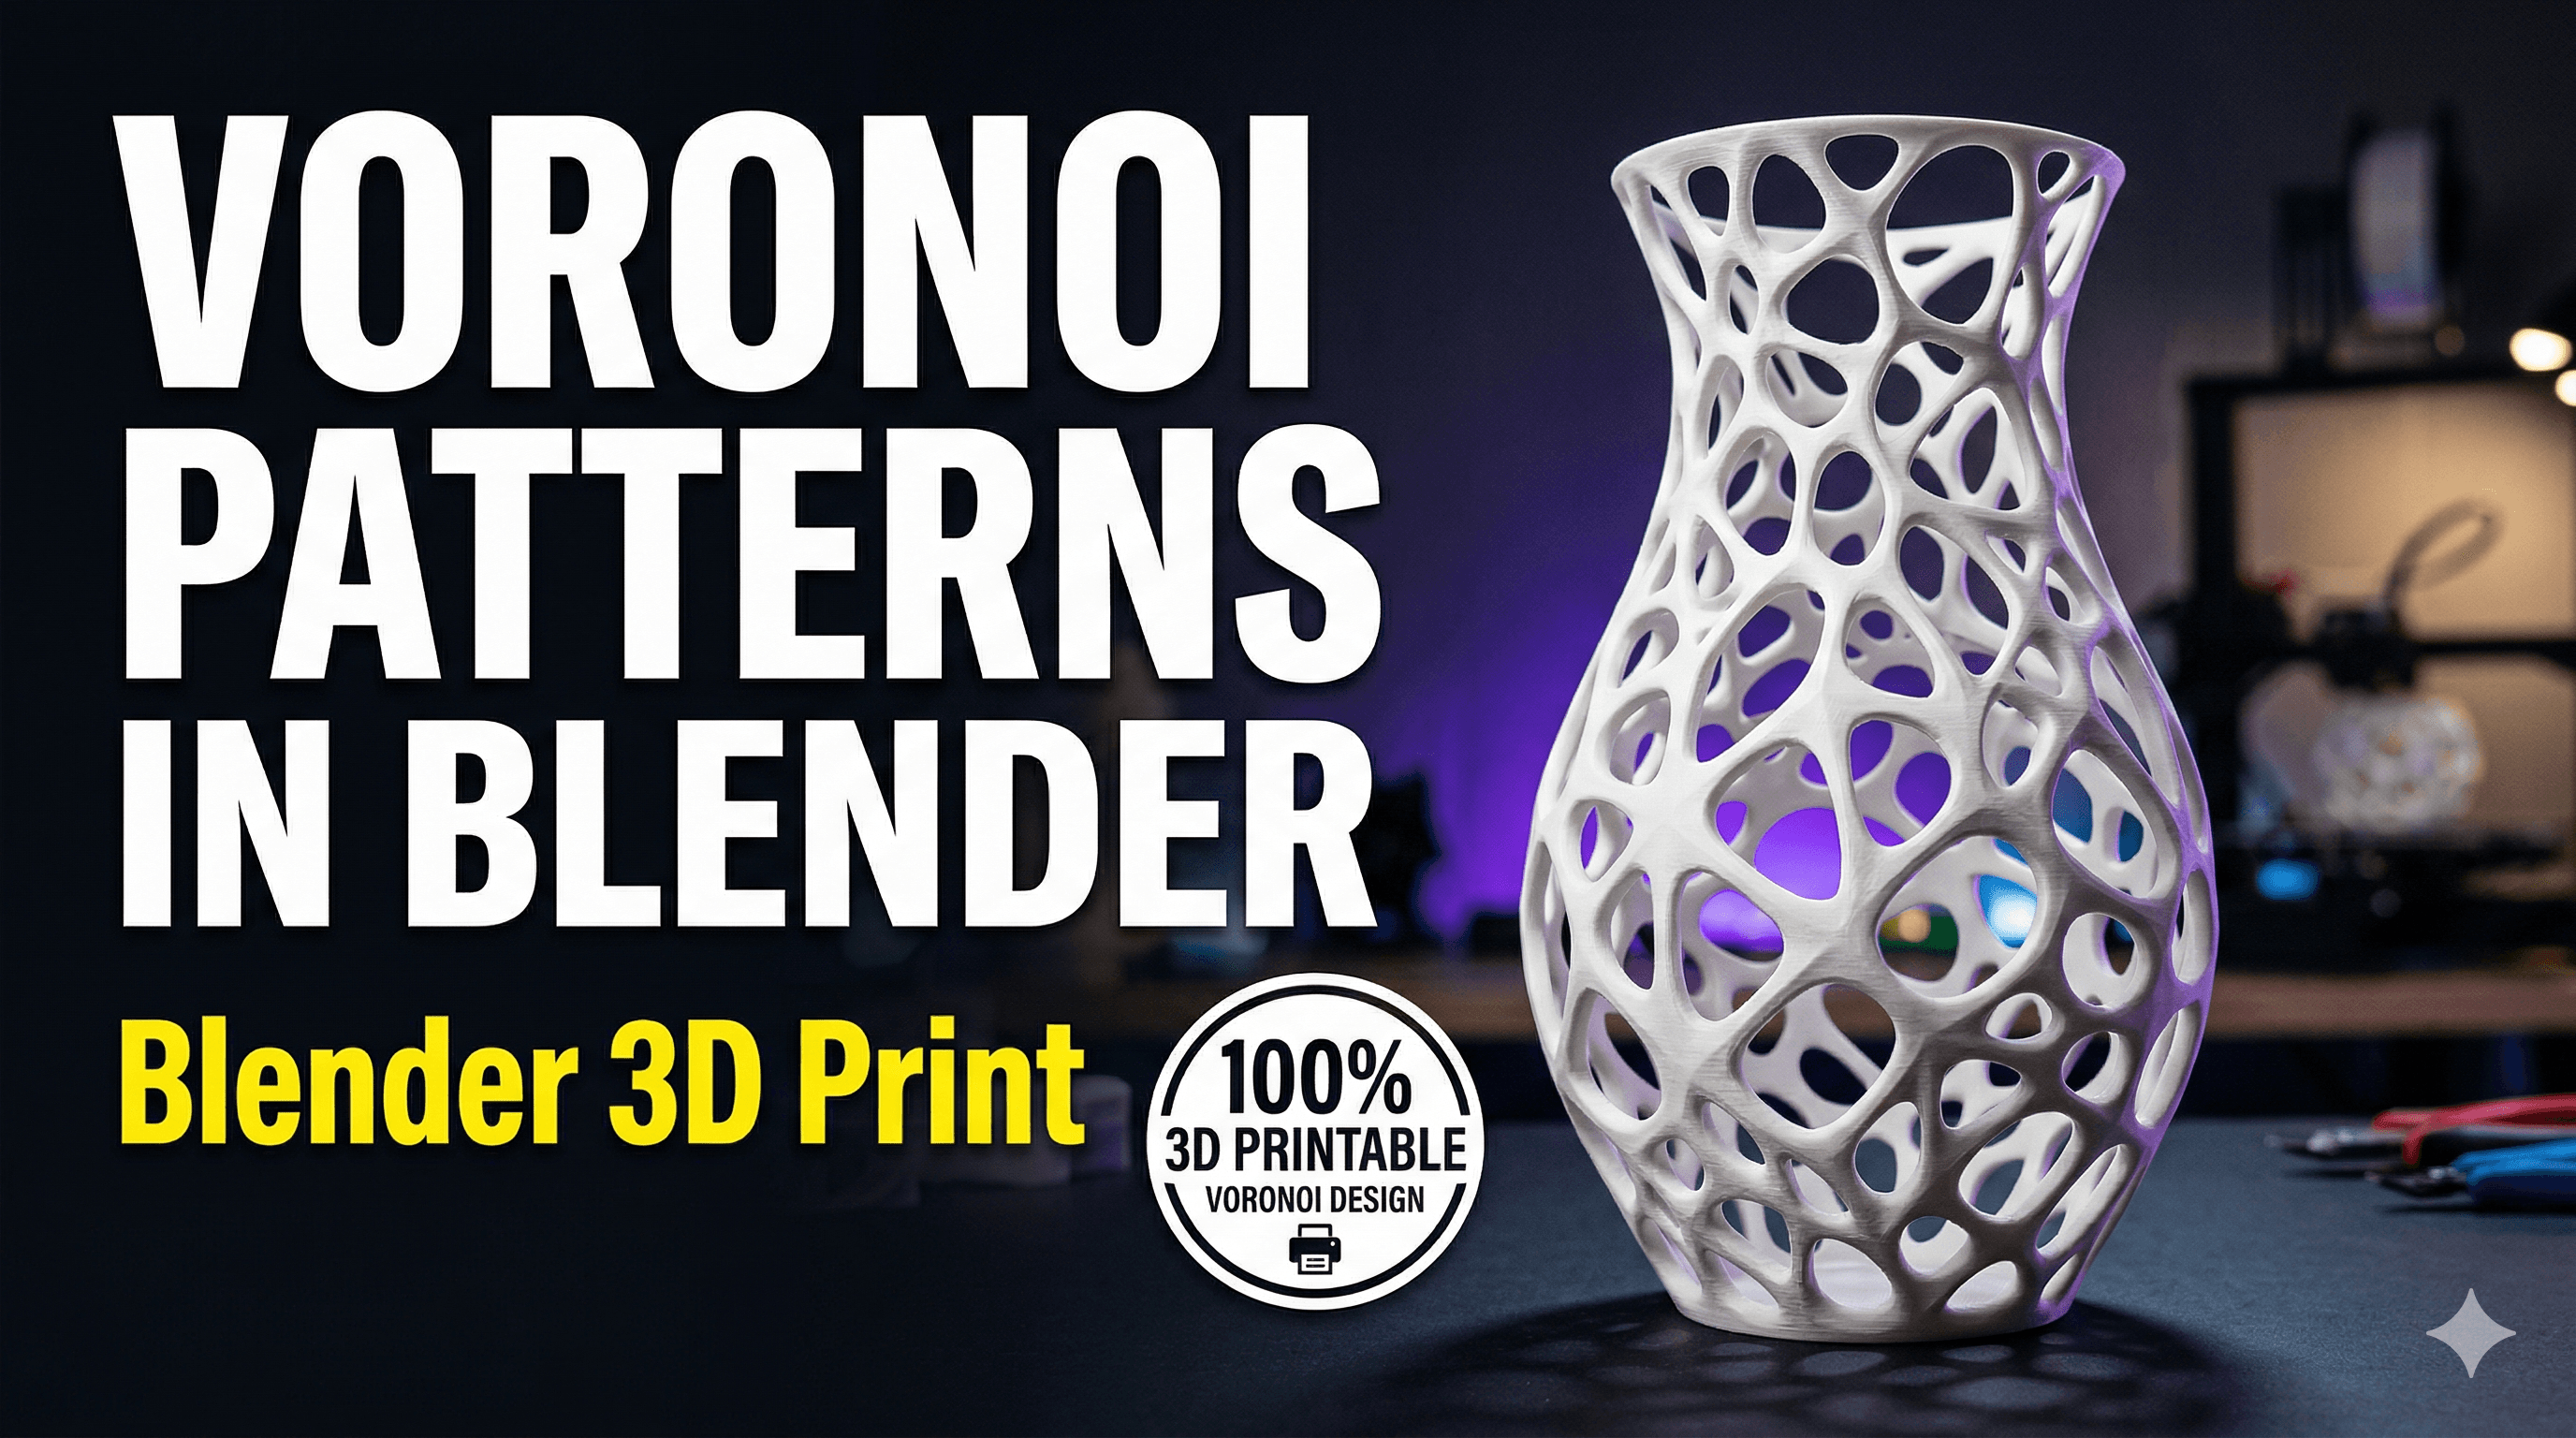
Hey everyone, it's your buddy from ArtOPIA Collections, Vidyut, back again! Man, what a week it's been. My Ender 3 V3 KE has been practically humming non-stop, churning out some of the wildest, most intricate pieces I’ve ever designed. And honestly, it’s all thanks to one magical pattern: Voronoi. If you’ve seen those cool, organic, cell-like structures – think cracked earth, dragonfly wings, or even the patterns on a giraffe – that’s Voronoi for you. And trust me, once you figure out how to weave this into your 3D prints using Blender, your designs are going to hit a whole new level of awesome. It’s a game-changer, seriously.
I remember when I first stumbled upon a Voronoi-patterned vase online. My jaw just dropped. It was so delicate, so complex, and yet looked perfectly natural. I was instantly hooked. But here's the deal: getting that look in a 3D printable model isn’t as straightforward as just hitting a button. It involves a bit of Blender magic, some patience, and a whole lot of trial and error. And believe me, I’ve had my share of errors – countless failed prints, hours spent staring at my screen, muttering to myself. But the results? Absolutely worth every single minute.
What Even IS Voronoi and Why Should You Care?
So, what exactly is this Voronoi thing? Basically, it’s a partition of a plane into regions based on distances to a discrete set of points. Each region consists of all points closer to one specific 'seed' point than to any other. Sounds complicated, right? But the visual result is stunning. It creates these irregular, organic-looking cells, like a natural tessellation. Think about how a soap bubble dries on a surface, or the way a cracked windshield looks. That’s the vibe. And for 3D printing, it means you can create incredibly lightweight, strong (sometimes!), and visually captivating structures that just pop. I’ve used it for lampshades, decorative bowls, jewellery, even intricate keychains. The possibilities are endless, my friends.
The main reason I’m so obsessed with it for 3D printing is how it transforms a simple, solid object into something ethereal. You can make an object look fragile and delicate while still maintaining enough structure to be printed and function. Plus, with the right filament – oh boy, we’ll get to filaments – it can create mind-blowing light diffusion effects. Imagine a lamp that casts these intricate shadows! That’s the kind of magic we’re talking about.
Blender: Your Creative Playground for Voronoi
Now, why Blender? Well, for starters, it’s free! And incredibly powerful. I’ve been using it for years, ever since I started ArtOPIA, and it’s my go-to for pretty much everything. Sure, there are other CAD software options out there, some are even easier for solid modelling. But for complex organic textures and generative designs like Voronoi, Blender is truly in a league of its own. It might seem intimidating at first – all those buttons and menus, it’s like a cockpit of a spaceship! – but trust me, with a little practice, you’ll be flying. The community around Blender is massive too, so there are tons of tutorials out there for almost anything you can imagine.
Here’s a simplified, step-by-step guide to get you started with creating a basic Voronoi pattern on a 3D object in Blender. Don't worry, we're not diving into complex node setups just yet, we're going for a more accessible approach using modifiers.
Step 1: Start with a Base Mesh (Your Canvas)
First things first, open Blender. Delete the default cube (classic move, right?). Now, add the object you want to apply the Voronoi pattern to. This could be anything – a sphere, a cylinder, a custom shape you’ve modelled. For beginners, I’d suggest something simple like a UV Sphere or a Cylinder. Let’s say you add a UV Sphere (Shift+A > Mesh > UV Sphere). Make sure it has enough subdivisions (adjust the 'Segments' and 'Rings' in the bottom-left menu that pops up right after adding it) because the Voronoi pattern needs geometry to work its magic. If you start with a low-poly object, you won't get that fine detail.
Step 2: Prepare for Displacement with Subdivision
Alright, so you’ve got your base mesh. The Voronoi pattern will basically "displace" the surface of your object. To make this displacement smooth and detailed, you need a lot of polygons. So, head over to the Modifiers tab (it looks like a blue wrench icon on the right sidebar). Click "Add Modifier" and select "Subdivision Surface". Set the 'Render' and 'Viewport' levels to something like 2 or 3. This will smooth out your mesh and add more vertices for the pattern to play with. Don't apply it yet, keep it as a modifier so you can always tweak it.
Step 3: The Magic of the Displace Modifier and Voronoi Texture
This is where the real fun begins! With your object selected, go back to the Modifiers tab and add another modifier: "Displace". You'll notice your object might puff out a bit. That's fine. Now, click the "New" button under the 'Texture' section in the Displace modifier. This creates a new texture that this modifier will use. Then, click the little icon next to the "New" button (it looks like a checkerboard pattern) to jump over to the Texture Properties tab.
In the Texture Properties, under the 'Type' dropdown, select "Voronoi". Boom! You'll immediately see your object transform. It's probably looking a bit bumpy or blocky right now, but we’re getting there. Under 'Voronoi Texture', you’ll see options like 'F1', 'F2', 'Smooth F1', etc. 'F1' usually gives a nice cell-like pattern. You can play with 'Distance Metric' too – 'Minkowski' or 'Chebychev' can give some cool variations. But the key here is 'Scale'. Reduce the 'Scale' value (e.g., to 5, 3, or even 1) to make the Voronoi cells smaller and more intricate. This is crucial for getting that delicate look. And honestly, this is where I spend a lot of my time, just tweaking the scale until it feels right. Sometimes, I’ll even mess with the 'Randomness' to get more organic, less uniform cells.
Go back to the Modifiers tab (the wrench icon). Now, adjust the 'Strength' of your Displace modifier. A positive strength value will push the geometry outwards, a negative value will push it inwards. For a cool, hollowed-out Voronoi pattern, you generally want to push it inwards. Try a negative value like -0.1 or -0.05. You'll see the pattern emerge, cutting into your sphere. If it looks too jagged, increase the subdivision levels or reduce the displacement strength.
Step 4: Making it Printable: Solidify!
Okay, so you’ve got a beautiful Voronoi-patterned surface. But here's the thing: for 3D printing, you can't just print a surface. It needs to have thickness, it needs to be manifold. So, add another modifier: "Solidify". Place it after the Displace modifier in the stack (you can drag modifiers up and down). This will give your thin displaced surface some actual thickness. Adjust the 'Thickness' value. For a decent 3D print, especially if you're going for strength, you'll want at least 1.5mm to 2mm of thickness. If you're using a 0.4mm nozzle, anything less than 1.2mm will be tricky and might print as just a few lines, or even separate walls. And trust me, nothing's more frustrating than a print failing because of insufficient wall thickness. I learned that the hard way, burning through a whole spool of eSun PLA+ worth ₹1800 on failed tests!
Sometimes, if the holes are too small, Solidify can create weird overlapping geometry. You might need to go back and adjust the 'Scale' of the Voronoi texture or the 'Strength' of the Displace modifier to make the openings slightly larger. It's a dance, really.
Step 5: Applying Modifiers and Exporting for Print
Once you're happy with the look, it's time to "apply" those modifiers. Start from the top of your modifier stack (Subdivision Surface first, then Displace, then Solidify) and click the dropdown arrow on each modifier, then select "Apply". This bakes the changes into your mesh. Important: Once applied, you can't easily go back, so save your file before this step!
After applying, you’ll likely have a very high-poly mesh. This is good for detail but can be heavy. Go to File > Export > STL (.stl). This is the standard file format for 3D printing. Make sure 'Selection Only' is checked if you only want to export your Voronoi object and not other things in your scene.
Printing Your Voronoi Masterpiece: Tips and Tricks
Now that you have your STL, it’s time to slice it and print it! This is where the real-world challenges of FDM printing come into play. Here are a few things I’ve picked up from countless hours of printing these intricate designs:
- Filament Choice is KEY: Oh, this is so important. For Voronoi patterns, especially decorative ones, I personally love translucent or clear filaments. They let light play through the intricate patterns beautifully. Brands like eSun, Overture, or even local Indian brands like 3D Print India offer some fantastic translucent PLAs. A good spool will set you back ₹1500-₹2000. If you’re selling these, the visual impact is huge. You can find some great options for good quality PLA filament on Amazon.in.
- Layer Height: Go fine! For these detailed prints, a layer height of 0.16mm or even 0.12mm makes a huge difference. It minimizes layer lines and makes the intricate pattern look smoother and more natural. You might need to slow down your print speed too, especially for overhangs.
- Supports: The Necessary Evil: Voronoi patterns often involve lots of overhangs and tiny bridges. You'll likely need supports. Tree supports in Cura or PrusaSlicer are usually your best bet, as they’re easier to remove from complex geometries. Experiment with support density; sometimes less is more for easier removal. I’ve had some nightmares trying to pick out tiny bits of support from delicate Voronoi structures. It's a painstaking process, trust me.
- Infill: Keep it Low or Zero: Since the Voronoi pattern itself creates a structured shell, you often don't need much infill. For purely decorative pieces, I usually go with 0% infill or a very low infill percentage (5-10%) and more perimeters/walls (3-4). This saves filament, print time, and still provides decent strength.
- Printer Calibration: Make sure your printer is well-calibrated. A perfectly leveled bed, correct extrusion multiplier, and dialed-in retraction settings are crucial for successful intricate prints. My Creality Ender 3 V3 KE is a workhorse, but even it needs regular TLC to produce these fine details consistently. If you're looking for a great entry-level workhorse, you can check out the Creality Ender-3 V3 KE on Amazon.in. It's fantastic for the price, usually around ₹30,000, and gives much more expensive printers a run for their money.
My Journey and How It Fuels ArtOPIA
Honestly, when I started ArtOPIA Collections, I was mostly printing functional stuff and basic decorative items. But delving into patterns like Voronoi has transformed my business. People here in India, they appreciate unique, handcrafted, or rather, custom-printed items. When they see a Voronoi vase or a lamp that just glows with this organic lattice, their eyes light up. I've sold these pieces for anywhere between ₹800 for a small coaster set to ₹3000-₹5000 for a large, intricate lamp. The perceived value is so much higher because of the complexity and the stunning visual appeal.
I remember one time I spent nearly three days designing and printing a bespoke Voronoi lampshade for a client in Bengaluru. It was a massive print on my Anycubic Kobra 2, taking almost 40 hours. I used a beautiful translucent PETG, and the client was absolutely thrilled. They even sent me pictures of it lit up in their living room. That feeling? That's what keeps me going. It's not just about printing; it's about creating something beautiful, something unique, something that brings joy. And let's be real, the profit margin on these custom jobs isn't bad either!
Look, the thing is, 3D printing isn’t just about making plastic doodads. It’s an art form, a craft, and a business all rolled into one. And mastering techniques like using Voronoi patterns in Blender just opens up a whole new world of creative possibilities. It allows you to transform simple objects into intricate pieces of art that truly stand out.
So, I encourage all of you, whether you’re a seasoned Blender guru or just starting your 3D printing journey, to give Voronoi patterns a try. It might seem daunting at first – Blender always does – but break it down into small steps. Watch a few YouTube tutorials (there are tons of great Indian creators making Blender content now!). Experiment. Fail a few times. That’s how we learn, that’s how we grow.
And if you're ever looking for some inspiration, or maybe want to pick up one of my latest Voronoi creations without going through the hassle of designing it yourself, feel free to check out our collection over at ArtOPIA Collections. We’re always adding new stuff, pushing the boundaries of what these amazing machines can do.
Keep those print beds hot, my friends, and keep creating! I’ll catch you in the next post. Happy printing!


