Reverse Engineering Broken Parts: Scan, Model, and 3D Print Replacements
Don't throw away your broken gadgets! Discover how to use 3D scanning, CAD software, and 3D printing to create perfect replacement parts and extend the life of your items.

Broken Part Blues? Let's 3D Print a Solution!
You know that feeling, right? That gut-wrenching moment when your favourite coffee machine’s lid latch snaps off, or the tiny plastic clip holding your refrigerator shelf in place decides to give up the ghost. Or maybe it’s an obscure part on your old scooter, something super specific that only came with that model twenty years ago. You scour the local shops, you search online, you call up service centres, and what do they tell you? "Sir, that model is discontinued." Or, even worse, "The part is available, but it'll cost you ₹2500 and take three weeks to arrive from who-knows-where!" And honestly, sometimes the part isn't even worth that much. It's just a tiny bit of plastic, probably costing less than ₹10 to manufacture, holding up an appliance worth thousands.
That, my friends, is where my passion, and a big part of my little 3D printing business, comes into its own. This isn't just about making cool figurines or prototypes anymore. This is about real-world problem-solving, about giving a second life to things, and frankly, about saving a whole lot of money and frustration. We're talking about reverse engineering broken parts: scanning, modeling, and then, the magic happens – 3D printing perfect, custom replacements right here in India.
Why Reverse Engineer and 3D Print? The Indian Context.
Here in India, the spare parts market can be a nightmare. Seriously. Availability is often patchy, prices are inflated for "official" parts, and you often end up having to buy an entire assembly just for one tiny broken component. The environmental impact of throwing away perfectly good appliances just because of a small plastic failure is also something that really bothers me. I mean, we're trying to be more sustainable, aren't we?
So, the idea is simple: if it's broken and made of plastic (or even some metals, though that's a different beast), chances are we can replicate it. Think about it: a washing machine knob, a vacuum cleaner attachment, a car dashboard clip, a bicycle accessory bracket – the list is endless. I've personally fixed everything from a cracked fan guard to a unique curtain rod holder that IKEA stopped selling years ago. And the satisfaction? Unbeatable.
The Journey from Broken to Brand New: Scan, Model, Print!
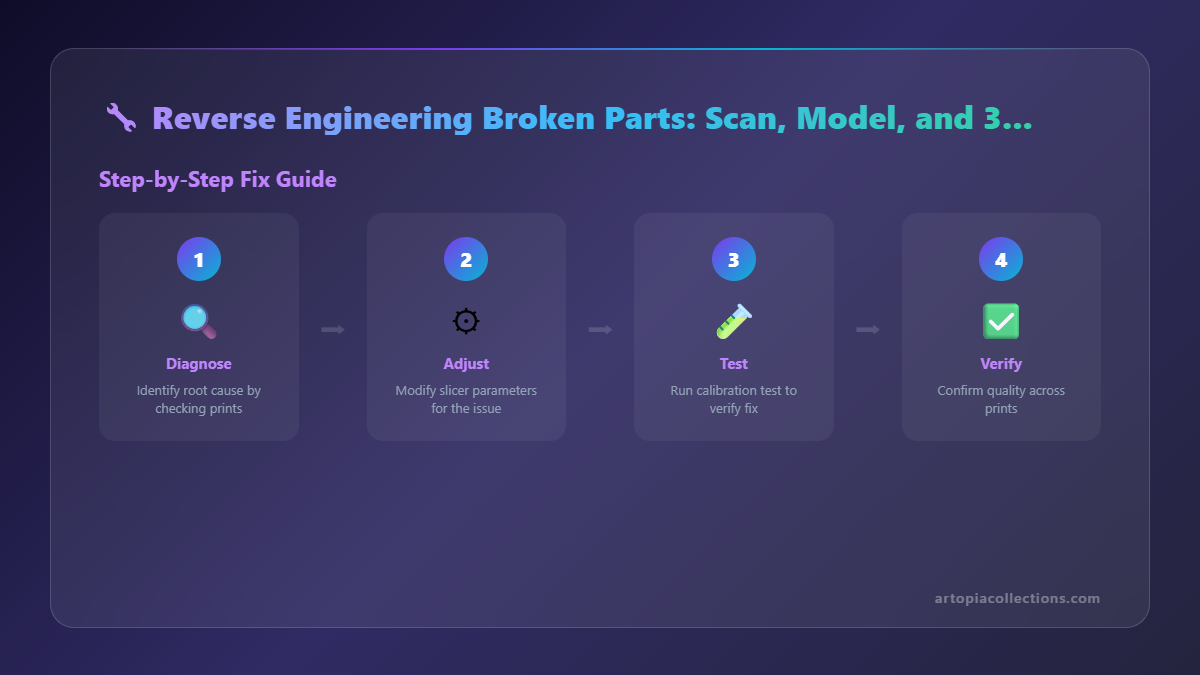 Let's break down the process. It's not rocket science, but it does require a bit of patience and some fundamental tools. And no, you don't necessarily need an industrial-grade scanner or a super fancy printer to get started.
Step 1: The Examination & The Measure
First things first, you need to look at the broken part. Really look at it. How did it break? What forces act on it? What material do you think it was originally made from? Is it rigid? Flexible? Transparent? These observations are crucial. Sometimes, if the part broke cleanly, you can even glue it back together temporarily just to get accurate measurements of the overall shape.
Then comes the measuring. This is where precision is key. For simple parts, a good old vernier caliper is your best friend. You can pick up a decent digital one on Amazon for around ₹500-₹1000. Look, these aren't just for 3D printing; they're super handy for any DIY enthusiast. You want something reliable. Check out some options for digital calipers here.
Measure every dimension: length, width, height, hole diameters, wall thicknesses, fillet radii, angles. And don't forget the offsets and distances between features. I personally take photos from multiple angles too, often with a ruler next to the part for scale. Sometimes, especially with complex curves or organic shapes, manual measurement becomes a headache. That's when we think about scanning.
Step 2: Scanning – From Phone Apps to Dedicated Devices
Honestly, you don't always need an expensive 3D scanner. For many simple geometric parts, accurate caliper measurements are enough. But for anything with complex curves, organic shapes, or multiple intricate features, scanning makes life so much easier.
There are a few options here:
- Smartphone Apps: Believe it or not, some newer smartphones with LiDAR sensors (like recent iPhones Pro models) can do a surprisingly decent job for small objects. Apps like Polycam or Kiri Engine let you take a series of photos and stitch them into a basic 3D model. It's not perfect, often a bit noisy, but it can give you a starting point for complex forms.
- Photogrammetry Software: If you have a decent camera (even a phone camera works), you can take 50-100 overlapping photos of the object from all angles and then process them using free software like Meshroom or paid options like Agisoft Metashape. This takes time and computing power, but the results can be fantastic for surface detail.
- Dedicated 3D Scanners: Now, this is where it gets serious. Handheld structured light scanners from brands like Creality (CR-Scan Lizard) or Revopoint (POP series) are becoming more affordable. You can find basic ones starting from ₹40,000-₹70,000. These offer much higher accuracy and are fantastic for reverse engineering. For my business, I've invested in one because it opens up a lot more possibilities for detailed work and quicker turnaround for clients. The thing is, they still require some learning, and the software can be a bit finicky sometimes, but the precision is game-changing.
The output from scanning is usually a mesh file (STL or OBJ). This mesh can then be imported into CAD software for the next step.
Step 3: The CAD Magic – Bringing it to Life Digitally
This is where the magic truly happens. You take your measurements or your scanned mesh and turn it into a solid, printable 3D model. My go-to software, and honestly, what I recommend to anyone serious about 3D design, is Fusion 360 by Autodesk. It's free for hobbyists and small businesses (under a certain revenue threshold), and it's incredibly powerful. Other excellent options include FreeCAD (open-source), SolidWorks (professional, expensive), or even simpler tools like Tinkercad for very basic shapes.
If you're starting from measurements, you'll be sketching 2D profiles and then extruding, revolving, or sweeping them into 3D shapes. You'll add fillets, chamfers, holes, and cut-outs, all based on those precise caliper readings. The trick here is not just replicating the shape, but understanding its function. Will it need to snap into place? Does it need clearances for movement? What kind of stress will it undergo?
If you're working from a scan, you'll import the mesh into your CAD software. Fusion 360 has excellent mesh-to-body tools where you can "reverse engineer" the mesh by sketching over its surfaces, creating planes, and ultimately building a solid model that approximates or perfectly matches the scanned object. It's like being a digital sculptor, but with engineering precision. This process is called "retopologizing" or "surfacing" and it does have a bit of a learning curve, but it’s incredibly rewarding.
Pro Tip: Always design with tolerances in mind. 3D printing isn't perfectly precise, and parts might shrink or expand slightly. If a hole needs to fit a 5mm shaft, design it as 5.2mm or 5.3mm for a comfortable fit, then test print and adjust.
Step 4: Slicing and Printing – Bringing it to Reality
Once your 3D model (usually a .STL file) is ready, you need to prepare it for your 3D printer. This is done in a "slicer" software like Ultimaker Cura, PrusaSlicer, or Simplify3D. The slicer converts your 3D model into a series of thin layers (G-code) that your printer understands.
Key slicer settings to consider:
- Infill: How solid do you want the part to be? 20-30% infill is often enough for structural parts, but for high-stress components, you might go up to 60% or even 100%.
- Layer Height: Thinner layers (0.12mm to 0.16mm) result in smoother prints but take longer. Thicker layers (0.2mm to 0.3mm) are faster but show layer lines more.
- Perimeters/Walls: The number of outer shells. More walls mean stronger parts. I usually aim for 3-4 walls for functional prints.
- Supports: If your part has overhangs (parts that print in thin air), you'll need supports.
- Material: This is crucial.
Now, let's talk materials. For most functional parts, especially those not exposed to high heat or extreme stress, PLA filament is a great starting point. It's easy to print, affordable (a good 1kg spool usually costs around ₹1200-₹2000 in India from brands like eSUN, Overture, or Eryone), and comes in many colours. But PLA can deform in heat (think inside a car in Indian summer!). For stronger, more heat-resistant parts, PETG is fantastic. It's a bit trickier to print than PLA but offers much better durability and temperature resistance. For really tough parts, or those needing chemical resistance, ABS or ASA are options, but they require enclosures and are more prone to warping. I personally love PETG for its balance of strength and printability.
My go-to printers for this kind of work are usually my trusty Creality Ender 3 S1 Pro or sometimes the Prusa MK3S+ if I need absolute reliability and finer detail. These are workhorses and pretty common in the Indian market.
Step 5: Test, Refine, Repeat!
Rarely does a part print perfectly the first time. You'll print it, test the fit, see where it rubs, where it's too loose, where it's too tight. Then you go back to your CAD model, make adjustments, reslice, and print again. This iterative process is part of the fun, honestly! It's like a puzzle, and each iteration gets you closer to the perfect fit.
Real-World Triumphs: From My Workshop to Your Home
I've had so many instances where this process has been a lifesaver. Just last month, a client came to me with a broken clip from their car's dashboard AC vent. The official service centre quoted ₹4000 for the entire vent assembly, just for a tiny plastic clip! I scanned the broken piece, modelled a reinforced version in Fusion 360, printed it in black PETG (for heat resistance), and within a day, he had his working vent back. The cost to him? Around ₹800, and that included my design time. He was ecstatic.
Another time, a friend's antique lamp had a very specific, ornate base cap that had crumbled with age. No chance of finding a replacement. We spent a good few hours measuring and modelling the intricate details, printed it in a silk gold PLA, and now the lamp looks as good as new. These aren't just fixes; they're acts of preservation.
The Cost Factor: Saving Big Rupees!
 Let's talk money, because that's a huge motivator for many. A typical small plastic part might use 10-30 grams of filament. At ₹1500 per kg for good PLA, that's ₹15-₹45 in material cost. Add a few rupees for electricity (most modern printers are quite power-efficient) and your personal time, and you're looking at a replacement part for under ₹100. Compare that to the hundreds, or even thousands, that an OEM spare part might cost – if you can even find it!
Even if you factor in the initial investment in a printer (an Ender 3 v3 SE, a fantastic beginner printer, costs around ₹18,000-₹25,000) and some filament, it pays for itself surprisingly quickly if you're someone who often faces these "broken part" dilemmas. Plus, think of all the other cool things you can print!
Challenges and What I've Learned
It's not always smooth sailing, I'll be honest. Sometimes, the original part might be made of a material that's hard to replicate with common FDM filaments (like very flexible rubber or super-strong, glass-filled nylon). Getting extremely tight tolerances perfect can require multiple iterations. And learning CAD takes time and practice. But the key is persistence. Don't get discouraged if your first print isn't perfect.
One self-correction I often make is to slightly over-engineer the replacement part. If the original broke because it was too thin in a certain spot, I'll make my printed version a little thicker or add a small fillet to reinforce that stress point. That's the beauty of custom manufacturing – you can actually improve on the original design!
Ready to Bring Your Broken Parts Back to Life?
So, next time something made of plastic breaks around your house, don't immediately despair or reach for the superglue (unless it's a temporary fix!). Take a moment, think about how 3D printing could be the answer. You might be surprised at what you can achieve.
If you're intrigued and want to dip your toes into this amazing world, there are tons of online tutorials for CAD and 3D printing. Or, if you have a broken part that's giving you sleepless nights and you'd rather leave it to the experts (that's me!), feel free to reach out. At Artopia Collections, we love a good challenge and are always ready to help you scan, model, and print that perfect replacement. You can even check out some of the unique stuff we already create and sell right here on our website.
The world of 3D printing is more than just a hobby for me; it's a tool for empowerment, a way to reduce waste, and a fantastic solution to everyday problems here in India. Happy printing, everyone!


