Using Google Scaniverse for Quick 3D Scans That Print Well
Scaniverse by Google offers an incredible way to capture real-world objects in 3D using just your smartphone. This post guides you through getting quick, high-fidelity scans perfect for 3D printing.

The Real-World Magic: How Google Scaniverse Turned My iPhone into a 3D Printing Superpower (and Yours Too!)
The smell of hot plastic, the rhythmic whir of stepper motors – that's my happy place, my friend. Here at ArtOpia Collections, we live and breathe 3D printing. We're constantly pushing the boundaries, trying to make unique, tangible things from digital dreams. But honestly, for the longest time, one massive hurdle always stood in our way: getting real-world objects into our digital workflow without spending a fortune or having an art degree in CAD modeling. I mean, sure, there's always Tinkercad or Fusion 360 for designing from scratch, and trust me, I've spent countless hours in those, fuelled by chai and stubbornness. But what if you need to replicate a broken part? Or immortalize a beloved pet's sculpture? Or simply grab a physical object and just... print it? That's where 3D scanning comes in, and for years, it felt like this mystical, expensive dark art reserved for big industries or people with pockets deeper than the Marianas Trench. Dedicated scanners? We're talking anywhere from ₹50,000 for a halfway decent one all the way up to several lakhs for professional-grade systems. Way, way out of reach for a small business like mine, trying to make a name in Bangalore with bespoke 3D printed art and functional items. So, what's a passionate entrepreneur to do? Well, let me tell you about a little game-changer called Google Scaniverse – it's basically magic for us FDM folks, and it runs right on your phone!
A Scanner in My Pocket? You Bet!
I stumbled upon Scaniverse quite by accident, scrolling through some tech forums one evening after a particularly frustrating attempt to model a tiny, intricate part for a client. Someone mentioned "LiDAR scanning" on iPhones and I was like, "Wait, what?" I knew newer iPhones and iPads had LiDAR, mostly for AR stuff, but I hadn't connected the dots to 3D printing. My jaw honestly dropped when I saw the first few demo videos. People were scanning everything – statues, furniture, even entire rooms – with just their phone! And the best part? The app itself is free! No subscriptions, no hidden costs. Just download it and go. That's a huge deal for us small business owners where every rupee counts, especially with filament costs fluctuating (a good kilo of PLA can set you back anywhere from ₹1000-₹2000 depending on the brand like eSun or Overture). So, I downloaded it faster than a speed demon print job on my Ender 3 V2.
And let me tell you, the first time I used it, it felt like I'd unlocked a secret level in the 3D printing game. I scanned a little Ganesha idol we have at home, just as a test. The ease of use was phenomenal. You basically just point your phone and move it around the object, painting it with a kind of virtual brush. The app gives you real-time feedback, showing you what areas you've covered and what you still need to capture. It's incredibly intuitive. Within minutes, I had a pretty decent 3D model right there on my phone screen.
How Does This "LiDAR Magic" Work, Exactly?
Okay, so without getting too bogged down in technical jargon, here's the gist. LiDAR, or Light Detection and Ranging, is basically like sonar but with light. Your iPhone (or iPad, if you have one of the Pro models or newer base models) shoots out tiny, invisible laser beams. These beams hit the object and bounce back to the sensor. By measuring how long it takes for the light to return, the device can accurately map distances and create a highly detailed depth map of the environment. Imagine millions of tiny measurements being taken every second. That's what gives Scaniverse its power to create really dense, accurate point clouds which it then stitches into a mesh.
This is crucial because, unlike photogrammetry (where you take a bazillion photos and software tries to guess the shape from overlaps), LiDAR directly measures depth. This means it works better in various lighting conditions (though bright, even light is always best), and it's much faster. You don't need a perfectly still object or a fancy turntable. Just your phone and a steady hand. And honestly, for FDM 3D printing, especially if you're not aiming for museum-grade perfection with super-fine details smaller than your nozzle diameter, the accuracy is more than sufficient. We're talking practical, usable models.
My Scaniverse-to-Printer Workflow: From Idea to Tangible
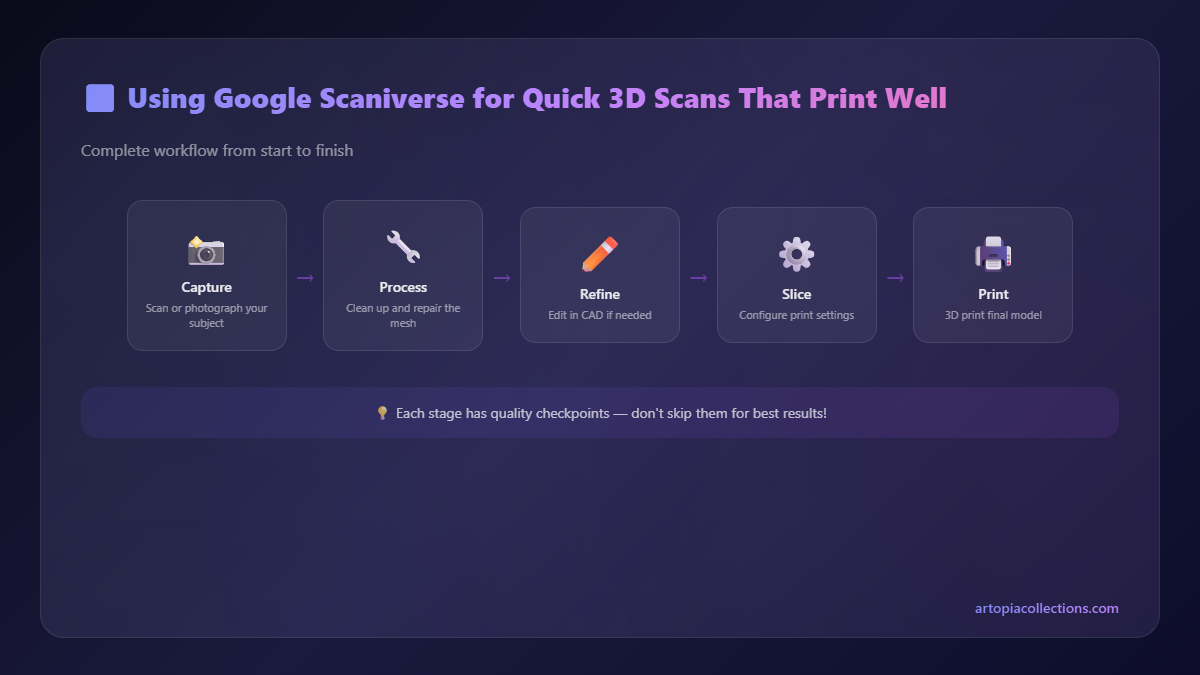
Here's how I usually roll with Scaniverse, from scanning to a finished print:
1. The Scan Itself: Patience is a Virtue (Mostly)
- Good Lighting: Try to scan in even, diffuse light. Direct sunlight can cause issues, and very low light makes it harder for the LiDAR to do its job.
- Steady Hand: Move slowly and deliberately around the object. Think of it like spray painting – you want full, even coverage.
- Overlap is Your Friend: Make sure to cover the object from multiple angles, getting the top, bottom (if possible), and all sides. I usually do a few passes at different heights.
- Background Matters: Try to have a clean, uncluttered background. While LiDAR is good at distinguishing, excessive clutter can introduce noise.
Once you're done, Scaniverse processes the scan. You can usually choose between "Standard," "High," or "Very High" quality. For quick prints, Standard or High is often fine. Very High takes longer to process but gives you a denser mesh. After processing, you can do some basic clean-up right in the app – cropping out unwanted background, filling small holes, etc. It's pretty straightforward, nothing super complicated. Sometimes, if the object is complex or shiny, I might even give it a light dusting of talcum powder or matte spray paint to help the LiDAR capture it better, but honestly, for most things, it's not needed.
2. Exporting and Basic Clean-up (If Needed)
Scaniverse lets you export in several formats: OBJ, FBX, USDZ, and PLY. For 3D printing, OBJ is usually my go-to. It's widely compatible. I'll export it and usually transfer it to my PC. Now, sometimes, the scan isn't perfectly clean. There might be some floating bits of geometry or minor imperfections. For minor clean-up, I'll often use a free tool like Meshmixer. It's fantastic for things like "make solid" to fix non-manifold geometry, plane cutting to flatten a base, or just snipping off stray triangles. For more complex fixes, Blender is always an option, but for most Scaniverse models destined for FDM, Meshmixer is usually enough to get it print-ready.
3. Slicing It Up!
Once I have a clean, watertight OBJ file, it's off to the slicer! I personally use PrusaSlicer for pretty much everything, though Cura is also excellent. I'll import the model, check its orientation, and then start thinking about print settings. For a scanned object, especially organic shapes, you'll almost always need supports. I try to orient the model to minimize support structures, saving both filament and post-processing time.
4. The Print and Post-Print!
This is where the magic happens! I’ve printed countless scanned objects on my Creality Ender 3 V2 and my Anycubic Kobra, and the results are consistently good. PLA is often my preferred filament for these kinds of prints because it's easy to work with, readily available (I often grab a few spools from Amazon.in), and captures decent detail. For functional parts that need more strength or heat resistance, PETG works wonderfully too. I typically use a 0.4mm nozzle, but for really fine details, a 0.2mm nozzle can make a difference, though it significantly increases print time.
Once the print is done, it's just a matter of carefully removing supports, maybe a bit of sanding if the surface finish needs it, and then it's ready! The feeling of holding a physical replica of something you just scanned a few hours ago is truly something else. It feels like you've got this incredible power.
Real-World Applications for My Business (and Yours!)
This isn't just a hobbyist tool, folks; it's a legitimate business asset! Here's how Scaniverse has helped ArtOpia Collections:
- Replicating Broken Parts: A client came to me with a snapped plastic bracket from an old machine – impossible to find spares for. I scanned the intact half, mirrored it, and printed a new one. Cost a fraction of what a custom-machined part would, and they were thrilled!
- Custom Art & Decor: We've used it to scan small sculptures or unique curios that clients want to reproduce at different scales or in different colours. Imagine scanning a favourite small statue and then printing it out larger as a centerpiece for their living room. We feature some of these bespoke creations on our ArtOpia Collections products page.
- Prototyping & Iteration: Sometimes, I'll sculpt something by hand (yes, I still love the feel of clay!) and then scan it to bring it into the digital world for refinement or to create moulds for other processes.
- Historical Preservation (on a micro-scale): I've helped a local artisan scan some of their intricate, handcrafted items to create digital archives, ensuring that even if the physical object is lost or damaged, a perfect 3D model exists.
- Education: It's a fantastic tool for demonstrating 3D scanning and printing to students or curious visitors. It demystifies the whole process.
The thing is, it opens up so many possibilities that were previously locked behind expensive equipment. It makes 3D scanning accessible to the masses, which is truly revolutionary for small businesses and makers.
Pros & Cons (Because Nothing's Perfect, Right?)
The Good Bits:
- Accessibility: If you have a compatible iPhone (XR or newer, or any iPad Pro with LiDAR, basically), you already have a 3D scanner!
- Speed: You can get a usable scan in minutes. No complex setups or calibration.
- Cost-Effective: The app is free! Your only "cost" is having the right device.
- User-Friendly: The interface is super intuitive. Anyone can pick it up and start scanning.
- Quality for FDM: For FDM printers, which have their own resolution limits anyway, the output from Scaniverse is usually excellent.
The Not-So-Good Bits:
- LiDAR Requirement: This is the biggest hurdle. If you don't have an iPhone/iPad with LiDAR, you're out of luck with Scaniverse.
- Detail Limitations: While good, it's not going to capture microscopic details like a dedicated industrial scanner. Don't expect to scan a coin and see every minute engraving perfectly.
- Shiny/Transparent Objects: Like all optical scanning methods, highly reflective or transparent objects are tricky. The laser light just bounces off or passes through, making it hard to get accurate data.
- No Colour/Texture for Export (Directly Usable): While Scaniverse captures colour, exporting it as a texture map that's perfectly aligned for FDM printing and easy to use without further UV mapping in Blender is, well, not its strong suit. Most of my FDM prints are single colour anyway, so it's rarely an issue, but if you're looking for full-colour texture mapping, you'll need more advanced tools.
- Outdoor Scanning: Can be challenging due to bright sunlight interfering with the LiDAR sensor.
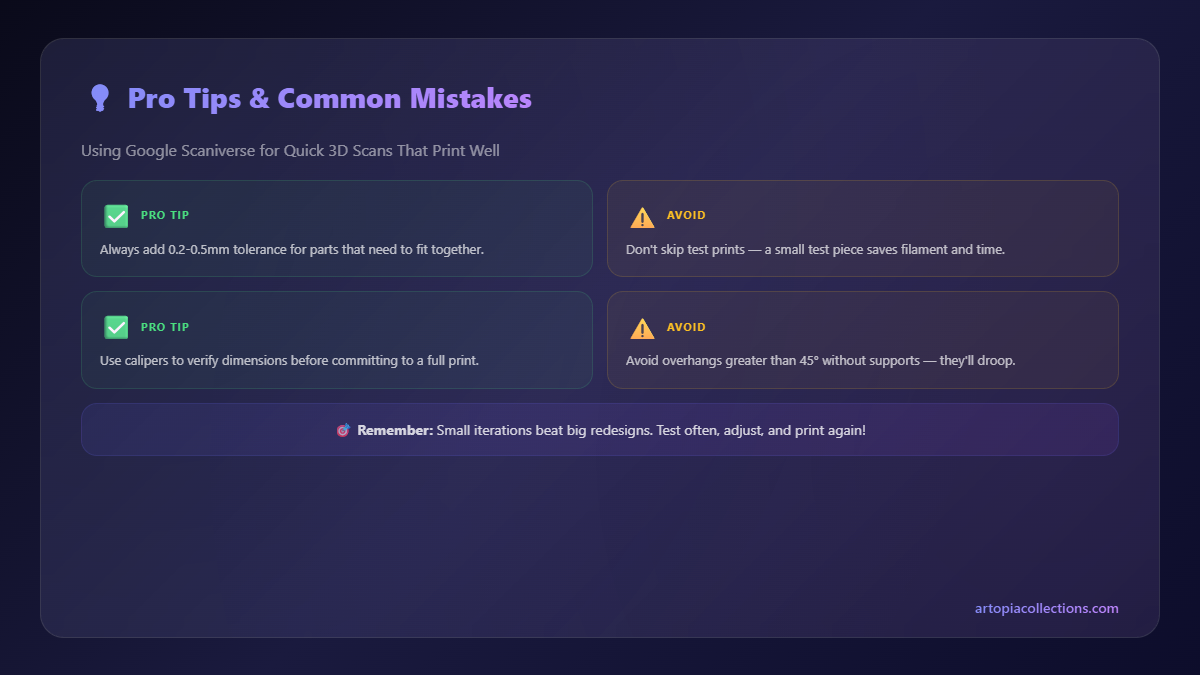
Pro-Tips for Printing Your Scaniverse Models
You've got your scan, you've cleaned it up. Now for the print! Here are a few things I've learned:
- Orient Carefully: Think about where supports will be needed. Try to orient the model to minimize overhangs that aren't critical for detail. For example, if it's a statue, I'll often print it upright.
- Supports are Your Friend (but not too many): Scanned organic shapes almost always need supports. Tree supports in PrusaSlicer or Cura are often fantastic for complex shapes as they use less material and are easier to remove than traditional grid supports.
- Infill: Unless it's a functional part needing strength, 10-15% infill is usually plenty. For decorative items, 5% or even 0% (if walls are thick enough and it doesn't need rigidity) can work to save filament.
- Layer Height: For capturing the details of a scan, I generally stick to 0.16mm or 0.2mm layer heights on my 0.4mm nozzle. Going lower can give more detail but significantly increases print time.
- Scaling: Don't be afraid to scale your models! If you scan something small, you can print it much larger, or vice-versa. Just remember to consider print stability if scaling a delicate item way up.
- Nozzles: A fresh nozzle can make a world of difference for print quality. I always keep a pack of nozzle replacement kits handy for my Ender 3 V2 – they're cheap and a quick swap can fix a lot of extrusion issues.
Final Thoughts: Embrace the Accessibility!
Honestly, if you've got a compatible iPhone or iPad and you're into 3D printing, you're doing yourself a disservice by not downloading Scaniverse right now. It's a powerful tool that levels the playing field, bringing professional-grade 3D scanning capabilities to your fingertips without the hefty price tag. It's transformed how I approach custom projects at ArtOpia Collections, allowing me to offer unique services that would have been impossible (or unprofitable) before. The ability to just *capture* a physical object and then manifest it with my printers... it still gives me goosebumps!
So go on, give it a try. Scan your favourite mug, that weird rock you found, a cool sculpture. You'll be amazed at what you can create. Happy scanning, and even happier printing!


