Elegoo Neptune 4 Pro Tuning Guide: Getting the Best Print Quality
Elevate your 3D printing experience with our Elegoo Neptune 4 Pro tuning guide. Discover expert tips and settings to consistently produce stunning, high-quality prints.

Elegoo Neptune 4 Pro Tuning Guide: Getting the Best Print Quality
You know that feeling, right? The fresh smell of plastic, the shiny new box, the absolute thrill of unboxing a brand new 3D printer. For me, that was the Elegoo Neptune 4 Pro. I’d been eyeing it for a while, seeing all the hype about its speed and Klipper integration straight out of the box. As someone running a small business, ArtOptia Collections, where quality and efficiency are paramount, the promise of a fast, reliable workhorse was too good to pass up. I wanted something that could churn out detailed pieces for my customers without breaking the bank or taking days to print a single item. So, I bought it, set it up, ran my first print – and honestly, it was... okay. Just okay.
And that’s the thing, isn't it? No matter how great the reviews, no matter how many features a printer boasts, "out of the box" rarely means "perfect." It's like buying a new guitar; it might play, but to truly sing, it needs a good tune-up. The Neptune 4 Pro is a fantastic machine, especially for its price point – I picked mine up for about ₹28,000 during a sale, which for a Klipper-enabled direct-drive printer, is an absolute steal. But to truly unlock its potential, to get those buttery-smooth surfaces and razor-sharp details that make people go, "Wow, you printed that?", you need to get your hands dirty with some proper tuning. And trust me, it's worth every minute.
Why Tuning Your Neptune 4 Pro Isn't Just for Enthusiasts
Look, I get it. You spent good money, you just want to print. But here’s the deal: every printer, every roll of filament, heck, even the ambient temperature in your workshop (especially here in India with our fluctuating climate!) can affect your prints. A well-tuned printer isn't just about pretty prints; it's about reliability, reducing failed prints (which saves you filament – and believe me, wasting a ₹1500-₹2000 roll of PLA stings!), and ultimately, getting consistent results. For my business, where I sell everything from intricate display pieces to functional prototypes, consistency is king. Without it, customer satisfaction drops, and so does my peace of mind. So, let’s dive into how we can turn your Neptune 4 Pro from 'pretty good' to 'absolutely phenomenal'.
The Pre-Flight Check: Before We Tweak Software
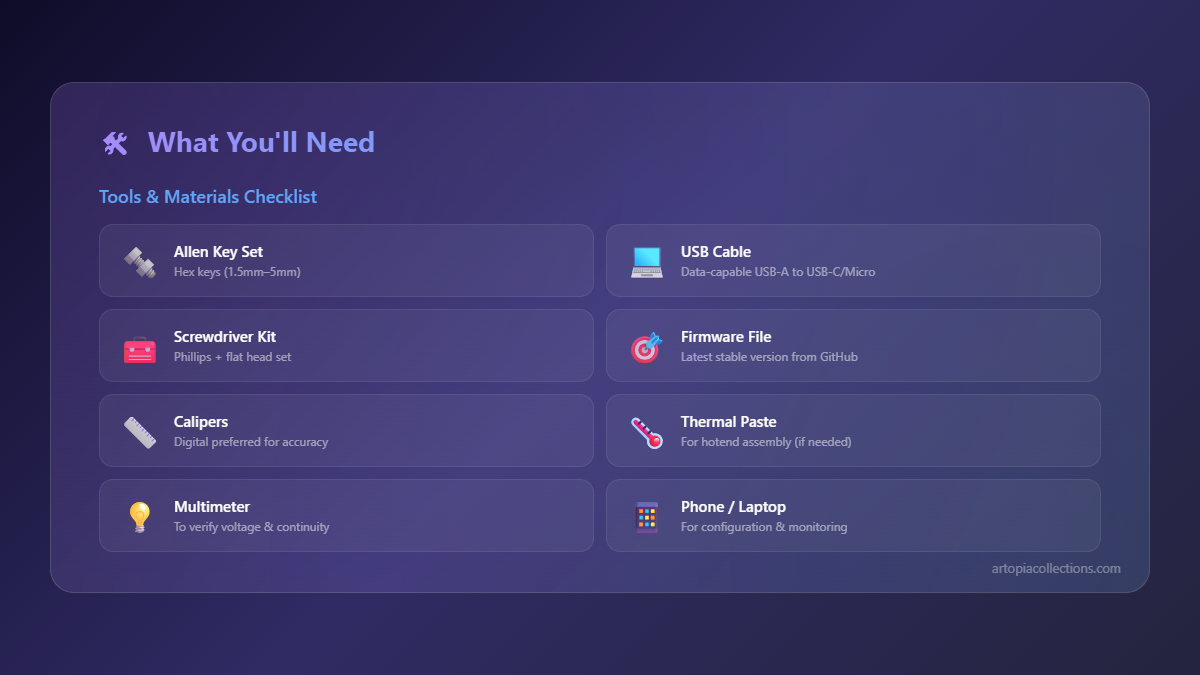
Before we even touch the Klipper interface, let's make sure the physical foundations are solid. This might sound basic, but you'd be surprised how many issues stem from simple mechanical oversights.
- Firmware Update: This is step zero. Elegoo constantly pushes updates to improve performance and fix bugs. Don't skip it. Check their official website or the Elegoo Global Facebook group for the latest versions and instructions.
- Tighten Everything: Go over all the screws. Check the gantry. Make sure your eccentric nuts on the wheels are snug – not too tight that they bind, but tight enough that there's no wobble. A wobbly print head or bed leads to ghosting and inconsistent layers.
- Belt Tension: This is crucial for speed. If your X and Y belts are too loose, you'll see ringing and ghosting. If they're too tight, they can strain your stepper motors. You want them taut, like a low guitar string – you should be able to pluck them and hear a low thrum. The Neptune 4 Pro has built-in tensioners, which is super handy.
- Bed Leveling (Again!): Even with the auto-leveling, a good manual level or at least ensuring your bed isn't wildly off before the ABL probe kicks in helps a lot. Run the auto-leveling routine.
- Z-Offset: This is probably the single most critical setting for first-layer adhesion. Use the paper method: lower your nozzle until a piece of paper barely slides with resistance. Then, do a first-layer test print (a simple square or line test) and live-adjust your Z-offset. You want it squished just right – not so much that it's transparent, but enough that it's truly adhering. In my experience, a slightly too high Z-offset is the most common cause of failed first layers.
Diving into Klipper & Slicer Settings: The Real Magic Happens Here
Okay, with the physical stuff sorted, let's get into the software. The Neptune 4 Pro comes with Klipper pre-installed, which is amazing because it opens up a world of advanced tuning options like Input Shaping and Pressure Advance that were once only for the hardcore DIY crowd. I mostly use Orca Slicer for my prints these days; it gives me a lot of control and has excellent calibration tools, but PrusaSlicer and Cura are also solid choices.
1. E-steps/Flow Calibration: Getting the Right Amount of Plastic
First up, let's talk about flow. E-steps (extruder steps per millimeter) are set at the factory, and for direct drives like the N4 Pro, they're usually pretty close. But flow, or extrusion multiplier, is something you need to tune for each filament. It basically tells your printer how much plastic to push out. If it's too high, you get over-extrusion (blobs, elephant's foot). Too low, and you get gaps and weak layers.
My go-to method: Print a single-wall calibration cube (20x20x20mm, 0% infill, 0 top/bottom layers). Measure the thickness of the printed wall with a digital caliper. Let's say your slicer expects a 0.4mm wall (with a 0.4mm nozzle). If you measure 0.45mm, you're over-extruding. You'd adjust your flow in the slicer down by (0.45-0.4)/0.45 = ~11%. So, if your flow was 100%, you'd set it to 89%. Do this a few times until you nail it. Honestly, this step alone makes a huge difference in surface quality and dimensional accuracy.
2. Input Shaping & Pressure Advance: Speed and Smoothness
This is where Klipper truly shines, especially for a fast printer like the Neptune 4 Pro. It's basically rocket science for your printer, compensating for vibrations (input shaping) and predicting pressure changes in the nozzle (pressure advance).
- Input Shaping: This mitigates ringing and ghosting caused by the printer's rapid movements. The Neptune 4 Pro often comes with ADXL345 accelerometers built into the print head for easy calibration. You typically run a specific Klipper command (like
ACCELEROMETER_QUERYfollowed byTUNING_TOWERor specific calibration macros provided by Elegoo/Klipper) to measure resonances and automatically apply the right compensation. It sounds complex, but the Elegoo interface often simplifies it. This is a must for those high-speed prints. - Pressure Advance: This helps prevent blobs and inconsistencies at the start and end of lines, especially at corners. It essentially tells the extruder to ease up on the plastic flow just before a corner and ramp it up after, preventing material build-up. You'll usually print a calibration line tower (a Klipper macro) and observe which line has the most consistent width from start to end. Again, Elegoo's Klipper interface often has easy-to-follow steps for this. Getting these two right will transform your prints from "good" to "wow, is that injection molded?"
3. Retraction Settings: Say Goodbye to Stringing and Blobs
Stringing is the bane of every 3D printer owner's existence. The Neptune 4 Pro has a direct drive, which generally means lower retraction distances are needed compared to Bowden setups. Start with Elegoo's recommended settings, then print a retraction tower (you can find models on Printables or Thingiverse). Vary the retraction distance and speed. Look for the sweet spot where you have minimal stringing without causing clogs or skips. For most PLA, I find something around 0.5-1.5mm retraction at 30-45mm/s works well. But honestly, it varies between filament brands – Protoprint PLA might behave differently than Think3D or generic brands.
4. Temperature Towers: The Filament Whisperer
Filament manufacturers give you a temperature range, but the optimal temperature for your specific printer and environment can be different. Print a temperature tower for each new roll of filament, especially if you're switching brands or material types (PLA, PETG, ABS). The tower prints at different temperatures for different sections, allowing you to visually identify the best temperature for strength, surface finish, and minimal stringing. For PLA, I usually aim for a temperature that gives a good balance of strength and surface finish, typically between 195-210°C on my N4 Pro. PETG often likes it a bit hotter, around 230-245°C. And always remember, layer adhesion is super important for durability, so don't go too low just for aesthetics!
5. Cooling: Bridging and Overhangs
The Neptune 4 Pro has some pretty beefy part cooling fans. For PLA, you generally want full cooling after the first few layers (say, layer 3 or 4 onwards) to solidify the plastic quickly and get sharp details, especially on overhangs and bridges. But for materials like PETG or ABS, too much cooling can lead to poor layer adhesion and warping. For PETG, I usually dial my cooling down to 20-50%, just enough to prevent excessive stringing but allow layers to bond well. This is another one you might need to experiment with using bridging or overhang test prints.
Advanced Tips & Maintenance for Continued Excellence
Tuning isn't a one-and-done deal. It's an ongoing relationship with your printer. Here are a few more things that have made a world of difference for me:
- Filament Drying: This is HUGE, especially in India’s humidity. Even new filament can absorb moisture, leading to bubbles, weak prints, and stringing. I've seen perfectly tuned printers produce terrible prints just because of wet filament. I use a dedicated filament dryer (you can get decent ones for ₹3000-₹5000, or even a cheap food dehydrator works wonders in a pinch!) and always store my opened filament in airtight bags with desiccant.
- Nozzle Inspection/Replacement: Nozzles wear out, especially with abrasive filaments (carbon fiber, glow-in-the-dark). A worn nozzle will give you inconsistent lines and poor quality. I keep a pack of spare brass nozzles (₹500-₹800 for a pack) and swap them out every few kilos of filament, or if I notice a sudden drop in quality. For tougher filaments, I switch to hardened steel nozzles.
- PEI Sheet Care: The textured PEI sheet on the N4 Pro is fantastic for adhesion, but keep it clean! I wash mine with warm water and dish soap periodically to remove oils from my hands or residue from prints. A quick wipe with isopropyl alcohol between prints also helps.
- Stable Surface: Make sure your printer is on a sturdy, level surface. Vibrations from your desk or workbench can transfer to your printer and degrade print quality, even with input shaping. Sometimes, a simple paver stone under the printer can make a surprising difference.
The Payoff: Beautiful Prints and a Thriving Business
All this tuning might sound like a lot of effort, but I promise you, the results are worth it. When I started ArtOptia Collections, I quickly realized that mediocre prints simply wouldn't cut it. Customers expect crisp details, smooth surfaces, and durable products. By meticulously tuning my Elegoo Neptune 4 Pro, I've been able to consistently deliver high-quality 3D prints that my customers love. Whether it's a custom figurine, a functional part, or one of my unique designs, the level of finish I can now achieve is something I'm truly proud of.
For instance, take a look at some of the intricate models we produce – the kind of quality that requires every setting to be dialed in. You can check out some examples of what well-tuned printers can achieve on our products page. This isn't just about printing faster; it's about printing better. It's about turning a hobby into a passion, and that passion into a reliable business. Don't be afraid to experiment, to fail a few prints – that's how you learn and grow. Your Neptune 4 Pro is a powerful machine; give it the love and attention it deserves, and it will reward you with prints that'll make your jaw drop.
Happy printing, my friends! And remember, the journey to perfect prints is an ongoing one. Keep tweaking, keep learning, and keep creating amazing things!


