How to Fix Elephants Foot on First Layer of 3D Prints
Elephant's foot can ruin the crucial first layer of your 3D prints, leading to frustrating failures. Discover practical solutions and settings adjustments to effectively eliminate this common printing problem for good.
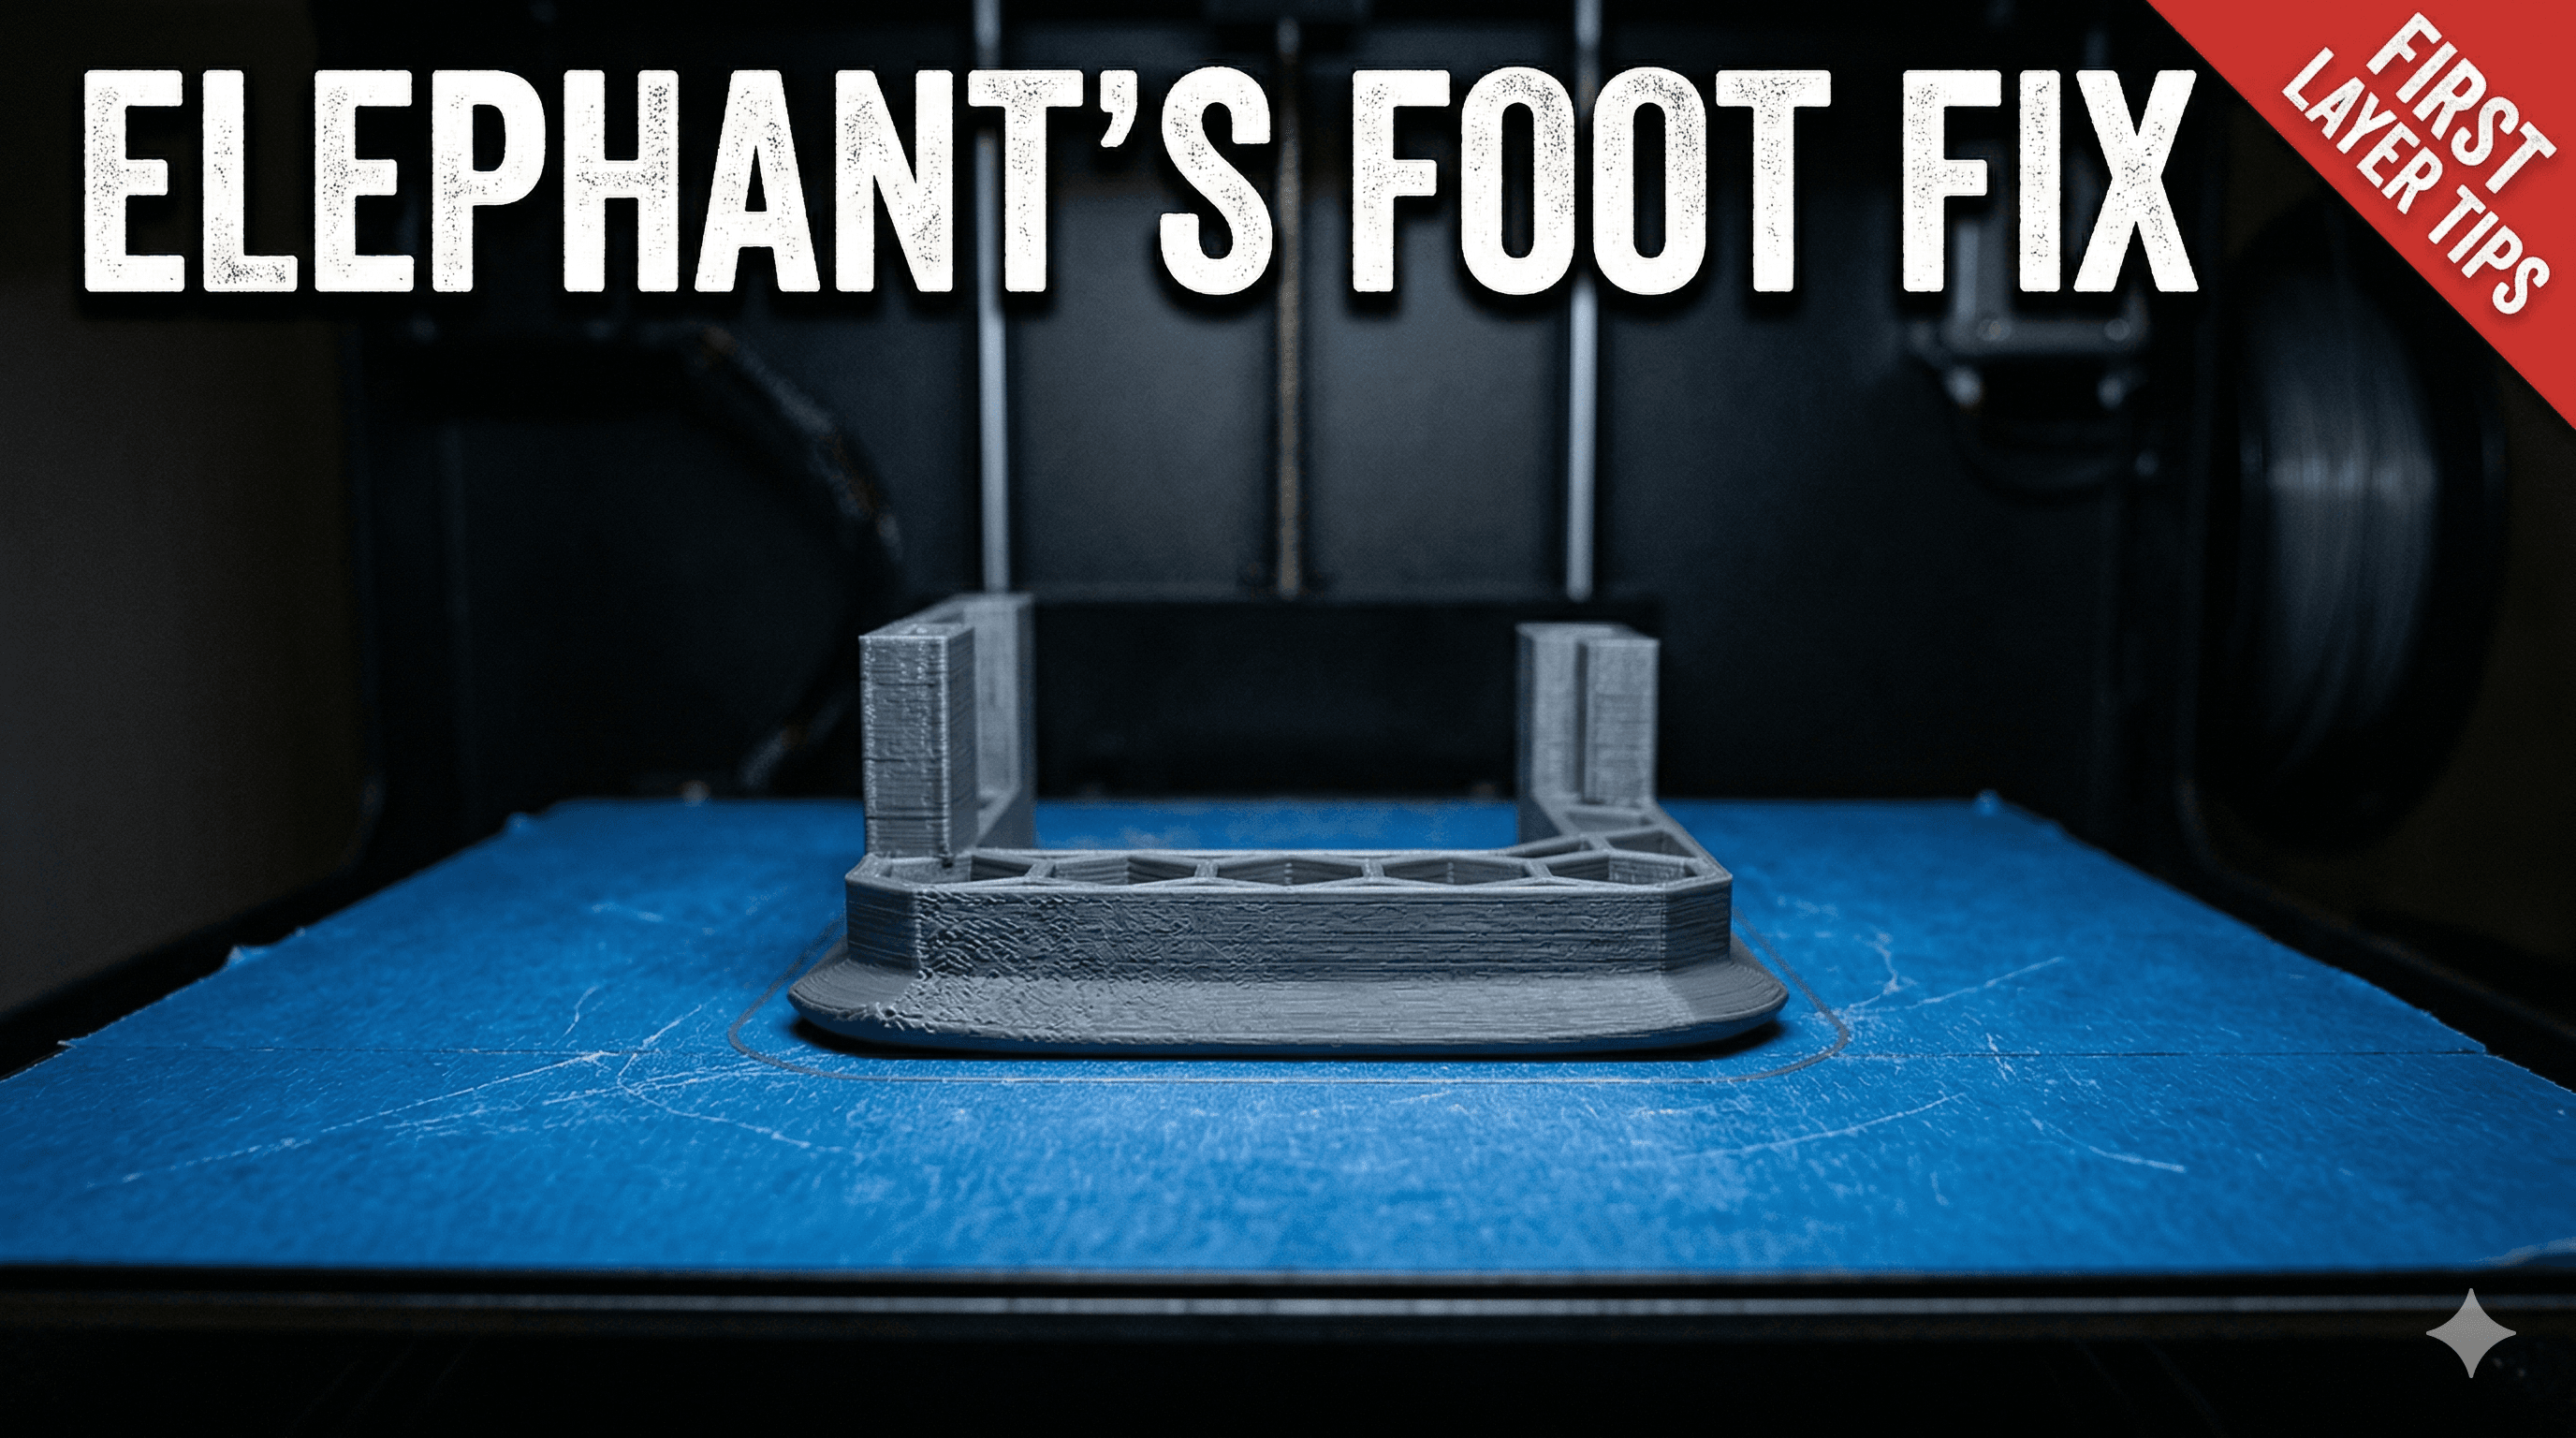
Ever pull a print off your build plate, excited to see your creation, only to find the very first layer bulging out like a melted candle-bottom? Yeah, that ugly, squished, wider-than-it-should-be base? That, my friends, is the infamous "Elephant's Foot," and honestly, it's one of those things that can drive you absolutely bonkers, especially when you've got client orders waiting and precision is key. I've been there, staring at a perfectly designed part, ruined by this small, yet significant, deformation right at the foundation. Itâs not just an aesthetic issue, mind you. If your part needs to fit into another component, that extra bulge means it won't. And that means wasted time, wasted filament (which, let's be real, isn't cheap, especially good quality stuff like eSun PLA+ that goes for around â¹1800-â¹2200 a roll), and a whole lot of frustration. So, letâs talk about how to kick this elephant right out of your workshop!
My journey into 3D printing started like many of yours, I guess. I bought an Ender 3 (classic choice, right? Solid machine for the price, around â¹15,000-â¹18,000 when I got mine a few years back) and immediately fell in love with the magic of bringing digital designs into the real world. But oh boy, the learning curve! Elephant's Foot was one of my earliest arch-nemeses. I remember having a batch of custom keychains for a local event, and every single one had that annoying lip. It took me ages, tweaking, printing, failing, and then finally figuring things out. And that's what I want to share with you today â my tried and tested methods for banishing the beast and getting those first layers looking crisp and clean, just as they should be. This isnât just theoretical stuff; this is what I use daily in my small business, Artopia Collections, to ensure my products are top-notch.
What Even IS Elephant's Foot, Anyway?
Basically, Elephant's Foot happens when the very first few layers of your print get squished outwards under the weight of the layers above them, before they've had a chance to properly cool and solidify. Think about it: your hot nozzle is laying down molten plastic onto a heated print bed. That plastic is soft. As more layers pile on, the pressure builds, and if the base layers are still too soft, they just spread out a little. It's like stepping on a very soft blob of dough â it's going to spread out at the bottom. The problem is exacerbated by a few factors, and understanding these is the first step to fixing it.
The Battle Plan: How to Fix Elephant's Foot
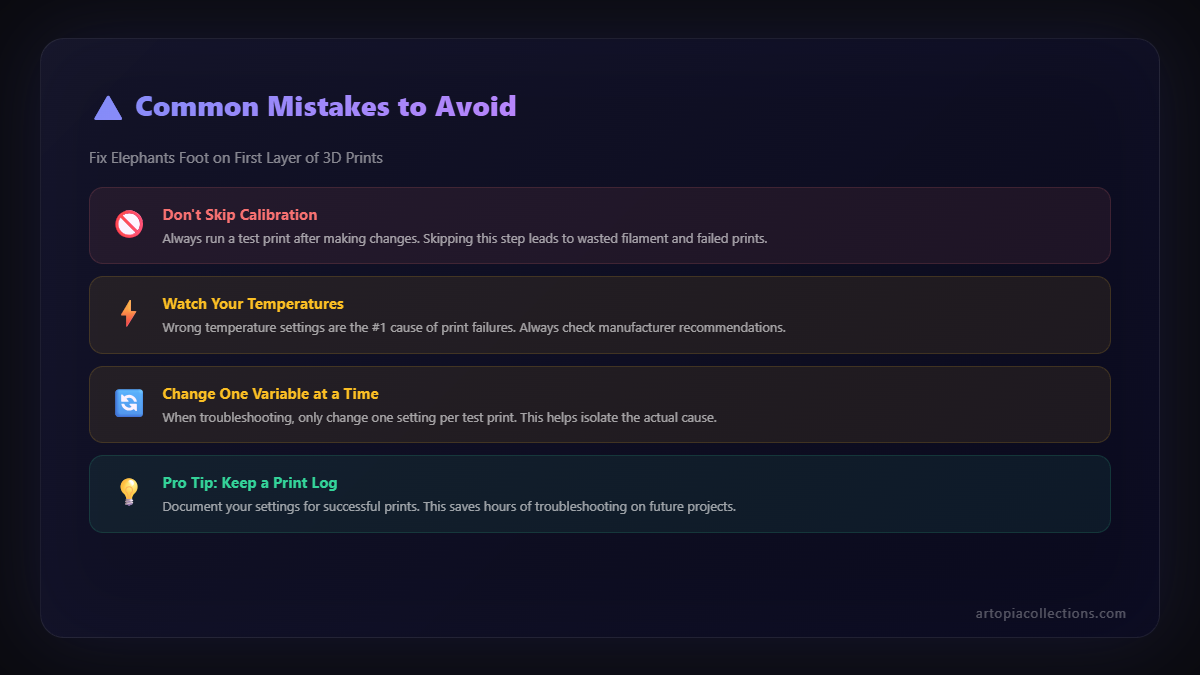
Alright, enough with the theory. Let's get down to the practical solutions. This isn't a "one size fits all" kind of fix. It's usually a combination of tweaks, so be prepared to experiment a little. But trust me, once you dial these in, your prints will look dramatically better.
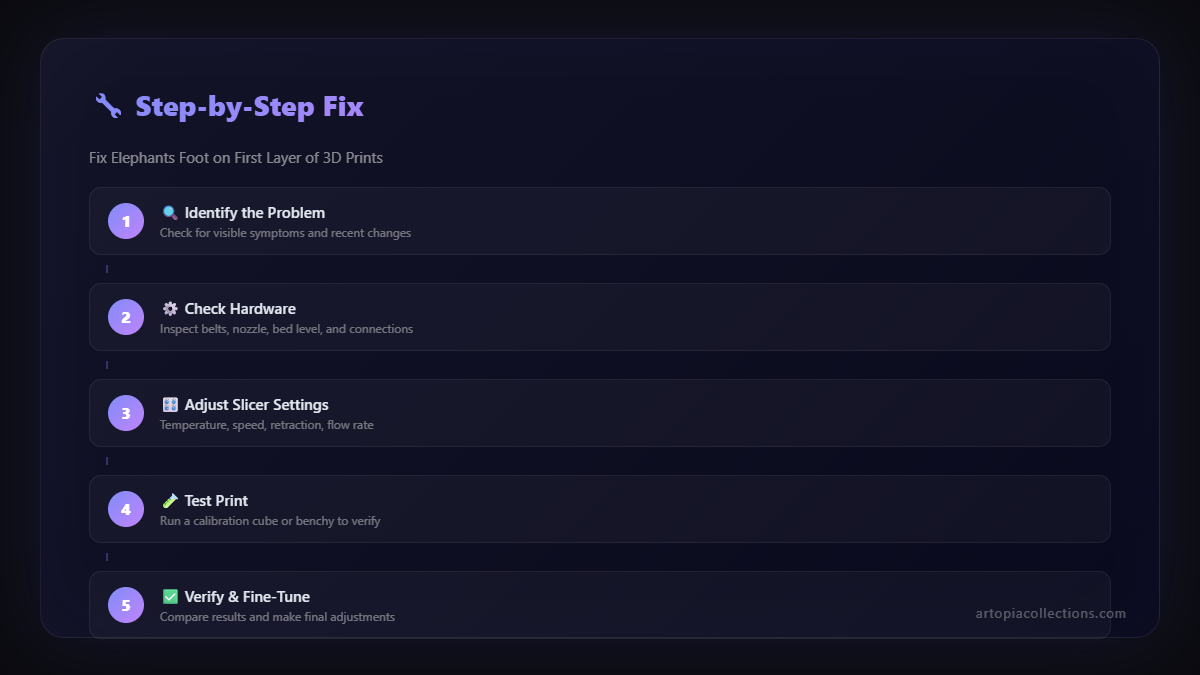
1. Dialing in Your Z-Offset and Bed Leveling: The Absolute Foundation
This is probably the single most critical step, and honestly, itâs often overlooked or done hastily. Your Z-offset dictates how close your nozzle is to the print bed. If it's too close, you're literally forcing the plastic out sideways as it tries to escape the nozzle, creating that squish. If it's too far, you get poor adhesion and spaghetti. Itâs a delicate balance. I usually go for the "paper test" â a standard A4 sheet of paper should just barely fit between the nozzle and the bed with a slight drag. My Creality CR-10S Pro V2 has auto-leveling, but even then, I always fine-tune the Z-offset manually. You can usually do this in your printer's menu while printing the first layer, adjusting in tiny increments (like 0.02mm or 0.05mm) until that first line looks perfect â not too squished, not too rounded. Remember, it's an art, not a science, at first! And sometimes, after a while, your bed springs might loosen a bit, so re-leveling isn't a one-time thing; it's a routine.
2. Initial Layer Height and Width: Less is Sometimes More
Many slicers, like PrusaSlicer or Cura, have settings for the initial layer height and width. Common wisdom might tell you to make the first layer extra thick for better adhesion. And yes, a slightly thicker first layer can help with adhesion, but if it's too thick, you're just putting down more material that's prone to squishing. I personally find that setting my initial layer height to be the same as my regular layer height (e.g., 0.2mm) or just slightly more (0.24mm max) works best. And for initial layer line width, some people bump it up to 120-150% to ensure good bed adhesion. This can contribute to Elephant's Foot. My advice? Try keeping it at 100-110% first, and only increase if youâre struggling with adhesion after checking other settings.
3. Slow Down, You Move Too Fast! Initial Layer Speed
This is a big one. The faster your nozzle moves on that first layer, the less time the plastic has to adhere and cool slightly before the next pass or before the weight of subsequent layers comes down. Slowing down gives the plastic time to bond to the plate and start solidifying. I typically set my initial layer speed to something really low, like 10-20 mm/s. Yes, it takes a bit longer for that first layer, but it's totally worth it for a clean base. Think about it â what's an extra minute or two for the first layer compared to reprinting an entire part that took hours? Time well spent, if you ask me.
4. Taming the Heat: Initial Layer Temperature
Heat is both your friend and your enemy here. You need enough heat for good adhesion, but too much heat keeps the plastic molten for longer, making it more susceptible to squishing. This applies to both your nozzle and your bed.
Nozzle Temperature: For PLA, I usually print around 200-205°C for the main print. For the first layer, sometimes I'll drop it by 5°C. For example, if my main print temp is 205°C, I'll set the initial layer to 200°C. This helps the plastic cool and firm up faster right at the bed.
Bed Temperature: This is a balancing act. For PLA, 60°C is usually my go-to for the bed. If your bed is too hot, the plastic stays soft and molten, contributing to the squish. If it's too cold, you get warping and poor adhesion. Sometimes, reducing the bed temp by 5°C after the first layer or two can also help, but be careful not to cause warping. In my experience, for good quality filaments like Overture or eSun, a consistent 60°C is usually fine, but if you're battling Elephant's Foot, try reducing it to 50-55°C for the *initial* layer only, and then bring it back up if needed.
5. Fan Speed & Cooling: A Double-Edged Sword
This one gets tricky. You want to cool the plastic so it hardens, right? So, crank up the fan! Well, not quite. Too much fan on the first layer can cause warping and make the print detach from the bed. The trick is to have *some* cooling, but not aggressive cooling. Many slicers let you set the fan speed for the initial layers. I usually have my part cooling fan off for the first 1-3 layers, then gradually ramp it up to full speed. For example, fan off for layer 1, 25% for layer 2, 50% for layer 3, and then 100% for layer 4 onwards. This allows the first layer to properly adhere and gives it a moment to cool gently, without shocking it and causing it to lift. Every printer and filament combination is different, so this is another setting where experimentation is key. Some filaments, like ABS, often prefer minimal or no fan at all for initial layers.
6. Slicer Compensation Settings: The Direct Attack
Good news! Many modern slicers have direct settings to combat Elephant's Foot. This is basically telling the slicer to slightly shrink the very first layer (or the first few layers) horizontally, to compensate for the anticipated squish. This is often called "Horizontal Expansion" or "Elephant Foot Compensation."
- Cura: Look under "Experimental" or "Initial Layer" settings for "Initial Layer Horizontal Expansion." A typical value to start with might be -0.1mm to -0.2mm.
- PrusaSlicer: You'll find "Elephant Foot Compensation" under "Print Settings" -> "Advanced." Again, start with a small negative value like -0.1mm.
- Simplify3D: This one uses "Horizontal Size Compensation" in the process settings.
Using these settings directly tells your printer to print the first layer slightly smaller than designed. So, even if there's some natural squish, the final dimensions should be closer to what you intended. This is often the most effective "one-shot" fix once your other settings (like Z-offset and temps) are generally dialed in. Itâs a lifesaver, honestly, and I use it on almost all my functional prints that require precise dimensions.
7. Calibration, Calibration, Calibration!
Have you calibrated your E-steps (extruder steps per mm)? What about your flow rate? If your extruder is pushing out too much plastic (over-extrusion), then naturally, that excess material has to go somewhere, and it often results in more squish on the first layer. There are tons of guides online for calibrating E-steps and flow rate, and itâs a crucial step for getting accurate prints across the board, not just for Elephant's Foot. In my experience, a properly calibrated machine will solve so many subtle print quality issues.
8. Hardware Considerations: Beyond the Software
Sometimes, the problem isn't just in the software or your settings; it can be hardware related.
Stiffer Bed Springs: Those flimsy springs that come with some budget printers like the Ender 3? They don't hold their level very well. Upgrading to stiffer springs (often yellow ones, you can get a pack for around â¹200-â¹300 on Amazon) makes a huge difference in maintaining your bed level, which, as we discussed, is crucial for that perfect first layer.
Solid Bed Mounts: Some folks even go a step further and replace the springs with solid mounts or silicone standoffs. This makes your bed extremely stable but means youâll rely entirely on your Z-offset and potentially an auto-leveling sensor.
Nozzle Wear: A worn-out nozzle can also cause issues. The hole might become slightly larger or irregular, leading to inconsistent extrusion. A brass nozzle is generally good for PLA, but for tougher filaments or long printing hours, consider a hardened steel nozzle. They are a bit more expensive, maybe â¹400-â¹800 for a good set, but they last much longer. You can find good quality nozzles on Amazon.in here.
My Workflow & Final Tips
Hereâs how I usually approach a new filament or a new print that might be sensitive to Elephant's Foot:
- Start with Z-offset: Always, always, always make sure your Z-offset is perfect. This is non-negotiable.
- Calibrate: Ensure E-steps and flow rate are calibrated. This gives you a baseline of accuracy.
- Temperature & Speed: Set my initial layer speed to 15-20mm/s, initial layer nozzle temp 5°C lower than main temp, and bed temp at 60°C.
- Fan Off: Part cooling fan off for the first 2-3 layers.
- Slicer Compensation: If I still see a slight bulge, I'll then dial in the "Elephant Foot Compensation" in my slicer, starting with -0.1mm and adjusting as needed. This is usually the final touch.
And hereâs a pro-tip for you: print a small, calibration cube (like a 20mm cube) or a custom small part with a good square base. Use that to test your settings rather than printing a full, hours-long part. It saves a ton of filament and time. You can probably print 5-6 calibration cubes with different settings in the time it takes to print one larger item. Remember, consistency is key, and taking notes on what settings worked for which filament and printer helps immensely!
One more thing: sometimes, getting a truly flat and perfectly adhering surface is simply about getting a good quality build surface. I've had fantastic results with textured PEI sheets (you can grab one for your Ender 3 for about â¹1000-â¹1500 on Amazon.in) or even just a good glass bed (Creality's own glass beds are great). They often negate a lot of adhesion issues and allow for better first layer control.
Don't Let the Elephant Win!
Elephant's Foot can be a real pain, but it's absolutely fixable. It requires patience, a bit of troubleshooting, and a methodical approach. Don't get disheartened if your first few attempts aren't perfect. That's the nature of 3D printing; it's a constant learning process. But by systematically going through these steps, you'll be well on your way to consistently beautiful, precise first layers that make your prints truly shine.
Happy printing, my friends! If you've got any questions or your own tips for tackling Elephant's Foot, drop them in the comments below. And hey, while you're at it, do check out some of the cool stuff we print over at Artopia Collections. Weâre always pushing the boundaries of what 3D printing can create!