How to Replace the Hotend on Your Creality K1 Series Printer
Experiencing issues with your Creality K1 hotend? Follow this easy, step-by-step guide to replace it and get your 3D printer printing perfectly again.

Don't Let a Clogged Nozzle Halt Your K1's Super Speed: A Hotend Replacement Guide!
Man, there's nothing quite like the rush of watching your Creality K1 just fly through a print, right? I mean, 600mm/s – that's not just fast, it's like a whole new dimension for us folks who started on slower Cartesian machines. The speed, the enclosed chamber, the precision… it's a dream. But let's be real, even these speed demons have their off days. And when your hotend decides to throw a tantrum, whether it's a nasty clog that just won't clear, a heater cartridge that's kicked the bucket, or you're simply eyeing an upgrade for even better performance, you know you've gotta roll up your sleeves.
I've been running ArtOptia Collections for a while now, churning out custom pieces and functional prototypes for clients all over India, and trust me, a faulty hotend can bring everything to a screeching halt. It's not just about the money, it's about reputation, missing deadlines... the works. I've had my share of heartbreak, from nozzles stubbornly refusing to clear to heater cartridges biting the dust mid-print. It’s frustrating beyond belief, especially when you have a big order waiting. So, if you're staring down a similar situation with your beloved K1, don't fret! Replacing the hotend isn't some black magic only wizards can perform. It's totally doable, even if you're a bit nervous about diving into your printer's guts. Let's get you sorted, shall we?
Why Even Replace the Hotend? Aren't These K1s Bulletproof?
Honestly, nothing in 3D printing is truly bulletproof, no matter how much we wish it were. The K1's hotend is a fantastic piece of engineering, designed for high flow and quick heating. But even the best components have a lifespan, or they just run into bad luck. Here are a few common reasons you might be swapping out your K1's hotend:
- Persistent Clogs: Sometimes a clog is so bad, so deeply embedded, or so carbonized that no amount of cold pulls or cleaning needles will fix it. It's just time for a fresh start.
- Damaged Heater Cartridge or Thermistor: These are the workhorses that heat your nozzle and tell the printer what temperature it's at. If either fails, your printer won't heat up correctly, or it'll throw thermal runaway errors. This usually necessitates a full hotend replacement on the K1 because these components are typically integrated.
- Worn Out Nozzle: Printing with abrasive filaments (like carbon fibre filled PLA or glow-in-the-dark stuff) can quickly wear down brass nozzles. While you can often just swap the nozzle, sometimes the threads on the heater block get stripped, or the whole assembly just looks a bit haggard.
- Performance Upgrade: Maybe you want to try a CHT-style nozzle for even higher flow, or a hardened steel nozzle for abrasive materials without the wear. Swapping the entire integrated hotend is often the easiest path to such upgrades on the K1.
- Accidental Damage: We've all been there. Maybe a wrench slipped, or you had a head crash into a print and bent something. It happens.
In my experience, a full replacement is often less hassle than trying to meticulously repair a heavily damaged or clogged hotend, especially when time is money in a small business setup.
Gather Your Tools (and Maybe a Chai Break)
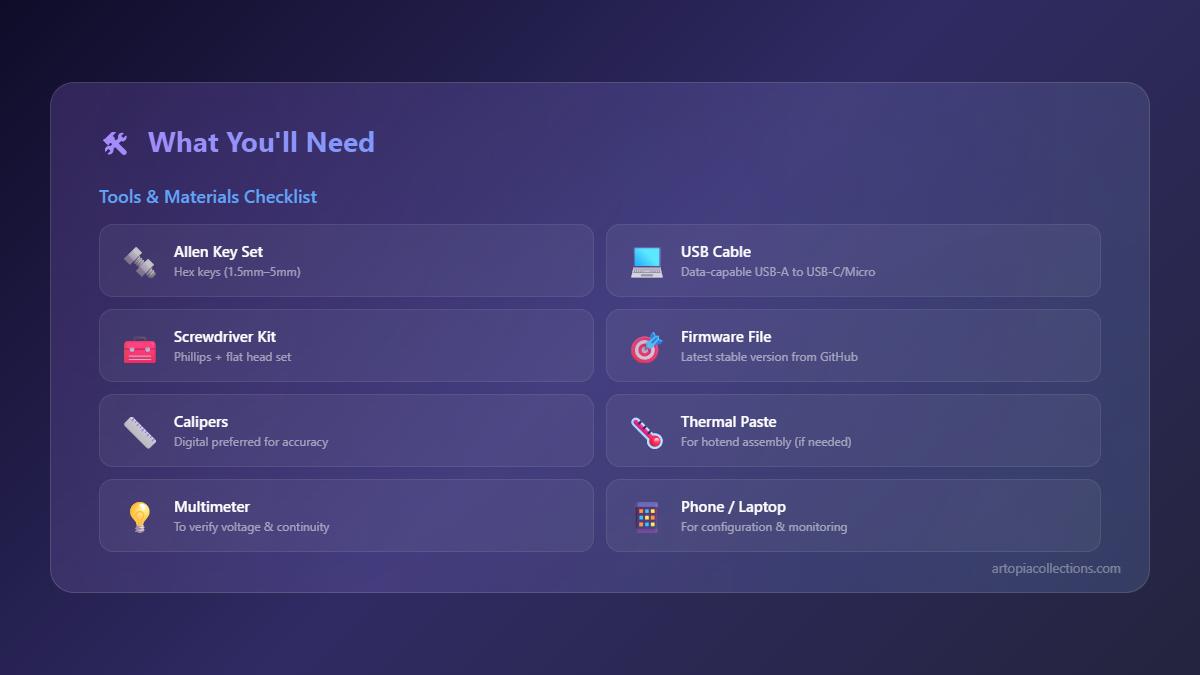
Alright, first things first: gather your arsenal. You don't need a whole workshop, but having the right tools makes this job a breeze. Honestly, good tools are an investment, not an expense. Here's what you'll want handy:
- Allen Key Set: The K1 typically uses 2mm and 2.5mm Allen keys for most screws. You know, I remember when I first started, I used whatever rusty tools I could find in my dad's toolbox. Big mistake. Invest in a decent set; you can grab a good quality set for around ₹400-₹700 from local hardware stores or online. It's worth every rupee, honestly.
- Small Adjustable Wrench or Spanner: Useful if you need to hold the heater block steady for any reason, though less critical for K1 hotend *assembly* removal.
- Flush Cutters: For snipping any zip ties or stray filament. They make everything so much cleaner.
- Tweezers: Super handy for delicate wire handling or grabbing tiny bits of filament.
- A New K1 Hotend Assembly: This is the star of the show! Make sure it's compatible with the Creality K1/K1 Max. A genuine Creality K1 hotend assembly will typically run you anywhere from ₹2500 to ₹4000, depending on where you source it from and if it's a standard or high-flow version. I usually grab mine from official distributors or reliable sellers on Amazon. You can search for one right here: Creality K1 Hotend on Amazon.in.
- Optional: Thermal Paste (if needed): The K1's integrated hotends usually come with everything pre-assembled and ready, so you likely won't need to apply thermal paste yourself for a straightforward replacement. But if you're messing with the heat break and heatsink separately (which you probably won't be for a K1 hotend replacement), it's crucial.
And while you're at it, a proper flush cutter makes snipping filament and zip ties so much cleaner. You can find a basic set of decent 3D printer tools on Amazon.in, something like this general tool kit will set you back about ₹600-₹1000. These kits usually include the basic Allen keys, cutters, and other bits you'll find yourself needing quite often.
Safety First! (Seriously, This Isn't a Game)
Okay, before we get our hands dirty, a quick but super important reminder: Safety First! This isn't just a fancy phrase, alright? We're dealing with electricity and components that get seriously hot. So, please, please, please:
- Unplug your printer from the wall socket. No exceptions. Don't just turn it off; pull the plug.
- Let it cool down completely. Seriously, that hotend can stay scalding for a good while. You don't want to learn that lesson the hard way. (And trust me, I've singed my fingers more times than I care to admit early on.)
- Work in a well-lit area.
- Take your time. Rushing leads to mistakes, and mistakes lead to frustration, or worse, damaged parts.
The Step-by-Step Hotend Surgery
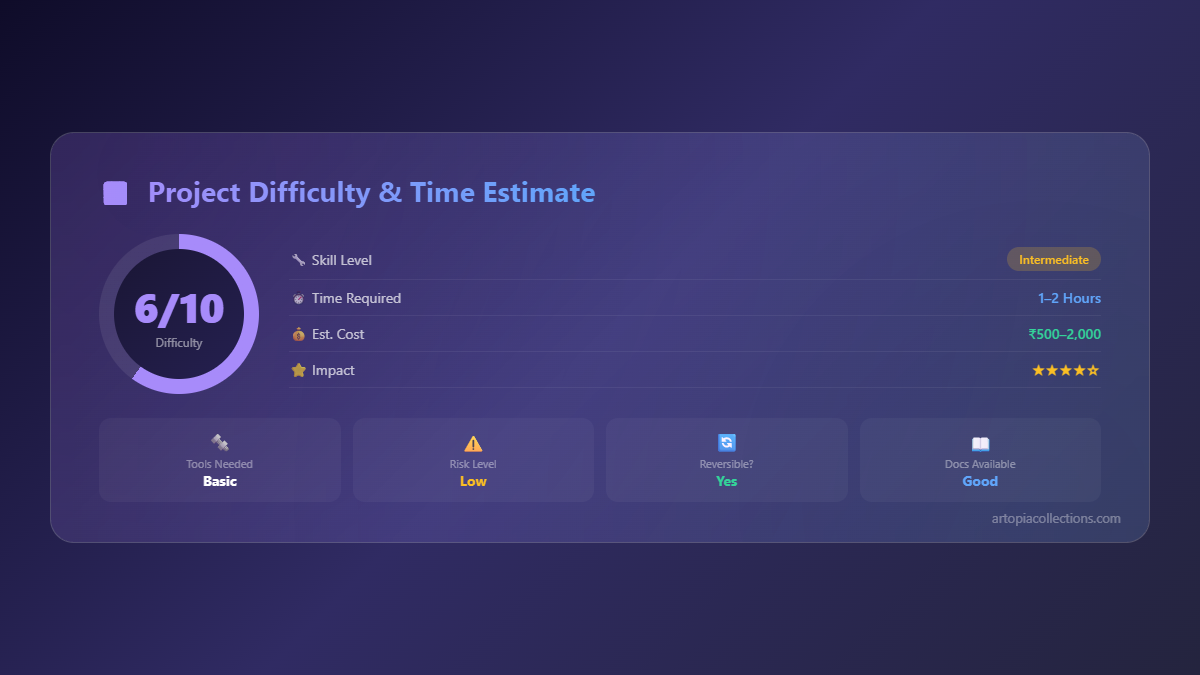
Right, with safety out of the way, let's dive into the guts of your K1. This isn't brain surgery, but precision helps, and a calm approach will save you headaches.
Step 1: Get the Old Filament Out (Optional but Recommended)
If your hotend isn't totally dead or clogged solid, it's a good idea to preheat it just enough to pull out any residual filament. Heat it to about 200°C for PLA or 240°C for PETG – whatever filament you last used. Once it's up to temp, gently pull the filament out from the top. Don't yank it, just a steady pull. Once it's clear, then shut off the printer and unplug it. And yes, let it cool down properly. This just makes the next steps cleaner and prevents melted filament from getting where it shouldn't.
Step 2: Access the Hotend Assembly
The K1's hotend lives under a protective shroud. You'll need to remove this to get to the good stuff. Look for the screws holding the front fan shroud in place. There are usually a couple of small screws, often 2mm or 2.5mm Allen head. Gently unscrew them and carefully detach the fan and shroud. Be mindful of the wires connected to the fan – you don't want to pull those out accidentally. You might need to disconnect the fan's JST connector to fully remove the shroud, or just carefully move it aside so you have enough room to work.
Step 3: Disconnect the Wiring
This is where it gets a little delicate, but nothing you can't handle. The K1 hotend assembly usually has two sets of wires coming out: one for the heater cartridge and one for the thermistor. These are critical for heating and temperature sensing. They typically connect to a small PCB (Printed Circuit Board) right on the toolhead. You'll see tiny connectors. Carefully unclip or unscrew these. My personal trick here, which has saved me countless times, is to take a photo with your phone before you disconnect anything. Seriously, I always do that; it's a lifesaver for remembering what goes where, especially if you're not super familiar with the wiring. Colour coding helps, but a picture is worth a thousand headaches.
Step 4: Remove the Old Hotend
Once the wires are free, the hotend itself is usually held in place by one or two screws, often on the side of the heat sink or within a clamping mechanism on the toolhead. Locate these screws and loosen them. The hotend assembly should then slide right out from the toolhead. Sometimes it might be a bit snug, especially if it's been in there a while, but it shouldn't require excessive force. If it feels stuck, double-check if there are any other retaining clips or screws you missed. Take your time, don't force it – that's when things break.
Step 5: Inspect and Clean
With the old hotend out, take a moment to look at the toolhead area. Are there any bits of filament stuck in the heat sink fins? Is there gunk around the extruder gear? Give it a quick clean with a small brush or a blast of compressed air (if you have it). A clean slate makes for a happy new hotend. Also, just quickly check the extruder gears for wear; if they look chewed up, that might be a future replacement project, but for now, just make a mental note.
Step 6: Install the New Hotend
Now for the satisfying part! Carefully slide your brand-new hotend assembly into place. Make sure it seats snugly and is oriented correctly. The mounting holes should line up perfectly with the screw holes on the toolhead. Once it's in position, secure it with the screws you removed earlier. Don't overtighten them – just snug is good. You don't want to strip anything or crack the plastic around the mount. A firm, but gentle hand is all that's needed.
Step 7: Reconnect the Wiring
Remember that photo you took? Now's its time to shine! Carefully reconnect the heater cartridge and thermistor wires to their respective spots on the PCB. Ensure they're fully seated and secure. Loose connections are a recipe for temperature fluctuations and print failures, or even worse, thermal runaway issues. Double-check everything. This is one area where I'm super meticulous because a bad connection here can ruin your day, and potentially your printer. Give each wire a very gentle tug to confirm it's secure.
Step 8: Reattach the Shroud and Fan
Slide the fan shroud back into position. If you disconnected the fan's JST connector, plug that back in first. Then, secure the shroud with its screws. Make absolutely sure the fan blades aren't obstructed and can spin freely. A blocked fan means poor cooling, and that means heat creep and clogs – basically, no bueno for a high-speed printer like the K1.
Step 9: Power Up and PID Tune!
Alright, moment of truth! Plug your K1 back in and power it on. Don't start printing just yet. Because you've replaced the heater and thermistor (they come as part of the K1's hotend assembly), your K1's temperature control might be a little off. This is where PID tuning comes in. PID stands for Proportional-Integral-Derivative, and it's basically how your printer learns to precisely maintain its nozzle temperature. It's super important for consistent prints, especially on a Klipper-based machine like the K1.
You'll need to send some commands via a terminal (like through Creality Print's built-in terminal, OctoPrint, or Fluidd/Mainsail if you've done some advanced modding). Here's the basic process:
- Connect to your printer's terminal.
- Send the command:
M106 S255(This turns the hotend fan on full blast during tuning, which is good practice). - Send the command:
PID_CALIBRATE HEATER=extruder TARGET=200(You can changeTARGETto your usual printing temp, say 220 for PETG, but 200 is a good starting point for calibration). - The printer will heat up and cool down several times to figure out the optimal settings. This might take 5-10 minutes. Just let it do its thing.
- Once it's done, it'll give you a message, usually with the new PID values.
- Crucially, you MUST save these new settings. Send the command:
SAVE_CONFIG. This writes the new PID values to your printer's configuration. Without this, the changes won't stick after a reboot, and you'll have to do it all


