How to Tune Pressure Advance on Klipper for Cleaner Corners
This guide will show you how to effectively tune Pressure Advance on your Klipper 3D printer. Achieve significantly cleaner and sharper corners on all your future prints.

Taming the Corners: My Klipper Pressure Advance Secret for Smoother Prints (and Happier Customers!)
Oh man, I know the feeling. You’ve spent hours designing something cool, or maybe you’ve got a big order from a client who wants flawless quality. You hit print, cross your fingers, and then… there it is. That little bulge, that slight roundness on what should be a perfectly crisp corner. Or maybe you see a tiny bit of underextrusion just *after* the corner, like the printer took a quick nap. Drives me absolutely bonkers, especially when I’m trying to deliver top-notch pieces for Artopia Collections. It’s not just about looking good; it’s about mechanical accuracy, about parts fitting snugly, about pride in your work.
For a long time, I just thought, "Eh, it's a 3D printer, what do you expect?" But then I stumbled upon Klipper, and my whole world, or at least my 3D printing world, changed. And one of the biggest game-changers for me, a real turning point for those notoriously tricky corners, has been something called Pressure Advance. If you're running Klipper and you're still fighting with corners, grab a chai, because we're gonna talk about tuning this bad boy, and trust me, it’s worth every minute.
What Even IS Pressure Advance? The Gist from My Workshop
So, what's the deal with Pressure Advance (often just called PA)? Think of it like this: when your printer's extruder pushes filament through the hotend, there's a certain amount of pressure that builds up. It's not instant, right? It takes a moment for that pressure to build and then to dissipate. When your nozzle zips along in a straight line, it's fine. The pressure is constant.
But then, BAM! A corner hits. The printer needs to slow down, maybe even pause for a split second, change direction, and then speed up again. If you don't have Pressure Advance enabled, or if it's not tuned correctly, what happens? As the nozzle approaches the corner, it's still pushing filament at the "straight line" pressure. This often leads to an excess of plastic being squeezed out right at the corner, creating that ugly bulge. Then, as it speeds up again, the pressure might drop too quickly, causing a moment of underextrusion just after the corner.
Pressure Advance basically tells Klipper to anticipate these changes. It subtly adjusts the extrusion rate *before* the corner to reduce the pressure buildup, and then *after* the corner to quickly re-establish it. It’s like giving your extruder a heads-up, saying, "Hey, big turn coming, ease off a bit!" and then "Okay, all clear, full speed ahead!" The goal? Consistent extrusion, no matter how sharp the turn, no matter how quickly the speed changes.
Why Should an Indian 3D Printing Enthusiast (Like Us!) Care About PA?
Honestly, it’s a game-changer for quality. Here in India, the 3D printing scene is exploding, and competition is getting tougher. Whether you're making prototypes for clients, crafting intricate models for home decor, or selling practical prints, people expect good quality. If your corners are consistently messy, it reflects poorly on your work. For my business, Artopia Collections, where I sell everything from custom lithophanes to functional parts, every print has to be as close to perfect as possible. I want my customers to look at a print and say, "Wow, this looks professionally done!" not "Hmm, nice print, but look at those corners."
Plus, let's be real, filament isn't exactly free. A good roll of eSUN PLA+ or even something like Overtone PLA can run you anywhere from ₹1200 to ₹1800, depending on the colour and brand. Wasting filament on prints that don't meet your standards because of sloppy corners? No thanks, boss. Tuning PA properly saves you material, time, and a whole lot of frustration. And trust me, when you get it right, that feeling of peeling a perfect print off the bed, with crisp, sharp corners that make you want to frame it – that's priceless!
Before We Dive In: A Quick Sanity Check
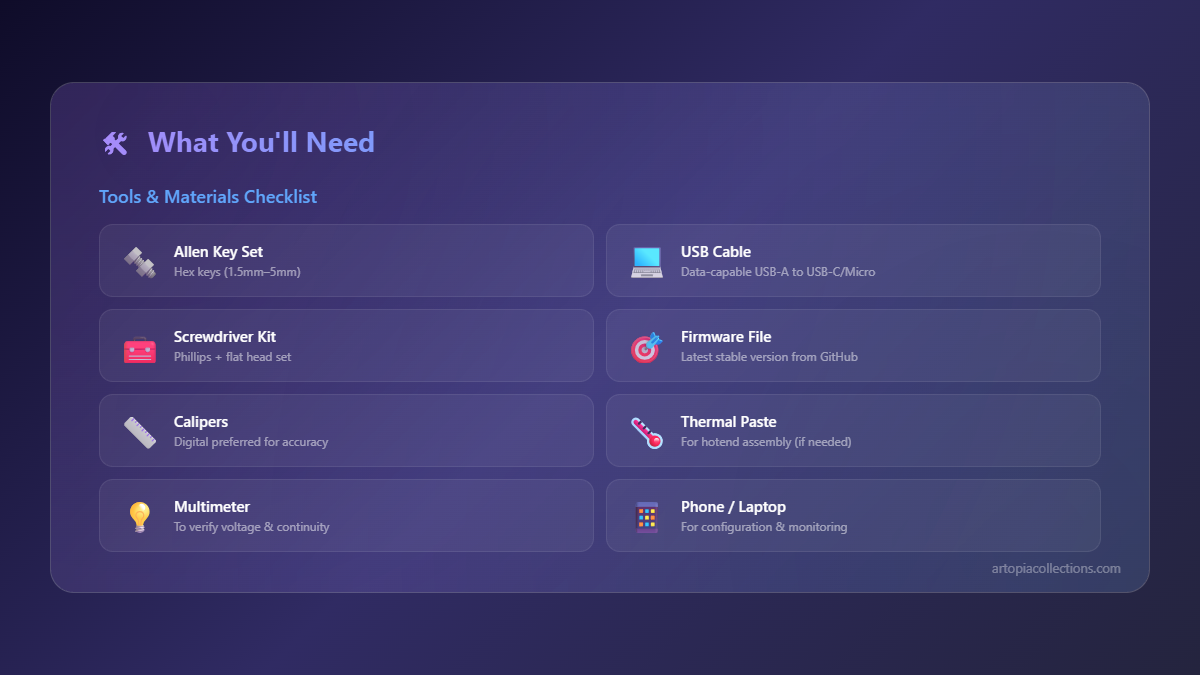
Before you even *think* about tuning Pressure Advance, make sure your printer is in good shape. PA is a fine-tuning step, not a magic bullet for a poorly calibrated machine. Here’s a quick checklist:
- E-steps are calibrated: Your extruder needs to be pushing the right amount of filament. This is fundamental.
- PID tuning is done: Especially for your hotend. Stable temperatures are key.
- Input Shaper is tuned (if you’re running Klipper, you really should be!): This significantly reduces ghosting and ringing, and PA works *with* Input Shaper to give you super clean prints. If you have an accelerometer (which I highly recommend, you can get a decent ADXL345 breakout board for around ₹500-₹800 online), use it. If not, the old 'eyeball' method still works.
- Good quality filament: Consistent diameter makes a HUGE difference. I've had some local cheap filaments that just refused to print well, no matter what I did. Brands like eSUN, 3D Print Zone, or even some of the better Voxelab filaments available on Amazon.in usually perform reliably.
Got all that checked off? Great! Let’s get those corners looking sharp enough to cut a diamond.
The Klipper Way: Tuning Pressure Advance
There are a couple of ways to approach this. Klipper offers a handy built-in method, but I've also found a more visual, iterative approach that I personally prefer for its simplicity. Let's look at both.
Method 1: The Klipper Tuning Tower (The Official Route)
Klipper has a `TUNING_TOWER` command that's super useful. Here’s the basic idea:
- Prepare a test print: You need a model with lots of sharp corners. A simple cube, or better yet, a hollow cube with thin walls (like 0.8mm or 1.2mm). The thinner the walls, the more pronounced the effect of PA will be. I often just use a standard calibration cube or even a custom square frame that prints in a spiral motion.
- Slice it: Use your favourite slicer (PrusaSlicer, Cura, SuperSlicer – whatever floats your boat). Make sure you're slicing with your usual print settings, including speeds.
- Upload and start printing: Once it's on your Klipper web interface (Mainsail or Fluidd), fire it up.
- The Klipper Magic: As soon as the print starts, open your console and send this command:
TUNING_TOWER COMMAND=SET_PRESSURE_ADVANCE PARAMETER=ADVANCE START=0 FACTOR=0.005Let's break that down:
COMMAND=SET_PRESSURE_ADVANCE PARAMETER=ADVANCE: This tells Klipper we want to modify the `pressure_advance` value.START=0: This is where we begin. We're starting with no pressure advance.FACTOR=0.005: This is the increment. For every 1mm of Z height, the pressure advance value will increase by 0.005. So, if your tower is 20mm tall, it will go from 0 to 0.1. You might need to adjust this factor depending on your printer. For a Bowden setup, you might start with a higher START value and a larger FACTOR, as Bowden systems typically need higher PA values (0.4-0.8 is common). For direct drive, it's usually much lower (0.02-0.1). My Creality Ender 3 V2, converted to direct drive, typically lands around 0.05-0.07 for PLA.
- Observe the magic: As the print progresses, keep a close eye on those corners. You'll start with bulges (or underextrusion if you started with a negative PA, but we're starting at 0 for simplicity). As the Z height increases and the PA value ramps up, you'll see the corners get progressively cleaner. At some point, they'll look perfect. Keep going, and eventually, the PA will be too high, and you’ll start seeing underextrusion *before* and *at* the corners. It’ll look like the nozzle is lifting off or pulling material away.
- Find the sweet spot: Once the print finishes, carefully examine the tower. Find the exact Z height where the corners look their absolute best – no bulging, no underextrusion. Measure that height accurately.
- Calculate your value: Take that Z height, multiply it by your `FACTOR`. So, if your perfect corner was at 12mm and your `FACTOR` was 0.005, your ideal PA is 12 * 0.005 = 0.06.
Method 2: The "Eyeball and Tune" (My Personal Go-To)
I find this method a bit more intuitive and quicker for me, especially since I'm often switching filaments and need to re-tune quickly.
- Print a simple square: I usually just grab a 20x20mm cube, make it hollow with a 0.8mm wall thickness, and print just the perimeter (no infill, no top/bottom). The faster the print speed, the more obvious the effects will be. My usual speed is 60-80 mm/s for this.
- Start with a conservative PA: In your Klipper console, set a low `pressure_advance` value. For direct drive, start with `SET_PRESSURE_ADVANCE ADVANCE=0.02`. For Bowden, maybe `ADVANCE=0.4`.
- Watch and adjust live: As the square prints, keep a hawk-eye on the corners. While it's printing, gradually increase the value. If you're on Fluidd or Mainsail, you can often add `SET_PRESSURE_ADVANCE ADVANCE=X` to a macro or just type it directly in the console and hit enter.
- If you see bulges at the corners: Your PA is too low. Increase the `ADVANCE` value (e.g., `SET_PRESSURE_ADVANCE ADVANCE=0.03`).
- If you see underextrusion or gaps just before/at the corners: Your PA is too high. Decrease the `ADVANCE` value (e.g., `SET_PRESSURE_ADVANCE ADVANCE=0.025`).
You’re looking for that sweet spot where the corner is perfectly sharp and the extrusion is consistent all the way around. This might take a few live adjustments, printing a few layers, adjusting, printing more layers, etc. Sometimes I'll even stop the print, adjust, restart, and see if it looks better.
Saving Your Precious Settings!
Once you’ve found that perfect value, it’s absolutely critical to save it. If you don't, it'll revert to 0 or whatever was in your `printer.cfg` after a restart. In your Klipper console, simply type:
SAVE_CONFIGThis will write your new `pressure_advance` value into the `[save_variables]` section of your `printer.cfg`. It’s usually a good idea to then manually move this value into your actual `[extruder]` section, or even create a macro for it if you use different PA values for different filaments.
Filament Specifics: The Annoying But True Part
Here’s the thing, and it’s a bit of a pain: Pressure Advance is filament-dependent. What works perfectly for your eSUN PLA+ might be slightly off for that new roll of 3D Print Zone PETG, or even a different colour of the same brand. Different materials have different viscosities and flow characteristics. So, yes, ideally, you should do this tuning for every new filament type or brand you use. For a small business like mine, where consistency is key, it's a necessary step. I often keep notes in a physical notebook or a simple spreadsheet with my ideal PA values for each specific filament brand and type I use.
Beyond PA: A Little Extra Tip for Ultimate Corner Goodness
While Pressure Advance works wonders, sometimes your slicer settings can also help. Look for settings like "Wipe" or "Coasting" or "Linear Advance" (if your firmware supports it, though Klipper's PA is superior in my opinion). Sometimes a tiny bit of wipe can clean up very minor corner imperfections. And don't forget your nozzle! A worn-out nozzle can cause all sorts of extrusion inconsistencies. I keep a pack of spare nozzles (0.4mm, 0.6mm brass, and even a hardened steel one for abrasive stuff) handy. You can grab a good assorted pack for pretty cheap on Amazon.in, usually just a few hundred rupees.
The Payoff: Beautiful Prints, Happy Customers, and Personal Satisfaction!
Look, the process of tuning PA might seem a little daunting at first, especially if you're new to Klipper. But honestly, it's one of those tweaks that gives you huge returns. The difference in print quality, particularly on models with intricate details or sharp angles, is immediately noticeable. Your parts will fit better, your aesthetic prints will look more refined, and you’ll spend less time post-processing. For my customers at Artopia Collections, seeing those super clean corners on their custom prints just makes them smile. And that, my friends, is why we do this.
So, fire up your Klipper machine, grab that favourite filament, and give Pressure Advance tuning a go. You’ll be amazed at how much cleaner your corners can get. And when you get that perfect print, do me a favour: share it online and tag me! I love seeing what fellow enthusiasts are creating here in India. Happy printing!


