Selling Custom 3D Printed Keychains: Design, Print, and Market Guide
Discover how to turn your 3D printing hobby into a profitable venture by selling custom keychains. This guide walks you through every step, from designing unique pieces to marketing them effectively.

Ready to Turn Your 3D Printer into a Money-Making Machine? Let's Talk Keychains!
Hey everyone! Vidyut here, from Artopia Collections. You know, sometimes I look at my farm of 3D printers chugging away, lights glowing, and I just get this warm fuzzy feeling. It’s not just the hum, it’s the thought of all the cool stuff we’re creating, and more importantly (let’s be honest here!), the business it’s helping build. I started just like many of you, with a single Ender 3, dreaming of printing spaceships and intricate models. But then, the real world hit, and I realised, to keep this passion alive, it needed to pay for itself. And that, my friends, is how I stumbled upon the goldmine that is custom 3D printed keychains.
Seriously, keychains. I know, I know, it sounds a bit… basic, right? But hear me out. Keychains are low-cost, high-demand, incredibly customisable, and the profit margins? Chef’s kiss! They’re the perfect entry point for anyone wanting to turn their 3D printing hobby into a legitimate side hustle, or even a full-blown small business like mine. So, grab a cup of chai, settle in, because today I’m spilling all the beans on how we design, print, and market these little money-spinners right here in India.
The Design Phase: Making Dreams Tangible (and Tiny!)
This is where the magic truly begins. Someone comes to you with an idea, a name, a logo, and your job is to make it real. And trust me, once you nail this, customers are hooked.
Software Choices: From Beginner-Friendly to Pro-Level
When it comes to designing keychains, you don't need to be a CAD guru right off the bat. Honestly, that's the beauty of it!
- Tinkercad: This is my absolute go-to recommendation for beginners. It’s browser-based, super intuitive, and you can create amazing things by just combining and subtracting basic shapes. For simple name keychains or logo extrusions, it's perfect. Plus, it’s free!
- Fusion 360: If you're ready to get a bit more serious and dive into parametric design, Fusion 360 is fantastic. It has a steeper learning curve, sure, but the precision and control it offers are unmatched. We use it for more complex, multi-part designs. And for hobbyists and startups, they have pretty generous free licenses.
- Blender: For artistic, organic shapes or if you want to get into character keychains, Blender is an incredibly powerful (and free!) tool. It's not primarily for CAD, but its sculpting and modeling capabilities are insane. I personally don't use it much for keychains, but for other models? Absolutely essential.
The main thing is to pick one and stick with it until you're comfortable. You don't need to learn all three at once. Start simple, then expand your toolkit.
Designing for Printability and Durability
Here’s the deal: a beautiful design means nothing if it breaks instantly or is a nightmare to print. When designing a keychain:
- Thickness: Don't make it too thin! I usually aim for a minimum of 3-4mm thickness for the main body. Any thinner, and it becomes brittle, especially if it's going to be rattling around in someone's pocket or bag. For letters or intricate parts, I might go even thicker, maybe 5-6mm.
- Attachment Point: This is CRUCIAL. The loop where the keyring goes needs to be strong. Design it with a good, solid base. Don't make it flimsy. I often add a slight fillet (rounded edge) to the base of the loop to prevent stress points. A minimum diameter of 4-5mm for the hole itself is good, to easily fit standard keyring hardware.
- Edges: Chamfer or fillet sharp edges. It not only makes the keychain feel nicer in the hand but also prevents sharp points from breaking off or snagging.
- Size: Keep it practical. Most people want something that fits comfortably in their hand or pocket, not a giant brick. Typically, anywhere from 50mm to 80mm in length is a good range for a custom keychain.
And remember, a good design often means less post-processing. Think about how the layers will build up. Avoid huge overhangs if you can, or design them to be easily supported and cleaned.
The Print Farm: Turning Filaments into Fortunes
 Alright, so you’ve got a killer design. Now it’s time to bring it to life! This is the part where your printer earns its keep.
Printer Power: My Recommendations for Indian Entrepreneurs
You don't need a super expensive industrial printer to make great keychains. In fact, some of the best budget printers are absolute workhorses.
- Creality Ender 3 V2 / Ender 3 Neo / Pro: Hands down, this series is phenomenal for the price. I started with an Ender 3 V2, and it’s still running strong. They’re reliable, easy to maintain, and the community support is massive. You can often find them for around ₹18,000 - ₹25,000 on Amazon.in. Check out the Creality Ender 3 V2 on Amazon here – it's a fantastic starting point!
- Anycubic Kobra Go/Neo: These are newer entrants but are proving to be very capable. They often come with auto-levelling, which is a HUGE time-saver, especially if you’re batch printing. Prices are comparable to the Enders.
The key is consistency. Make sure your printer is well-calibrated, your bed is level, and your nozzles are clean. Trust me, nothing eats into your profit more than failed prints.
Filament Choices: PLA is Your Best Friend
For keychains, PLA (Polylactic Acid) is king. Why?
- Easy to Print: It’s incredibly forgiving, meaning fewer failed prints.
- Biodegradable: A nice talking point for eco-conscious customers.
- Vibrant Colors: PLA comes in an astonishing array of colors, perfect for customisation. Black, white, red, blue, green, yellow, pink, even glitter and silk finishes – the sky's the limit!
- Cost-Effective: Generally, it's one of the cheapest filaments. A good quality 1kg spool can cost anywhere from ₹1800 to ₹2500 here in India, depending on the brand and type (like silk PLA often being a bit pricier).
I usually stick with brands like eSUN, Overture, or even some of the decent local Indian brands you find online. Just make sure you’re buying from a reputable seller to avoid quality issues. Consistency in filament diameter really matters. Sometimes, if I'm doing something that absolutely needs to be tougher, I might use PETG, but honestly, for most keychains, PLA is perfectly adequate. You can find a great selection of eSUN PLA on Amazon.in here.
Slicer Settings: Optimize for Speed and Quality
This is where you tell your printer what to do. I primarily use Cura, but PrusaSlicer and Orca Slicer are also excellent.
- Layer Height: For keychains, I usually go with 0.2mm. It's a good balance between speed and acceptable quality. If it's a very intricate design with fine details, I might drop to 0.16mm, but rarely finer than that for a keychain.
- Infill: You don't need 100% infill! For keychains, 20-30% infill (I usually use Cubic or Gyroid pattern) is more than enough to make them strong. It saves a ton of filament and print time.
- Print Speed: This depends on your printer and filament, but for PLA, 60-80mm/s is usually a safe bet. Experiment to find your printer's sweet spot. Faster equals more output, but don't compromise quality.
- Supports: Try to design your keychains to minimise or eliminate the need for supports. Every support means extra filament, extra print time, and extra post-processing. If you absolutely need them, keep them minimal and easy to remove.
- Build Plate Adhesion: A good brim or skirt is usually sufficient. Make sure your first layer is squished perfectly to the bed!
Batch Printing: Maximise Your Output
The beauty of keychains is that they're small. You can print multiple keychains on your build plate at once! We often load up our printers with 10-15 keychains, sometimes even more if they’re very small. This significantly reduces the 'per item' print time once you factor in bed heating, cooldown, and filament changes. Set it, forget it, and come back to a pile of printed goodies!
Costing: Know Your Numbers
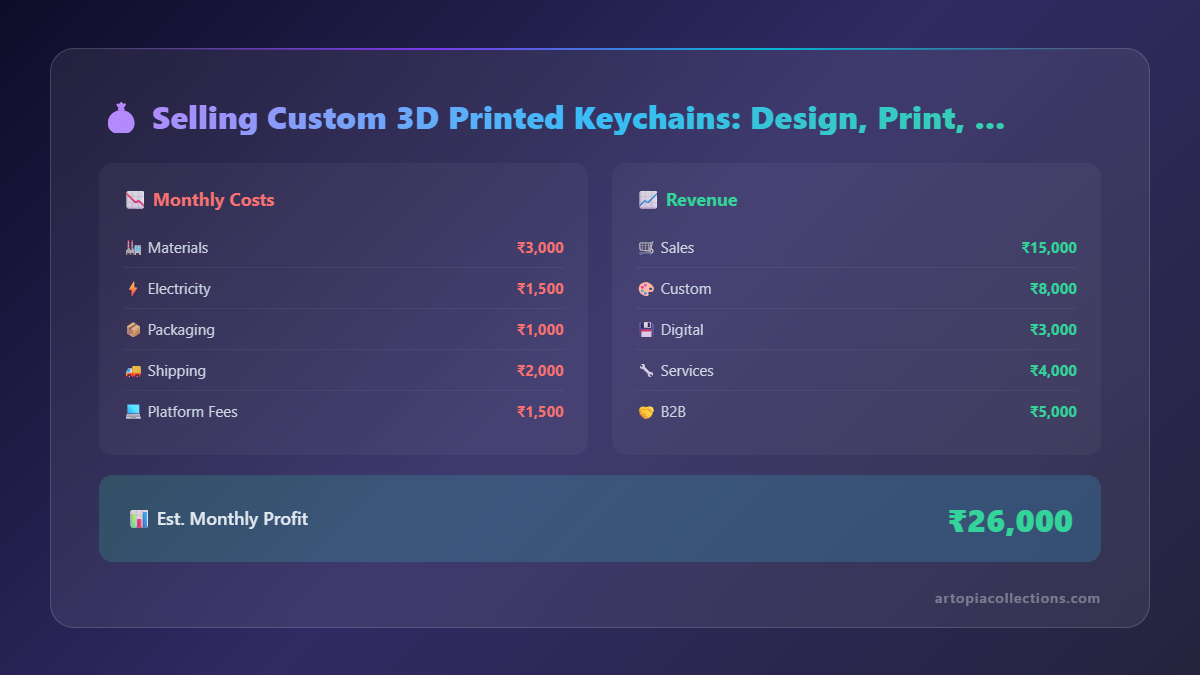
This is business 101. You need to know how much each keychain costs you. * Filament Cost: A typical keychain might use 5-10 grams of filament. If a 1kg (1000g) spool costs ₹2000, then 1 gram is ₹2. So, a 10g keychain costs ₹20 in filament. * Electricity: Your printer uses electricity. A typical 3D printer might consume around 50-100W while printing (more during bed heating). Calculate your local electricity cost per unit. For example, if it's ₹8/unit (kWh) and your printer uses 0.1 kWh for an hour, that's ₹0.8 per hour. A keychain taking 30 minutes would be ₹0.4. It's usually a small fraction but adds up over time. * Hardware: Keyrings, chains, jump rings. You can buy these in bulk. A pack of 100 keyrings might cost ₹300-₹500. So, ₹3-₹5 per keychain. * Your Time: Don't forget to factor in your design time, slicer setup, print monitoring, and post-processing. This is often the most overlooked cost for hobbyists!
So, an average keychain might cost you ₹25-₹40 in raw materials and electricity. Knowing this allows you to price competitively and profitably.
Post-Processing and Assembly: The Finishing Touches
Printed doesn't mean done! A little attention to detail here goes a long way.
- Support Removal: If you used supports, carefully remove them with flush cutters or a hobby knife. Be gentle to avoid marring the print.
- Smoothing (Optional): For PLA, you don't typically do much smoothing, but a quick pass with fine-grit sandpaper (400-600 grit) can help clean up rough edges from supports or stringing. You can also use a heat gun (carefully!) to lightly melt away wisps of stringing.
- Hardware Attachment: This is straightforward. Using pliers, attach the keyrings, jump rings, or chains to your printed keychain. I source my keyring hardware from local hardware shops or online marketplaces like Amazon, usually buying in packs of 100 or 200. It’s significantly cheaper that way.
- Packaging: A simple, clear plastic pouch or a small custom-printed paper bag with your brand logo can elevate the perceived value tremendously. It also protects the keychain during transit.
The Market: Selling Your Masterpieces
 You’ve designed, you’ve printed, you’ve assembled. Now, how do you get these beauties into people’s hands (and make some cash)?
Where to Sell: Online and Offline Strategies
India is a huge market with incredible potential for custom products!
- Online:
- Instagram & Facebook: These are goldmines. Post high-quality photos and videos of your keychains. Use relevant hashtags (#3dprintedkeychain #customkeychainindia #personalizedgifts #madeinindia #smallbusinessindia). Run targeted ads if you have a budget. Engage with your audience!
- WhatsApp Business: Many Indian customers prefer interacting and ordering via WhatsApp. Set up a business profile, create a catalog, and share updates.
- Etsy India: While it has fees, Etsy is a global marketplace for handmade and custom items. It can expose you to a wider audience, both within India and internationally.
- Your Own Website (e-commerce): This is the most professional approach. Platforms like Shopify or even a simple WordPress site with WooCommerce can get you set up. This gives you full control over your brand and customer experience. We use our own site, like for our Artopia Collections product range, it helps immensely with credibility.
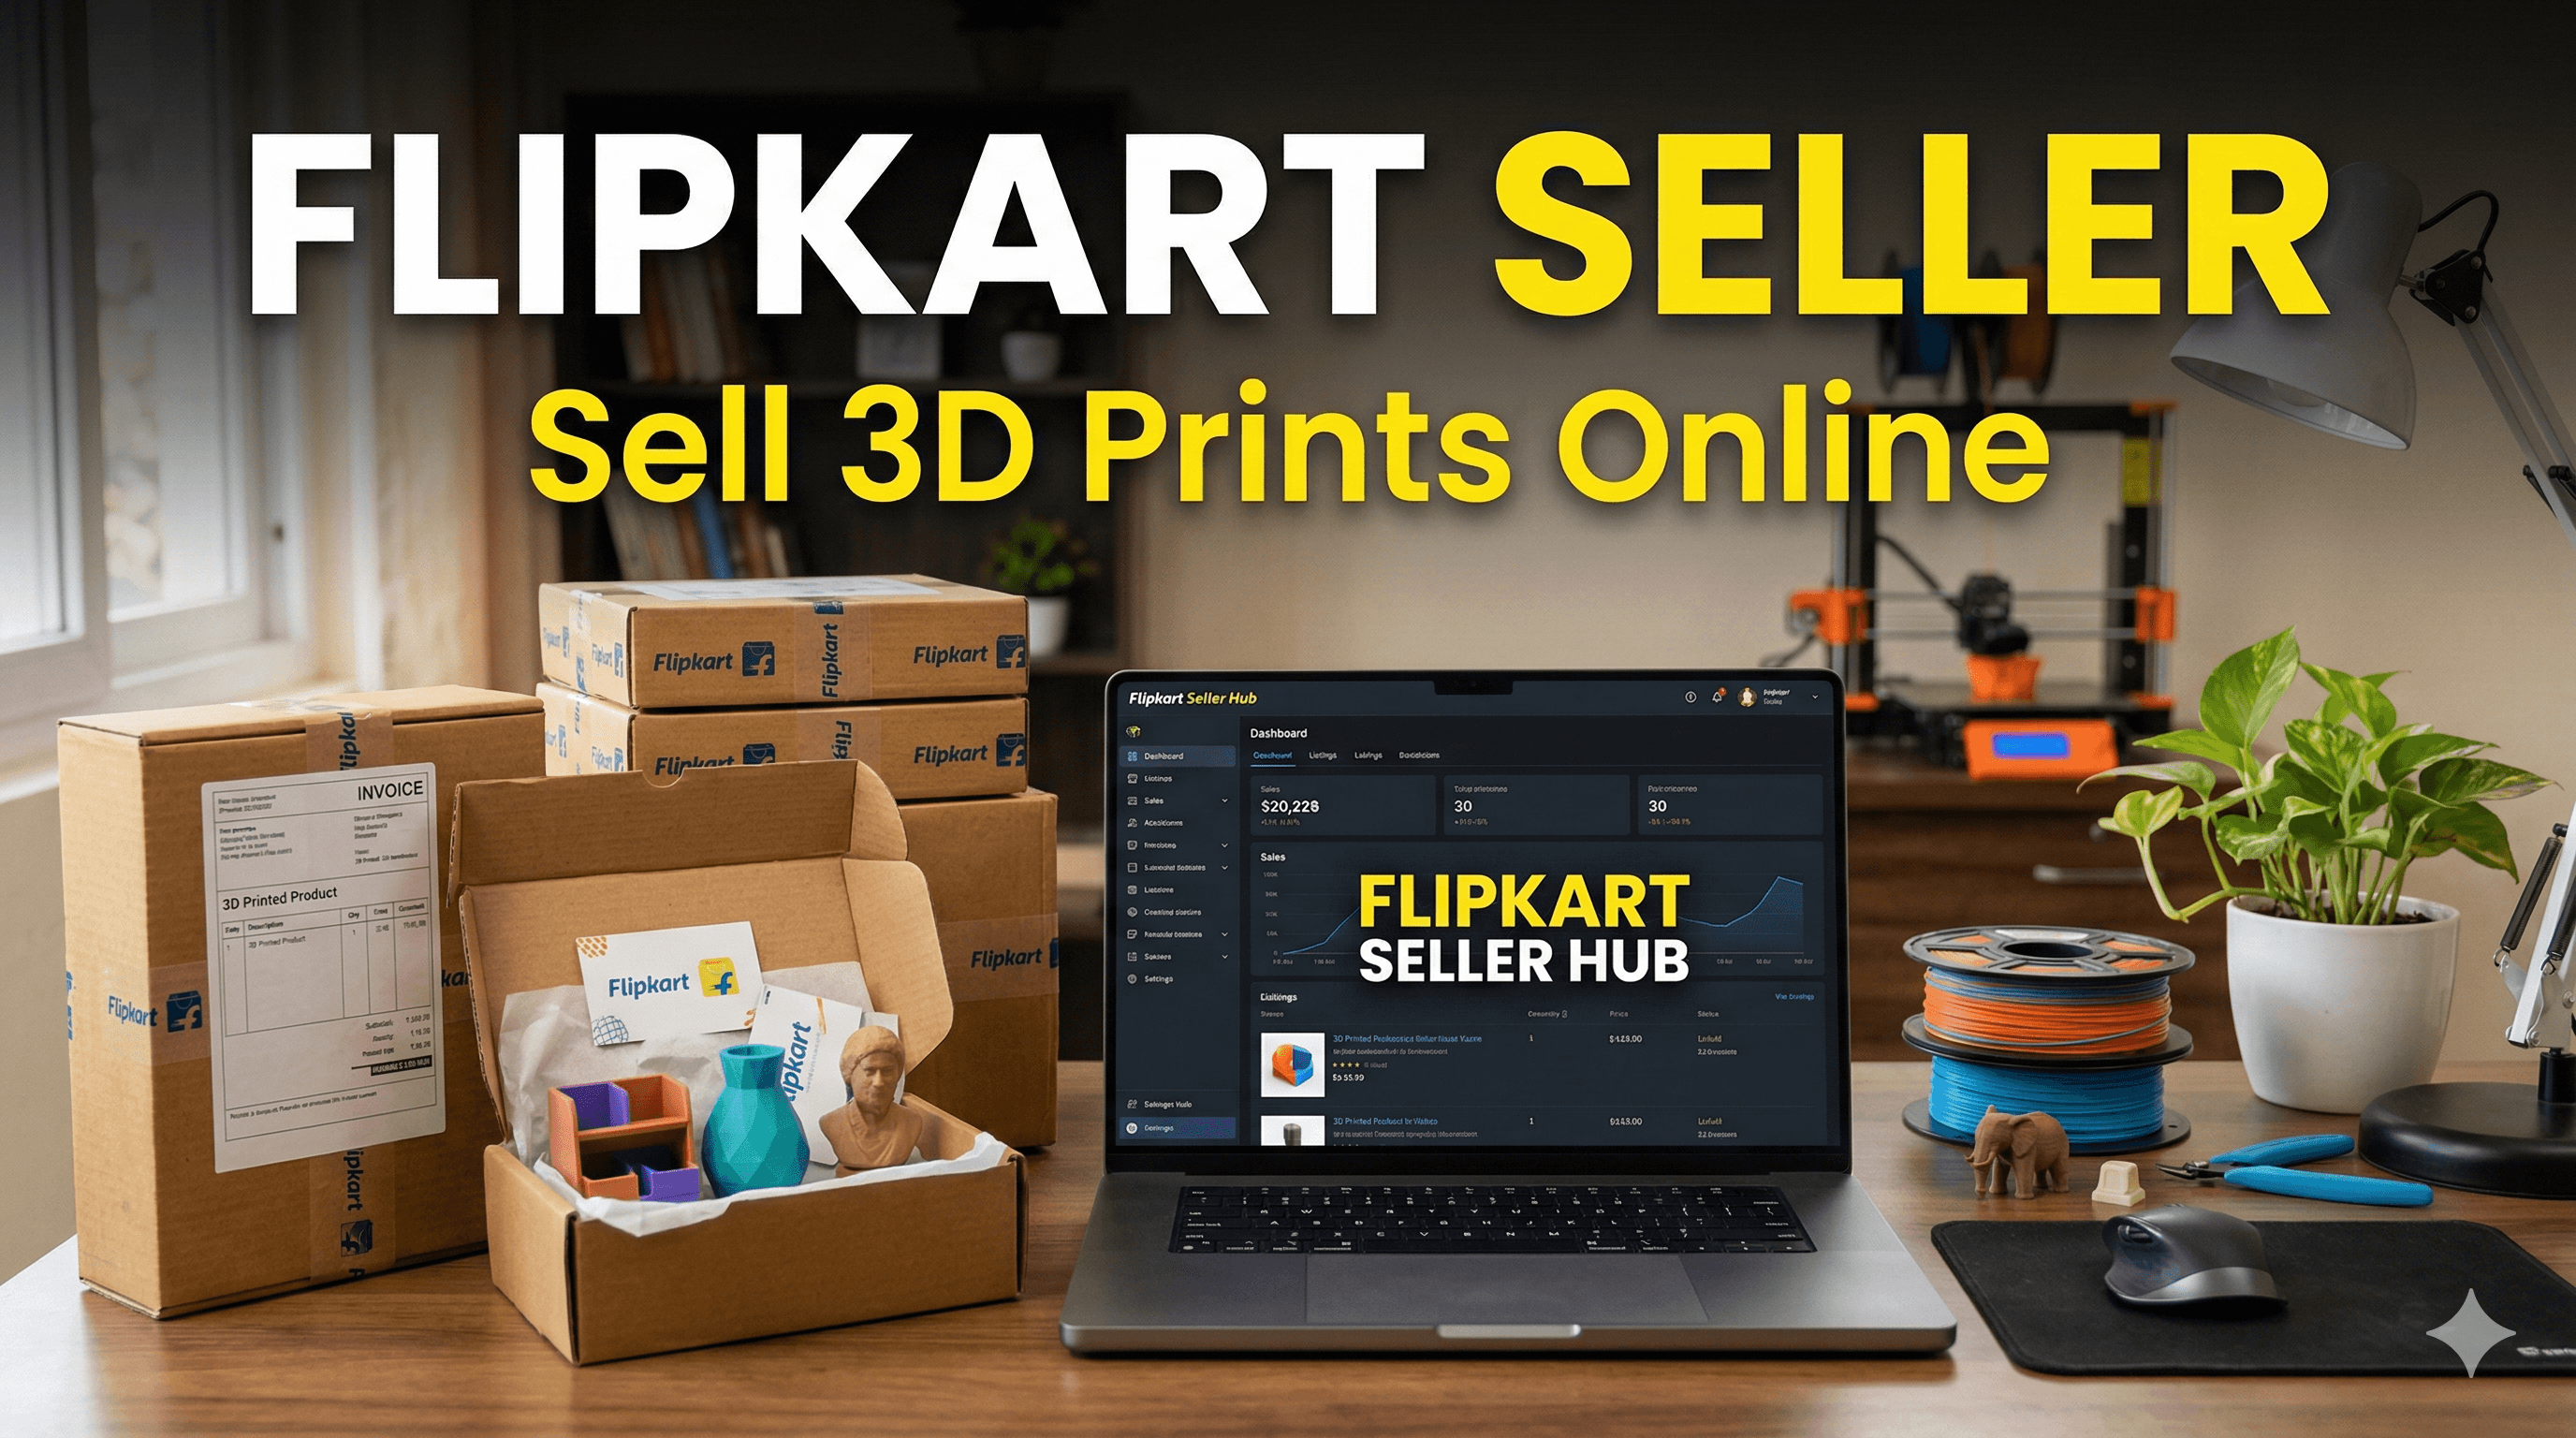
- Local E-commerce: Platforms like Meesho or Flipkart also have options for small sellers, though they might have higher competition for generic items.
- Offline:
- Local Markets & Fairs: Think Sunday markets, college fests, school events, craft fairs. Set up a small stall with samples. People love to see and touch the products. Offer on-the-spot customisation (take orders, deliver later).
- Gift Shops & Boutiques: Approach local gift shops, novelty stores, or even small boutiques. They might be interested in stocking your unique, customisable keychains, especially if they cater to tourists or local events.
- Corporate Gifting: This is a big one! Companies constantly look for unique, branded merchandise for employees, clients, or events. Design keychains with their logos. It's B2B, so higher volume orders.
- Schools & Colleges: Offer keychains with school mascots, college names, or batch year. Alumni love these!
Pricing Strategy: Don't Undersell Yourself!
This is an art, not a science, but here’s a basic formula:
(Material Cost + Electricity Cost + Hardware Cost) x (Time Factor) x (Profit Margin) = Selling Price
- Time Factor: How much is your design and post-processing time worth? Don't undervalue it.
- Profit Margin: Aim for at least 2x-3x your base cost. So, if a keychain costs you ₹40, you should be selling it for ₹120-₹200.
- Competitive Pricing: Look at what others are selling similar custom keychains for, both online and offline. Don't be the cheapest – differentiate yourself on quality, design, and customer service.
For a custom, single-color PLA keychain, I usually price them anywhere from ₹150 to ₹300, depending on complexity, size, and whether it’s a bulk order or a one-off. Two-color keychains (achieved by pausing prints and swapping filament) or multi-material ones would be on the higher end.
Marketing Tips: Show, Don’t Just Tell
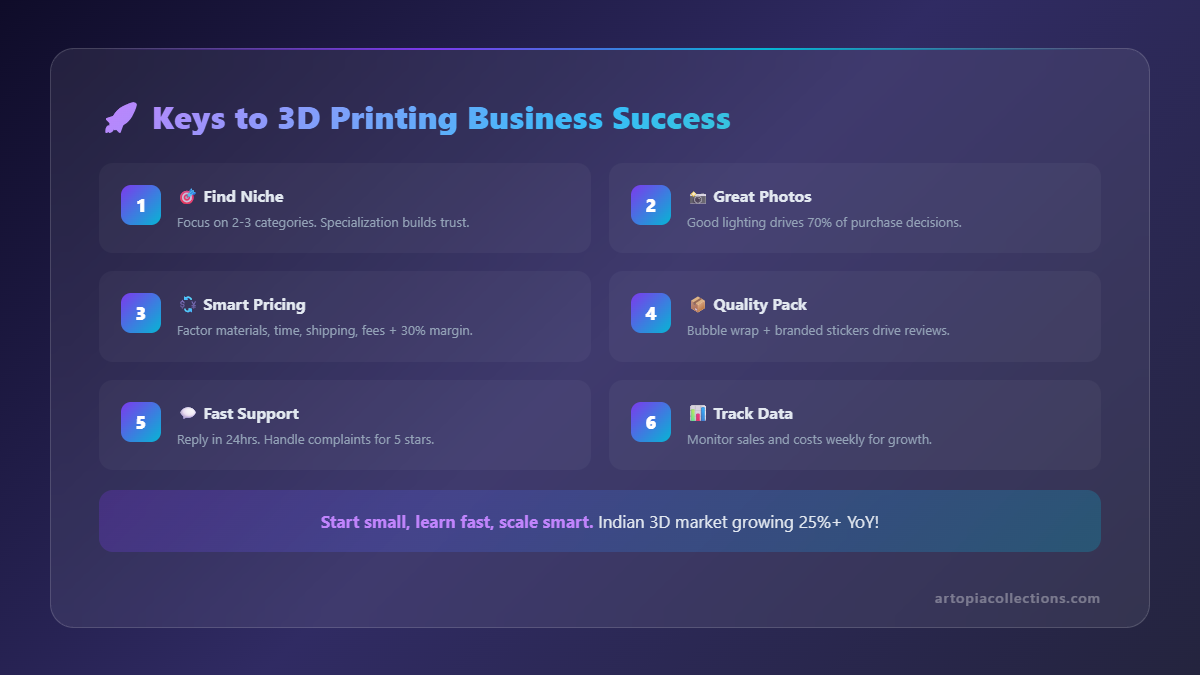
- High-Quality Photos: This is non-negotiable. Good lighting, clear focus, appealing backgrounds. Show the customisation options.
- Behind-the-Scenes Content: People love seeing the 3D printer in action! Share time-lapses of prints, design process snippets, or even just your workspace. It builds trust and shows the effort involved.
- Customer Testimonials: Ask happy customers for reviews and photos of their keychains. User-generated content is incredibly powerful.
- Collaborations: Partner with local artists, influencers (even micro-influencers), or other small businesses for cross-promotion.
- Offer Bundles & Discounts: "Buy 3, Get 10% Off" or a "Combo Pack with a custom coaster."
Challenges & My Two Cents
It's not all smooth sailing, folks. There will be challenges, trust me. Printers fail, customers can be demanding, and sometimes inspiration just won't strike.
- Printer Woes: No matter how good your printer is, it will have issues. Clogged nozzles, bed adhesion problems, spaghetti monsters. Learn to troubleshoot. YouTube is your best friend here. Don't get discouraged; it's part of the process.
- Customer Communication: Be clear about timelines, pricing, and what you can and cannot do. Set expectations upfront. Send progress updates for custom orders. Good communication builds loyalty.
- Scalability: As orders increase, you might need more printers or better workflow. That's a good problem to have! But plan for it. Can you outsource some parts? Can you hire an extra hand for post-processing?
- Originality: While it's great to get inspiration from others, try to develop your own unique design style. That's what will make your brand stand out.
And you know, sometimes I even forget to clean my print bed properly, leading to a botched first layer (don't tell anyone, okay?). It happens! Just learn from it and move on.
Your Journey Starts Now!
Look, starting a 3D printing business, even a small one focused on keychains, is incredibly rewarding. It combines technology, creativity, and entrepreneurship. It's a fantastic way to monetise your passion, learn valuable business skills, and connect with people. Keychains are just the beginning – once you master these, you can easily expand into custom coasters, signs, lithophanes, phone stands, and so much more!
So, if you’ve been on the fence, wondering if your 3D printer can really make you some money, I hope this guide gives you the push you need. Dive in, experiment, learn, and don’t be afraid to make mistakes. That's how we all grow. Happy printing, and I can't wait to see what amazing custom keychains you all come up with!
Cheers,
Vidyut
Artopia Collections