Best Turntable Setups for Consistent 3D Scanning Results
Achieve flawless 3D scans with the right turntable setup. This guide reveals the best turntables and techniques for consistent, high-quality results every time.

Ever had one of those days where you’re trying to scan a super cool object, maybe a detailed idol for a custom print order, or a broken part you need to replicate, and it just… won’t… come… out… right? The scanner keeps losing tracking, you get holes in your mesh, or the whole thing just looks like a blurry, digital nightmare? Yeah, been there, done that, bought the T-shirt. And frankly, for a long time, I thought it was just my scanner, or my technique, or maybe I just wasn't "zen" enough for 3D scanning. Turns out, a lot of the headache, the missing data, the misalignments – it all boils down to one simple, often overlooked component: your turntable setup.
Here at ArtOptia Collections, we do a fair bit of scanning, not just for our own design work but also for customers who want something unique – like that time we scanned an old, intricate brass lamp for a client who wanted a miniaturized, functional replica printed. It was a challenge, but with the right turntable, it went from pulling-my-hair-out frustrating to "hey, this is actually pretty cool!" I mean, who wants to spend hours manually rotating an object, only to find out you missed an entire side, right? Not me, and I bet not you either.
So, let's talk turntables. Because honestly, for consistent, high-quality 3D scanning results, a good turntable isn't just a nice-to-have; it's practically a necessity. Especially when you're using handheld scanners or even structured light scanners that don't have their own integrated rotation.
Why a Turntable is Your Scanning Best Friend
Think about it. When you're scanning an object, especially something with complex geometry, you need to capture every single angle. If you're manually rotating it, even with the steadiest hands, you're bound to introduce inconsistencies. Your rotation speed might vary, your hand might wobble slightly, or you might accidentally shift the object's position relative to the scanner. All these little things add up to a messy scan, alignment issues, and ultimately, more time spent in post-processing cleaning up the mesh. And time, my friends, is money, especially when you're running a small business like ours.
A good turntable:
- Ensures Consistent Rotation: This is huge. The object rotates at a constant speed and axis, giving your scanner a predictable movement to track.
- Minimizes Manual Errors: No more shaky hands or accidental bumps.
- Improves Data Capture: By maintaining a consistent distance and angle, you're less likely to miss tricky spots or create holes in your mesh.
- Saves Post-Processing Time: A cleaner initial scan means less time spent filling holes, smoothing surfaces, and aligning multiple scan passes. Trust me, your software will thank you.
- Boosts Productivity: You can set it up, hit scan, and let it do its thing while you prep the next object or answer an email. Efficiency, baby!
I've seen the difference firsthand. When I started out, my scans were... well, let's just say they looked like abstract art. Now, with a proper setup, I can get a decent initial mesh almost every time, ready for printing on my trusty Ender 3 V2 or even our Anycubic Kobra Max for bigger stuff. And the quality of prints we get from good scans, say with eSUN PLA+ filament, it's just night and day.
Different Flavors of Turntable Setups
Alright, so you're convinced. You need a turntable. But which one? There's a whole spectrum, from super DIY to professional-grade, and your choice will depend on your budget, the size of objects you're scanning, and how often you're doing it.
1. The DIY Marvel: Lazy Susans & Motorized Hacks
Let's start with the budget-friendly options. Because, you know, every rupee counts! The simplest setup is a good old lazy Susan bearing. You can pick one up from a local hardware store for a few hundred rupees, like ₹200-₹500. Mount a flat, sturdy surface on top, and boom – manual turntable. It works for smaller, lighter objects, but you still have to manually rotate it, so consistency is still a bit of a challenge. I used one of these myself for a while, carefully marking intervals on the base so I knew how much to turn it. It was... quaint.
A step up from that is a motorized DIY setup. This usually involves a small, low-RPM motor (like a gear motor or a motor from a microwave turntable) hooked up to a platform. You can find these motors online for around ₹500-₹1500. You'll need some basic electronics knowledge (or a friend who has it!) to wire it up with a power supply and maybe a speed controller. I've seen some ingenious setups using old CD player motors, too! The biggest advantage here is consistent rotation without manual intervention. The downside? Stability can be an issue if not built well, and the speed control might be basic.
Pros: Super cheap, customizable. Cons: Requires DIY skills, can lack precision and stability, limited weight capacity. Best for: Hobbyists, very small objects, infrequent scanning.
2. The Off-the-Shelf Manual & Basic Motorized Turntables
If DIY isn't your jam, or you need something a bit more robust, there are ready-made options. You can find basic manual display turntables (the kind used for displaying models in shops) for around ₹800-₹2000. They're usually smoother than a raw lazy Susan, often have markings for degrees, and are generally more stable. Still manual, but a nicer experience.
Then you step into the world of basic motorized display turntables. These are a fantastic starting point for many. You can find them on Amazon.in for anywhere from ₹1,500 to ₹5,000, depending on size and weight capacity. Look for ones with good reviews, designed for product photography or display. Many run on batteries or USB power, which is convenient. The key features to look for are:
- Smooth, Consistent Rotation: This is non-negotiable.
- Weight Capacity: Make sure it can handle your heaviest objects comfortably.
- Speed Control: Some have multiple speeds, which is a bonus.
- Diameter: Ensure the platform is large enough for your typical objects.
I personally use a motorized display turntable for most of my smaller to medium-sized items. It's stable, quiet, and gives me consistent rotation. I picked up one similar to this (though not exactly the same model) for about ₹3,000 a couple of years back. It’s been a workhorse. Here's a generic search link for motorized display turntables on Amazon, you might find something that fits your needs: Motorized Display Turntable on Amazon.in.
Pros: Good balance of cost and performance, easy to set up, consistent rotation. Cons: Limited speed control on cheaper models, not typically integrated with scanning software. Best for: Small businesses, frequent scanning of small to medium objects.
3. The Professional Edge: Dedicated Scanning & Integrated Turntables
This is where things get serious, and a bit pricier. Some higher-end 3D scanners, especially structured light ones, come with their own integrated turntables. These are often precisely calibrated, communicate directly with the scanning software, and offer highly accurate, automated scanning cycles. Brands like EinScan or even some industrial-grade scanners will have these. They're amazing because the software knows exactly when and how much the object has rotated, allowing for seamless data stitching and superior accuracy.
If your scanner doesn't come with one, you can sometimes buy third-party professional motorized turntables designed specifically for scanning. These will have features like:
- High Precision Stepper Motors: For extremely accurate angular rotation.
- Software Integration: Often with APIs or specific drivers to link with popular scanning software.
- High Load Capacity: For heavier industrial parts.
- Variable Speed and Step Control: Fine-grained control over rotation.
You're looking at ₹15,000 and upwards for these, potentially even lakhs for industrial-grade setups. While fantastic, they're usually overkill for most hobbyists or small businesses dealing with typical 3D print sizes. For my business, as much as I'd love one, it's just not justifiable right now, given the cost of the actual scanner itself, let alone the turntable!
Pros: Highest precision, seamless software integration, fully automated workflow. Cons: Very expensive, often specific to certain scanner ecosystems. Best for: Professional scanning services, industrial applications, high-volume, high-precision work.
Setting Up for Success: More Than Just the Turntable
Having the right turntable is a huge step, but it's not the only piece of the puzzle. Here are a few other things I've learned are super important for getting those pristine scans:
- Lighting, Lighting, Lighting: Oh, man, this is crucial. You want diffused, even lighting. Avoid harsh shadows or direct spotlights, as these can confuse your scanner. I use a couple of LED panels with diffusers, angled to eliminate shadows. Sometimes, for very shiny objects, I'll even create a small "light tent" from translucent plastic sheets. Makes a world of difference.
- A Stable Environment: Make sure your scanner, the turntable, and the object are all on a rock-solid surface. Any vibrations can throw off your scan data. My workbench is pretty sturdy, but I've seen people use heavy concrete blocks for extra stability.
- Background Matters: A plain, non-reflective, contrasting background is your best friend. I usually use a matte black or white poster board. Avoid busy patterns or highly reflective surfaces as they can create noise in your scan.
- Object Preparation: For really tricky, shiny, or transparent objects, you might need to use a matte scanning spray. I've had to do this for a few metallic miniatures. It temporarily dulls the surface, making it much easier for the scanner to pick up geometry. Remember to clean it off thoroughly afterwards!
- Calibration is Key: Always, always, *always* calibrate your scanner regularly, especially if you're moving it around or changing your setup. Most scanners come with calibration boards and software routines. Don't skip this step!
It's basically like setting up for a photoshoot, but instead of taking pictures, you're mapping out 3D space. Get the environment right, and your scanning experience becomes a whole lot smoother.
My Go-To Setup and Workflow (for now!)
Currently, my primary scanning setup for most customer orders and internal projects involves a handheld Revopoint POP 2 scanner (a fantastic value-for-money option, by the way!) paired with a basic motorized display turntable. The turntable, as I mentioned, cost me around ₹3,000, and it has a decent weight capacity of about 5-7 kg, which covers most of the objects I deal with – from small intricate jewellery pieces to medium-sized sculptures.
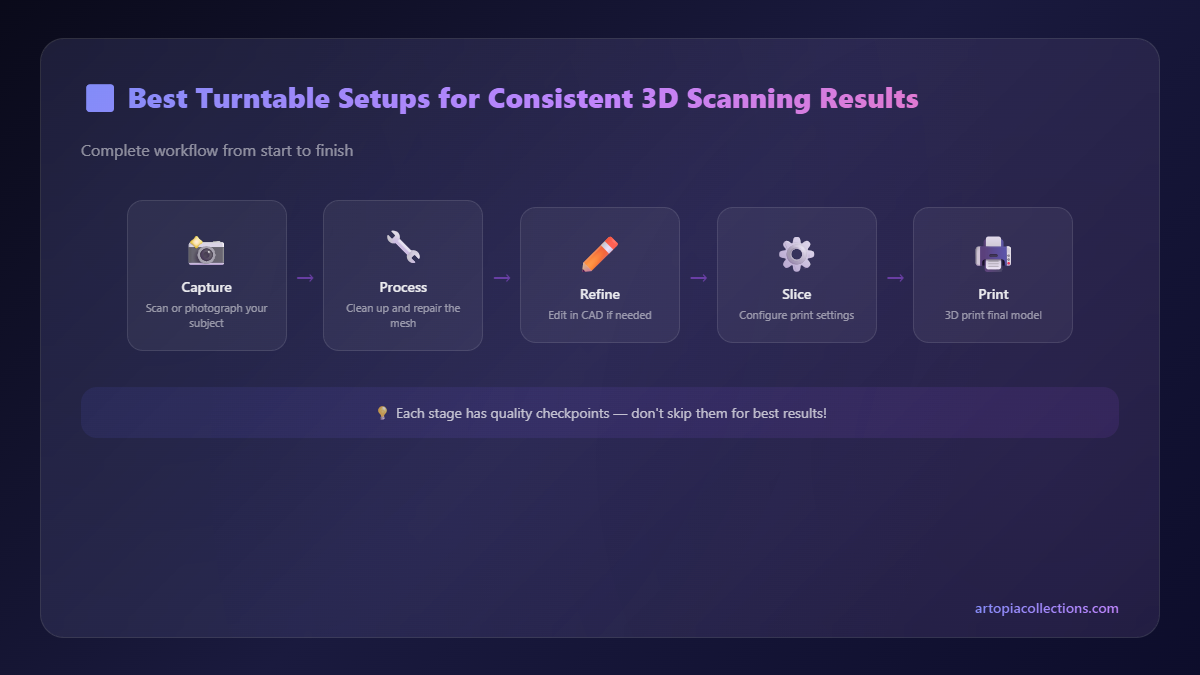
My workflow generally looks like this:
- Object Prep: Clean the object, apply scanning spray if needed, mount it securely (sometimes with a bit of Blu Tack) to the center of the turntable.
- Turntable & Lighting Setup: Position the turntable, ensure the LED panels are providing even, diffused light.
- Scanner Calibration: Quick calibration routine, especially if it's the first scan of the day.
- Scanning: I usually do two passes. First, I'll set the turntable to a slow, continuous rotation and scan from above, moving the scanner smoothly from top to bottom, capturing the main body. Then, I'll pause, adjust the scanner angle (maybe a bit lower, or from a different side), and do a second pass, focusing on any details or tricky angles I might have missed. For complex parts, I might even flip the object (and recalibrate, of course!) and do a bottom scan.
- Software Processing: Let the scanner's software do its initial data stitching and mesh generation. Then, I'll export the mesh (usually as an OBJ or STL) to my preferred CAD software for cleaning, hole filling, and optimization for 3D printing. This is where I refine the mesh before sending it off to my FDM printers like the Ender 3 or Anycubic.
It's not the fanciest setup in the world, but for the kind of work we do here at ArtOptia, it's incredibly effective and budget-friendly. And honestly, the quality of the raw scan data I get now compared to when I was just manually fumbling with objects is just incomparable. A good scan is the foundation of a good print, after all.
Wrapping Up: Get That Spin On!
So, if you've been struggling with inconsistent 3D scans, please, for the love of all things printed, invest in a decent turntable setup. It doesn't have to break the bank. Even a ₹2,000-₹4,000 motorized display turntable can elevate your scanning game significantly. It’s one of those quality-of-life upgrades that you won't regret. It saves time, reduces frustration, and ultimately, helps you produce better, more accurate 3D models.
Whether you're scanning something for fun, or working on client projects like we do for custom creations on our ArtOptia Collections products page, consistency is king. And a reliable turntable is your loyal subject in the realm of 3D scanning. So, go on, give your scanner the stable rotation it deserves!
What's your current scanning setup? Any turntable hacks you've discovered? Drop a comment below; I'd love to hear your experiences!


