Fusion 360 Simulation: Will Your 3D Printed Part Break Under Load?
Before you print, ensure your 3D part won't break. Discover how Fusion 360 simulation helps predict failure points and optimize designs for strength under load.
Fusion 360 Simulation: Will Your 3D Printed Part Break Under Load?
Picture this: you've spent hours hunched over your computer, meticulously designing the perfect part. It's for a custom bracket, a replacement gear, maybe even a new component for your drone. You hit print, your faithful Creality Ender 3 Pro or Anycubic Kobra whirs to life, layering filament with hypnotic precision. Fast forward 8, 10, maybe even 15 hours later, the print is done. You carefully peel it off the build plate, post-process it, and with a hopeful grin, you snap it into place. You apply the load, a gentle pressure at first, then a bit more... and *snap*. The dreaded sound. Your heart sinks. All that time, all that precious filament – gone. Just like that.
Sound familiar? Because, man, it's been my life for far too long, especially in the early days of running ArtOpia Collections. Wasted filament isn't just a minor annoyance when you're doing this professionally; it's real money out of your pocket. A kilo of good quality PETG or PLA+ from brands like eSUN or Overture can set you back anywhere from ₹800 to ₹1500, sometimes even more for engineering filaments. And when you're burning through spools prototyping, those costs add up quicker than you can say "layer shift."
The Trial-and-Error Trap: My Early Days
Honestly, when I first started my 3D printing journey, I was caught in this vicious cycle of design, print, test, fail, redesign, and reprint. It was infuriating. I remember one specific project for a client who needed a custom mount for some electronic equipment. It had to be strong, rigid, and withstand a certain amount of vibration and direct load. I printed three iterations, each time making the walls thicker, bumping up the infill, and spending countless hours waiting, only for each one to eventually fail under the stress test. It wasn't just the filament cost – though that was substantial, probably close to ₹2000-₹3000 just for failed prototypes – but the *time*. My printer was tied up for days, preventing me from taking on other projects. That's opportunity cost, my friends, and it stings.
I knew there had to be a better way. I mean, engineers don't just build bridges and hope for the best, do they? They simulate! They calculate! And that's when I started seriously looking into simulation software. I'd heard whispers about it, seen some advanced CAD users showing off fancy stress maps, but it always felt like something beyond my league, something for multi-national corporations with huge budgets, not a small business guy in India like me.
Enter Fusion 360 Simulation: A Game-Changer for Us "Little Guys"
But boy, was I wrong. Fusion 360, my go-to CAD software for most of my designs (it's incredible how much power it packs, especially with its free personal license!), actually has robust simulation capabilities built right in. And it's not just for mega-companies; it's incredibly accessible once you get past the initial learning curve. For someone like me, who's constantly designing custom fixtures, prototypes, and functional parts, learning Fusion 360's simulation workspace has been nothing short of transformative.
So, what exactly is it? Basically, Fusion 360 Simulation (and other FEA - Finite Element Analysis - tools) lets you digitally test how your part will behave under various real-world conditions *before* you even hit print. You can apply forces, pressures, constraints (where the part is held), and even temperature changes to see how it deforms, what stresses build up, and ultimately, if it's going to break. It's like having a virtual testing lab right on your desktop, saving you a ton of guesswork, time, and money.
Why It's a Lifesaver for 3D Printing Enthusiasts and Businesses:
- Saves Precious Filament & Money: This is probably the biggest one for me. No more guessing if 2mm walls are enough or if you need 50% infill. Simulate it, see the weak points, and optimize. Instead of printing 3-4 failed prototypes costing ₹1000-₹2000 in material alone, you might get it right in one or two goes. Think about it – a good spool of PLA+ like eSUN's can be found for around ₹900-₹1200 on Amazon.in (check it out here!). Two failed prints and you've basically bought a whole new spool.
- Saves Time & Printer Availability: My printers (I've got a couple of Crealitys and a heavily modified Prusa MK3S+) are my income generators. Every hour they're printing a failed prototype is an hour they're not printing something profitable. Simulation helps reduce that downtime drastically.
- Optimizes Design for Strength & Material Usage: You can find exactly where your part needs more material, or surprisingly, where it has too much! This means lighter, stronger, and more efficient designs.
- Builds Confidence: When you hand over a custom-printed part to a client, knowing you've subjected it to virtual stress tests gives you immense confidence. You're not just hoping it works; you have data to back it up.
- Informs Material Choices: Simulation can help you decide if PLA is truly sufficient, or if you need to jump to PETG for better strength and temperature resistance, or even ABS for impact and higher heat.
And honestly, it's not just about avoiding failure. It's also about building *better* parts. Parts that are perfectly tuned for their purpose, not over-engineered or under-engineered. That's the kind of quality I strive for at ArtOpia Collections, and simulation is a core part of how I achieve it.
My Journey into Fusion 360's Simulation Workspace
When I first ventured into the "Simulation" tab in Fusion 360, it looked like a spaceship cockpit. So many buttons, so many options! But I quickly learned that for 3D printed parts, especially for beginners, the "Static Stress" analysis is your bread and butter. It's relatively straightforward and gives you the most bang for your buck.
My first attempts were... well, let's just say I broke a lot of virtual parts. I didn't understand material properties fully, how to apply loads correctly, or even what the colourful stress maps meant. But I stuck with it. YouTube tutorials became my late-night companions. I experimented with simple shapes – a basic cantilever beam, a block with a hole – and compared the simulation results to real-world tests. It was a slow process, but each "aha!" moment felt like a small victory.
One of the biggest lessons? Don't just slap a generic material on your digital model. The strength of your 3D print is heavily dependent on the filament you use. A digital model with "Steel" properties will show wildly different results than one with "PLA" properties. And even then, it's not perfect.
A Quick Look at How I Approach Static Stress Simulation in Fusion 360 for 3D Prints
Okay, so here's a simplified rundown of the steps I typically follow. It's not a full tutorial, but it gives you an idea of the workflow:
- Design Your Part: This is step zero, obviously. Make sure your design is solid and ready for analysis in the "Design" workspace.
- Enter the "Simulation" Workspace: In Fusion 360, just click the dropdown at the top left and select "Simulation." Choose "Static Stress" as your study type.
- Apply Materials (Critically Important!): This is where most beginners go wrong. Don't use the default "Steel." You need to find or create a material that approximates your actual filament (PLA, PETG, ABS, Nylon). Fusion 360 has a decent library, but you often need to tweak the Young's Modulus, Yield Strength, and Tensile Strength values based on your filament manufacturer's datasheet. This is key because 3D prints are anisotropic – meaning they are weaker in some directions (especially along the Z-axis, perpendicular to the layers) than others. I usually err on the side of caution and use slightly lower values for properties to account for layer adhesion issues.
- Apply Constraints: Where is your part held? Is it bolted down? Clamped? Sitting on a surface? You need to tell Fusion 360 which parts of your model are fixed or restricted in their movement. This is crucial for realistic results.
- Apply Loads: What kind of force is acting on your part? Is it a weight pulling down? A push from the side? Pressure spread over a surface? You can apply forces, pressures, moments, or even remote forces. Be as accurate as possible with the magnitude and direction of the load. For that custom mount I mentioned earlier, I had to apply a force equivalent to the weight of the electronics plus a factor for vibration.
- Generate Mesh: This is basically Fusion 360 dividing your part into thousands of tiny elements (the "finite elements"). The software then calculates the stress and strain on each of these elements. For simpler parts, the default mesh is usually fine, but for complex geometries or areas of high stress, you might need to refine the mesh for more accurate results.
- Solve: Hit that "Solve" button! Fusion 360 sends your study to the cloud (for paid subscriptions) or solves it locally, crunching all those numbers. This can take anywhere from a few seconds to several minutes, depending on complexity.
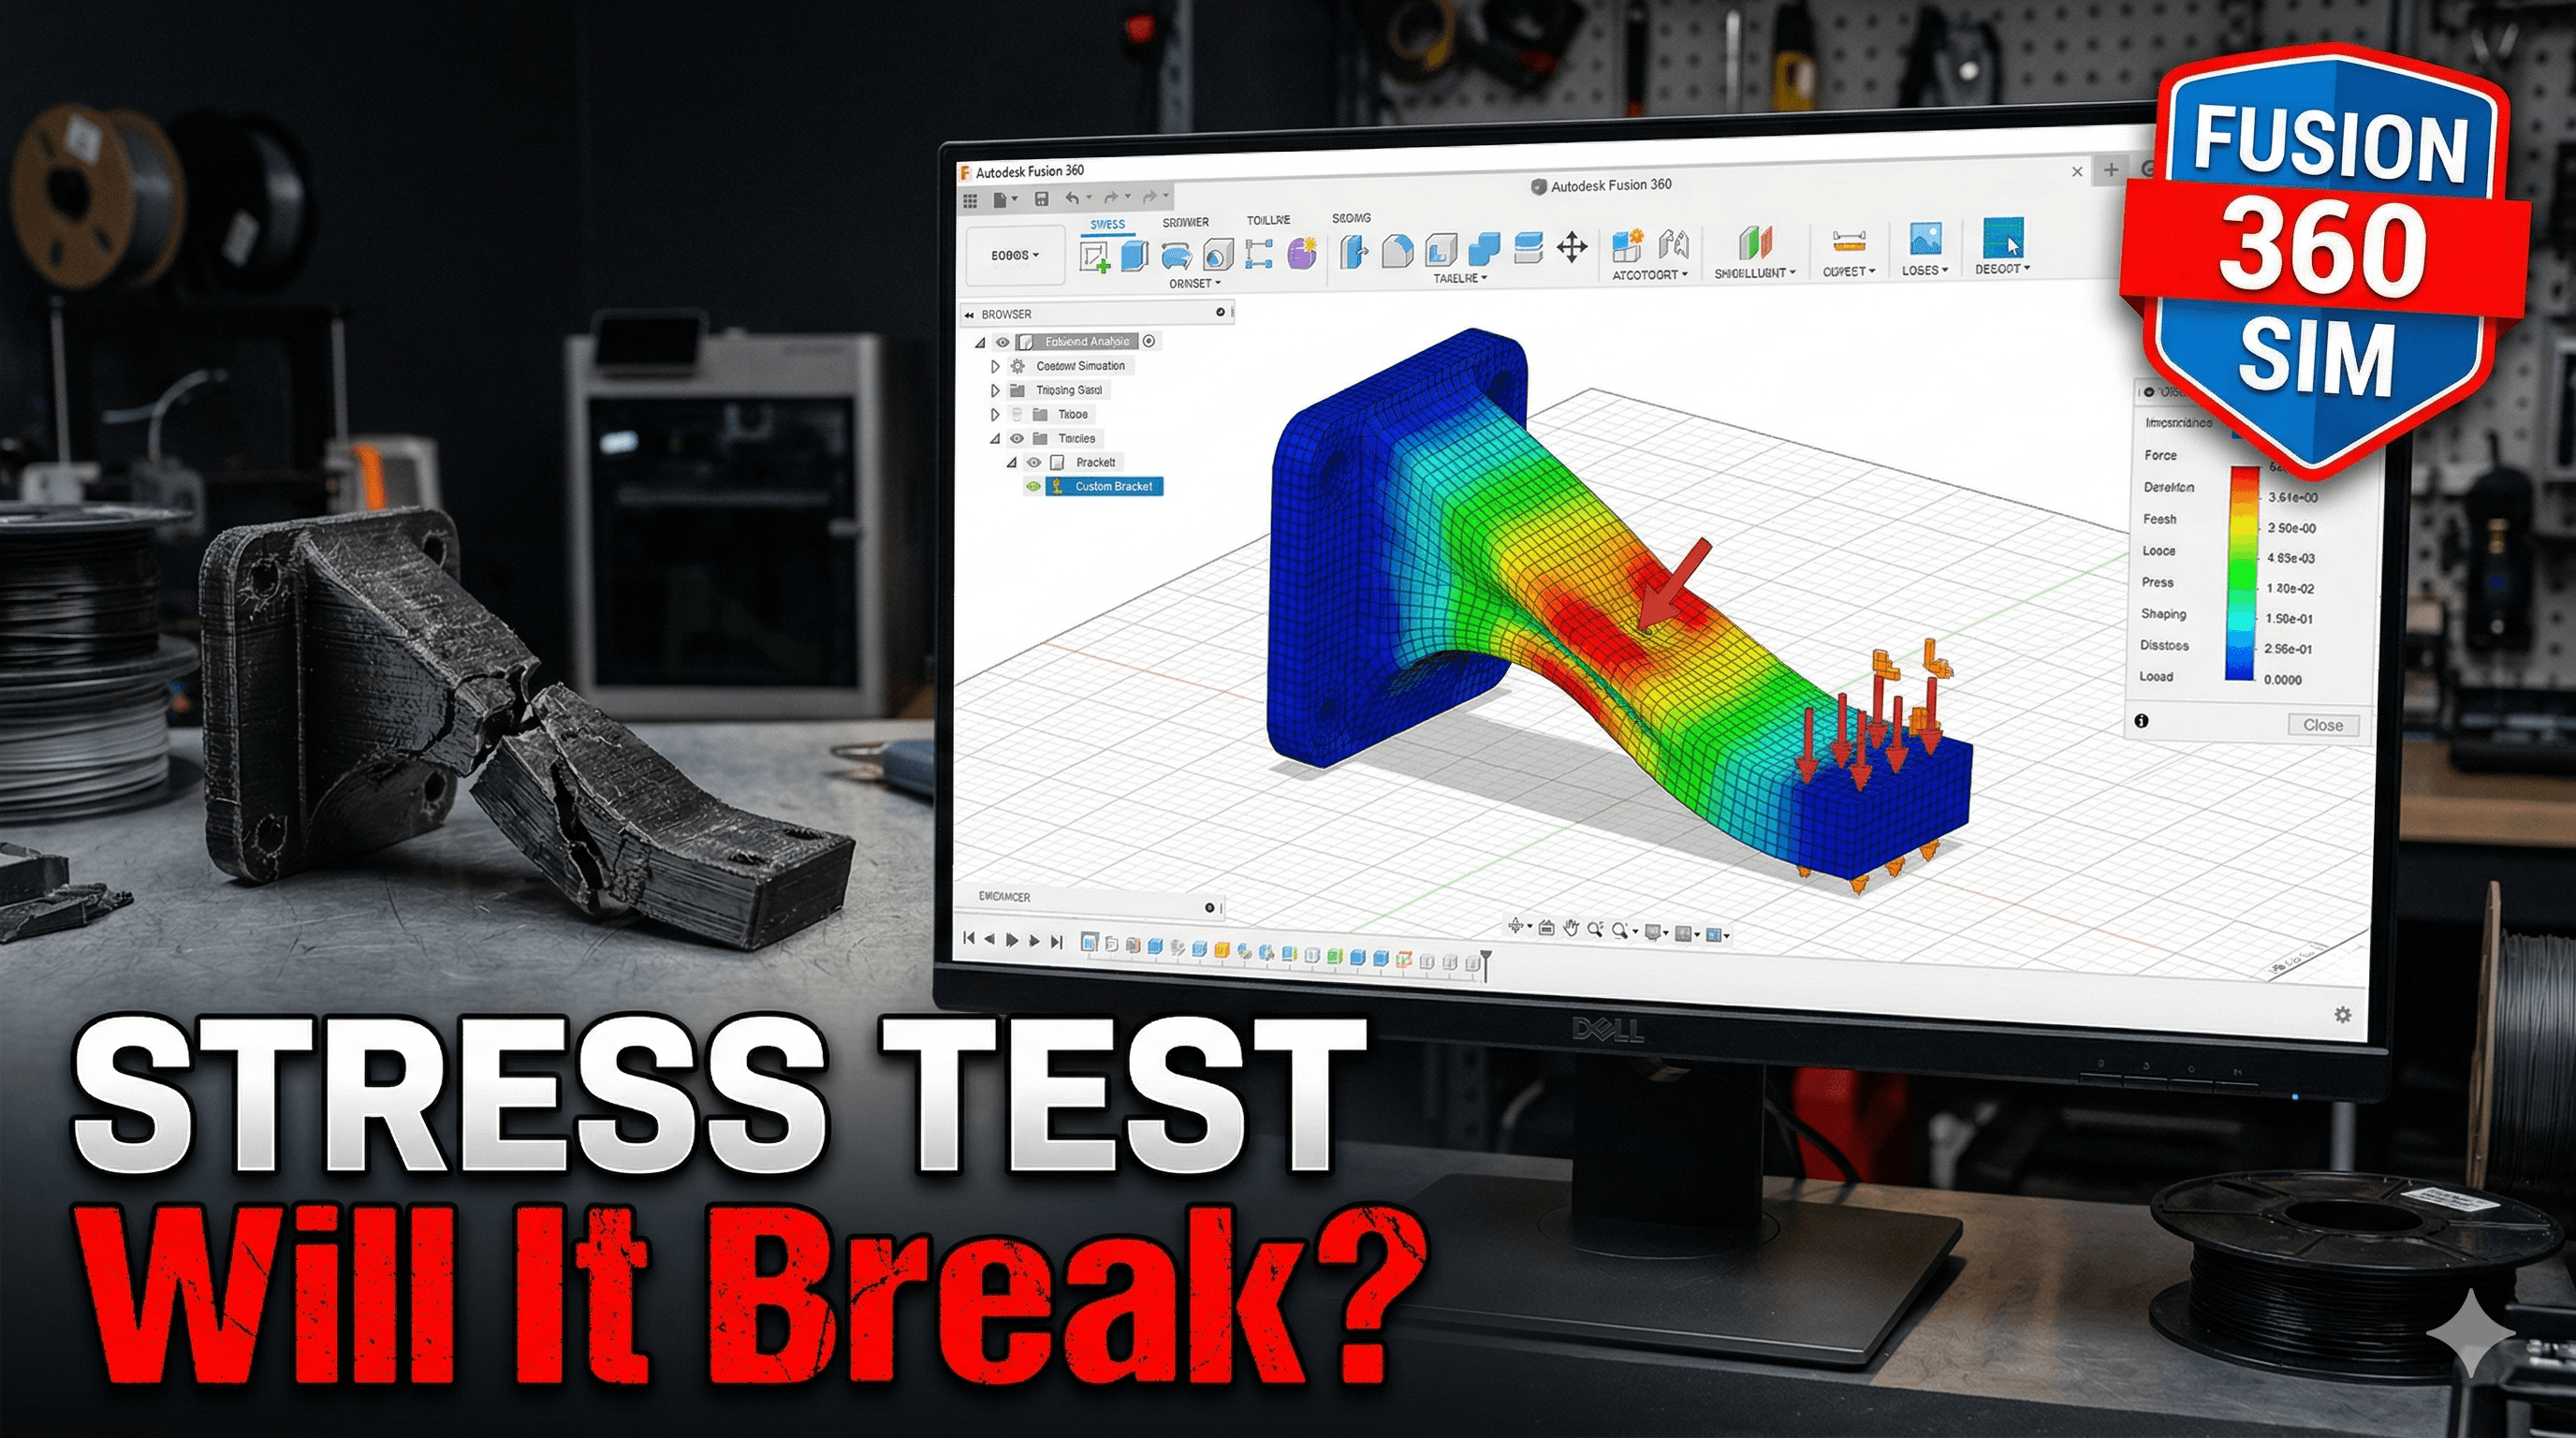
- Interpret Results: This is where the magic happens. You'll see beautiful (or terrifying) colour maps showing stress distribution (usually von Mises stress), displacement (how much the part deforms), and safety factor. High stress areas are usually red/orange, indicating potential failure points. High displacement shows where the part bends the most. The safety factor tells you how much stronger your part is than it needs to be for the applied load – a factor of 1 means it's just strong enough, anything less means it fails, and 2 or 3 is generally good practice for 3D printed parts due to inherent print variations.
Key Considerations for 3D Printed Parts and Simulation
Now, here's the thing: simulation isn't a magic bullet. It's a powerful tool, but you have to use it smartly, especially with 3D prints. Why? Because 3D prints behave a little differently than traditionally manufactured parts:
- Anisotropy is Real: As I mentioned, FDM 3D prints are inherently weaker in the Z-axis (layer adhesion) than in the X-Y plane. Simulation models often treat materials as isotropic (uniform in all directions) by default. To account for this, I often adjust the material properties (like Young's Modulus) to be more conservative, especially if the primary load is perpendicular to the layer lines. Or, if I'm feeling fancy, I might try to define a custom orthotropic material if the simulation software allows that level of detail, but that's advanced stuff.
- Infill and Walls: While you can't perfectly model the exact infill pattern (like gyroid or honeycomb) in a macro simulation, you can make approximations. Thicker walls and higher infill percentages generally mean a stronger part, and you can model this by considering the overall density and material properties of your 'effective' material. For me, it's often about figuring out if 2 walls are enough or if I need 4.
- Layer Adhesion is King: No matter how good your simulation, a poor print with bad layer adhesion will fail regardless of how strong the simulation says it should be. Printer calibration, temperature, speed, and filament quality all play a huge role. You can get quality filaments like eSUN PLA+ or PETG from Amazon.in, but make sure your printer settings are dialled in!
- Post-Processing: Annealing, vapour smoothing, or even applying epoxy coatings can significantly alter the strength of your print, something a basic static stress simulation won't account for.
So, the simulation gives you a *strong indication* and helps you iterate rapidly on your design, but it doesn't replace real-world validation, especially for critical parts. I always do a small physical stress test on a scaled-down or simplified version of the part to validate my simulation results. And having a good digital vernier caliper is essential for checking dimensions before and after applying load, helping you understand actual deformation.
Is Fusion 360 Simulation Worth It?
For me, absolutely. The personal license of Fusion 360 is free, which includes the basic Static Stress simulation. This is an incredible resource for hobbyists and small businesses just starting out. For more advanced simulations (like event simulation, shape optimization, or full cloud solve access), you'd need a commercial license, which is a significant investment (currently, an annual subscription is in the range of ₹20,000-₹30,000 in India, depending on offers and reseller). But here's the deal: if simulation saves you even a handful of failed prints and days of printer time each year, it can quickly pay for itself.
I personally think every serious 3D printing enthusiast, and especially anyone running a business, should at least dabble in Fusion 360's simulation tools. It elevates your design game, reduces waste, and helps you deliver more reliable products.
My Business & Simulation
At ArtOpia Collections, using Fusion 360 simulation isn't just a nicety; it's a fundamental part of our design process for functional parts. It means when a client comes to me with a challenge – whether it's a custom industrial tool, a robust drone component, or an intricate prototype for a startup – I can confidently say we'll deliver a part that not only looks great but also performs exactly as needed under load. It streamlines our workflow, allowing us to offer quicker turnaround times and more accurate solutions, saving both us and our clients time and money.
If you're looking for custom 3D printed parts that are designed with durability and functionality in mind, check out our product and service offerings at ArtOpia Collections. We're passionate about bringing your ideas to life, reliably and efficiently.
Final Thoughts for Fellow Makers
Don't be intimidated by simulation. Start simple. Learn the basics of Static Stress. Experiment with your own designs. You'll quickly see the power it brings. It's not about making perfect parts on the first try, but about making *better* parts, faster, and with less waste.
So, next time you're designing something critical, ask yourself: "Will my 3D printed part break under load?" And then, instead of just hoping for the best, fire up Fusion 360 and let the digital magic show you the way. Your wallet (and your sanity) will thank you!