Custom 3D Printed Nameplates for Indian Homes: Design, Print, and Sell
Transform your home with unique, personalized decor! Discover how easy it is to design and 3D print custom nameplates and signs that perfectly match your style and needs.
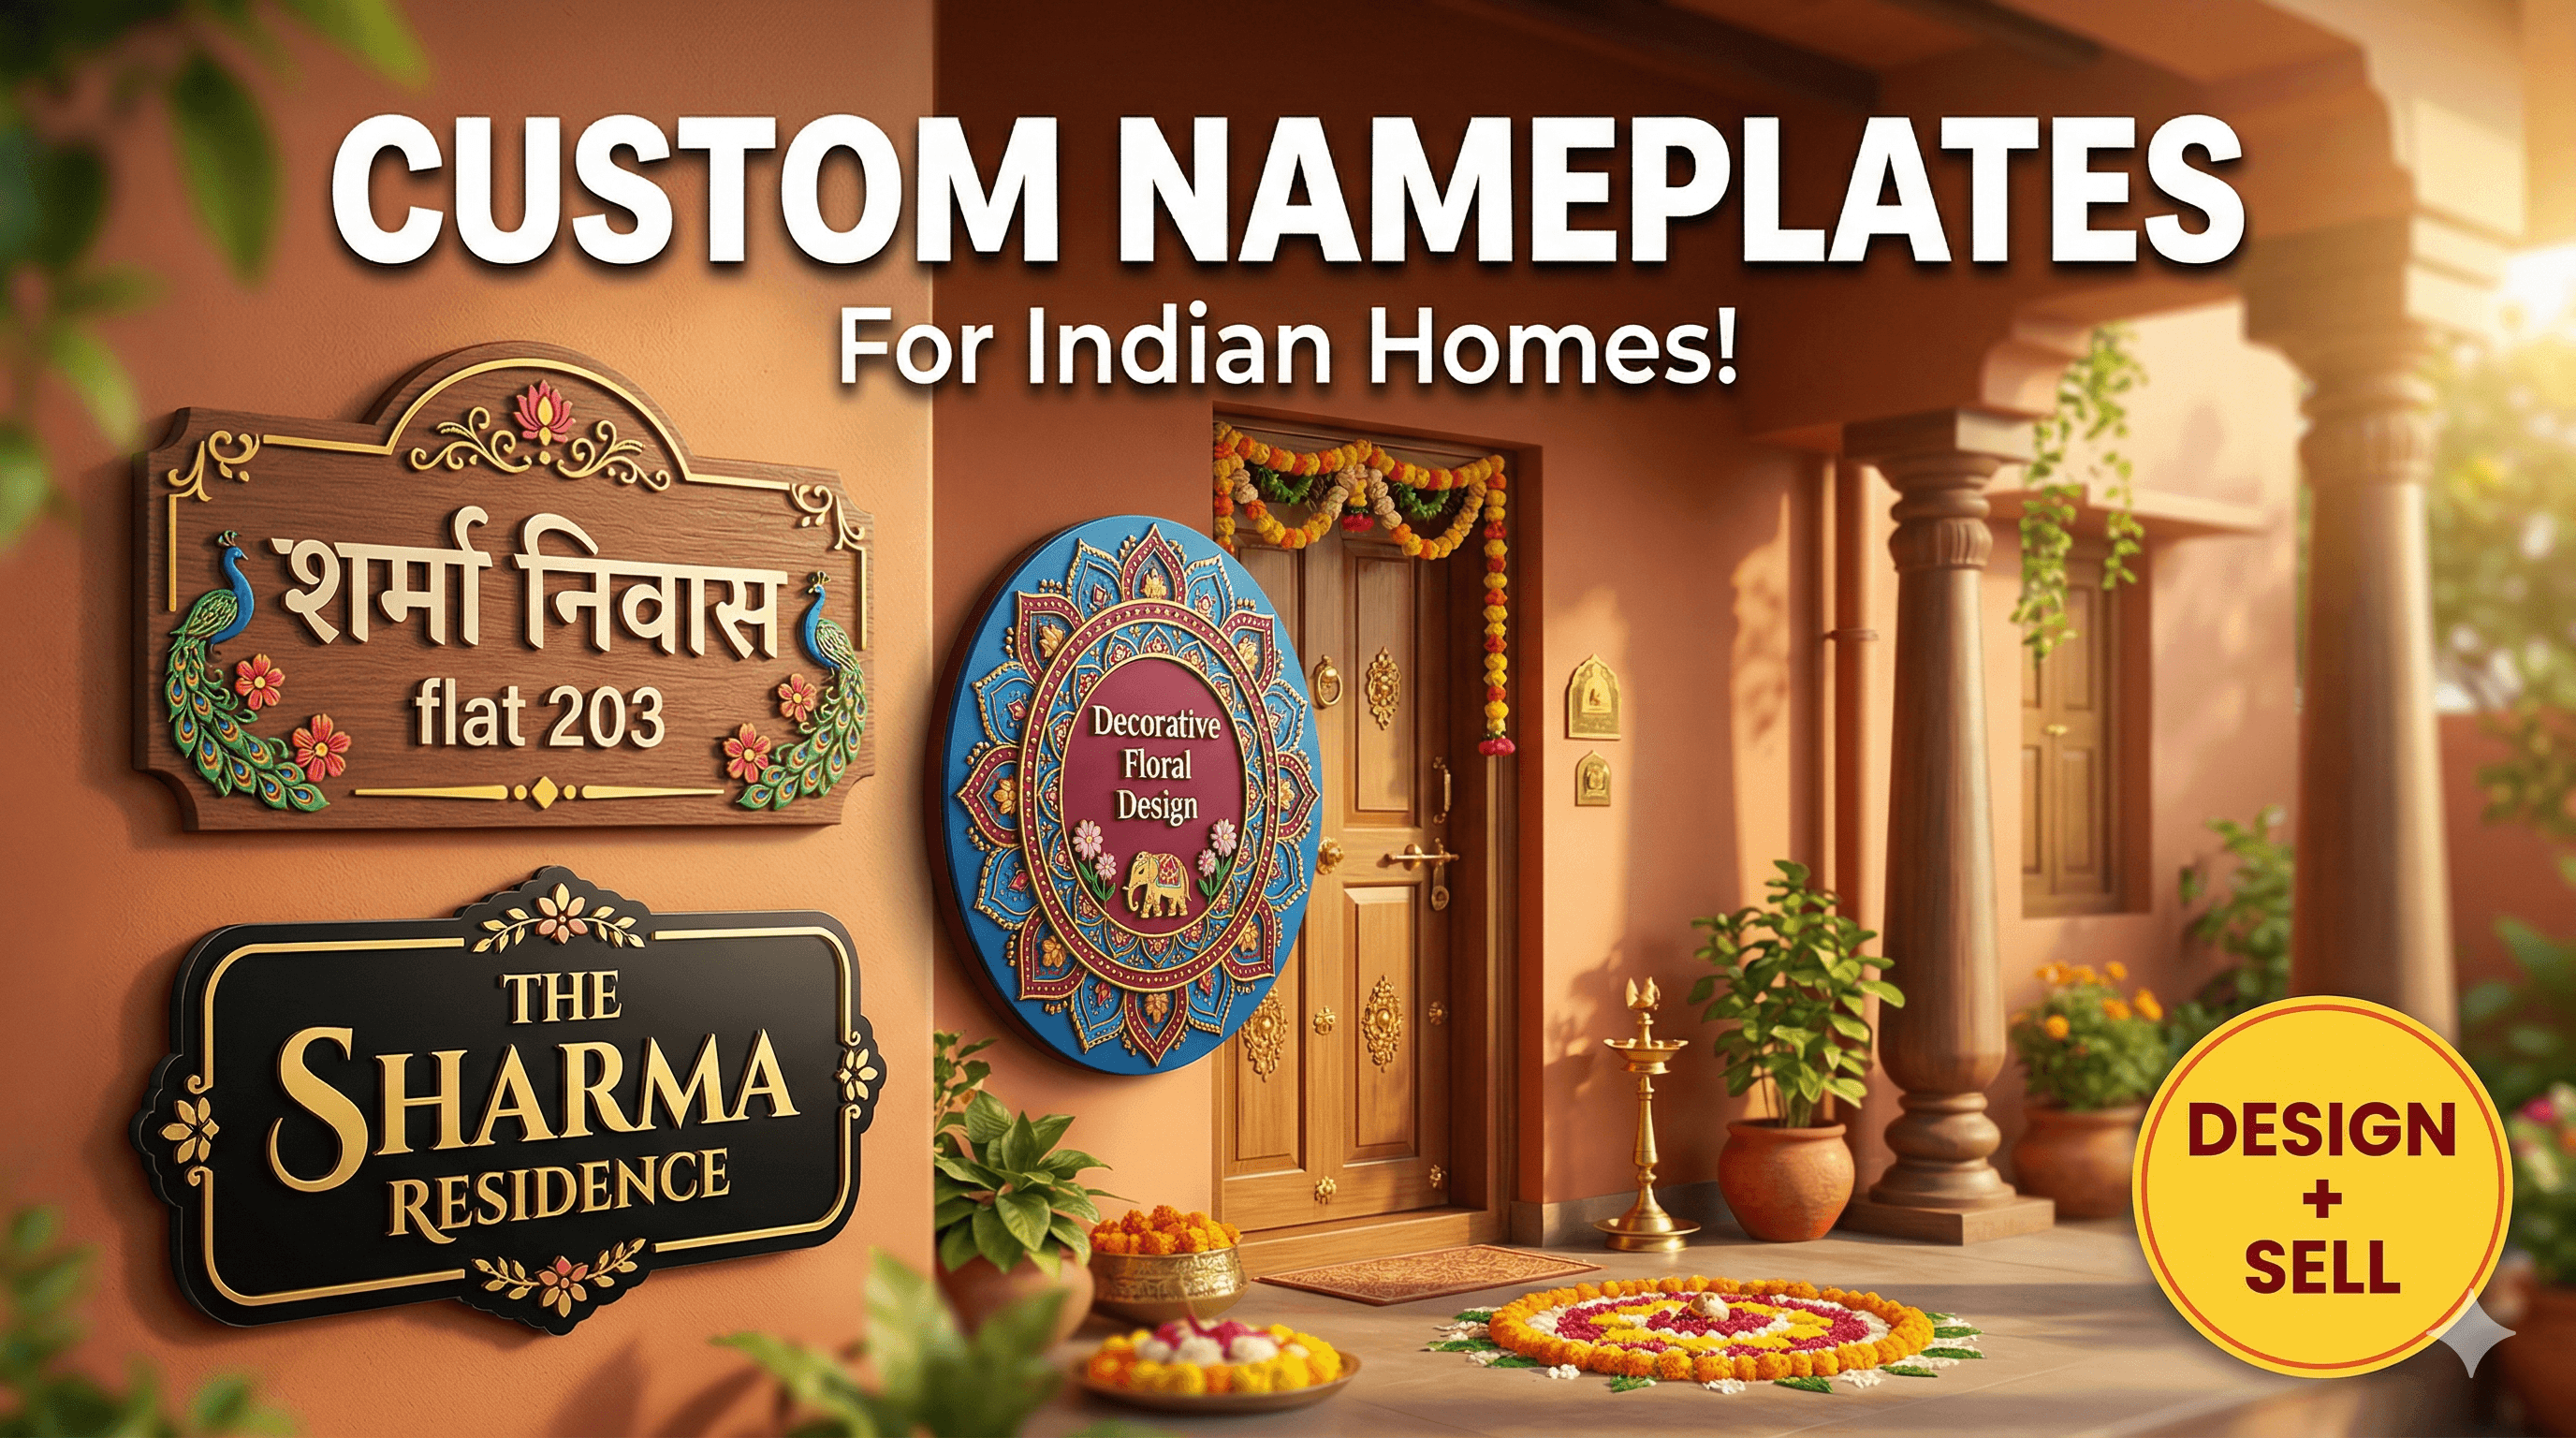
Ever walked into a home and seen a nameplate that just screams "personality"? You know, the kind that isn't just a boring rectangular piece of metal or plastic, but something truly unique, something that tells a story even before you ring the doorbell? Man, I absolutely love those! For years, I've been fascinated by how a simple sign can transform the vibe of a place, and honestly, that's what got me into 3D printing in the first place. This isn't just about printing some generic thing; it's about making a statement, about adding a little piece of your heart to your home. And guess what? You can totally do it yourself, or at least understand the magic behind it. Today, I'm going to pull back the curtain and show you how to 3D print custom nameplates and signs that will make your neighbours (and guests!) go, "Wow, where did you get that?"
Why 3D Print Your Own Signs?
So, you might be thinking, "Vidyut, why go through all this trouble when I can just buy one?" And that's a fair question, my friend. But here's the deal: with 3D printing, the possibilities are literally endless. You're not limited to a few fonts or pre-designed templates. Want a sign that looks like a miniature cityscape? Go for it! Fancy one with your family's beloved pet sculpted onto it? Absolutely doable! The creative freedom is exhilarating. Plus, it's often more cost-effective than getting something custom made from scratch, especially if you have a printer already. In my experience, seeing a design come to life, piece by painstaking piece, is incredibly rewarding. It's not just a sign; it's a creation, a little bit of your soul made tangible. And honestly, it makes for a fantastic conversation starter. People are always amazed when they find out it's 3D printed!
Getting Started: The Design Phase â Where Ideas Take Shape!
Alright, let's dive into the nitty-gritty. The very first step, arguably the most crucial one, is the design. This is where your imagination gets to run wild. Don't worry if you're not a seasoned CAD engineer; there are some fantastic, user-friendly tools out there.
Choosing Your Design Software
- Tinkercad: If you're an absolute beginner, Tinkercad is your best friend. It's free, web-based, and incredibly intuitive. You basically drag and drop shapes, combine them, subtract them â it's like digital LEGOs! You can create surprisingly complex designs with it, perfect for basic nameplates or simple logos.
- Fusion 360: For those who want a bit more power and precision, Fusion 360 by Autodesk is phenomenal. It has a steeper learning curve, I won't lie, but once you get the hang of it, you can design almost anything. Itâs free for hobbyists and startups, which is brilliant. I personally use Fusion 360 for most of my intricate designs, especially if I need specific dimensions or complex curves.
- Blender: Now, Blender is mainly for 3D modelling and animation, but it can also be used for creating printable models. It's incredibly powerful but definitely for the more advanced user. If you're thinking of sculpted elements or highly artistic designs, Blender might be your jam.
Tips for a Great Sign Design
When you're designing, keep these things in mind:
- Readability is Key: Make sure your font is clear and large enough to be seen from a distance. Fancy cursive looks great on screen, but it can be a nightmare to print and read.
- Thickness Matters: Don't make your sign too thin. I recommend a minimum thickness of 3-4mm for the base, and letters at least 2mm thick. This ensures durability and prevents breakage during printing or handling.
- Multi-Colour Magic: Think about how you'll achieve different colours. Will you print different parts separately and glue them? Or will you do a filament change mid-print? For nameplates, a common technique is to print the base in one colour and then switch filament for the letters, which gives a beautiful embossed look.
- Mounting: Design with mounting in mind. Do you want holes for screws? A flat back for double-sided tape? Or maybe a stand?
Once your masterpiece is designed, you'll export it as an STL file â that's the standard file format for 3D printing, basically a blueprint for your printer.
Slicing It Up: Preparing Your Model for Print
Okay, you've got your beautiful STL file. Now, how do you turn that digital vision into a physical object? Enter the slicer software. This program takes your 3D model and "slices" it into hundreds or thousands of thin layers, generating instructions (G-code) that your 3D printer understands.
Popular Slicer Software
- Cura: This is probably the most widely used slicer, especially for FDM (Fused Deposition Modeling) printers. It's free, open-source, and has tons of features. Most entry-level printers have profiles built into Cura, making it super easy to get started.
- PrusaSlicer: Another fantastic free option, developed by Prusa Research. It's known for its advanced features and excellent print quality, often preferred by more experienced users.
Crucial Slicer Settings for Nameplates
Hereâs where you fine-tune everything. These settings will directly impact your print quality, strength, and print time:
- Layer Height: This determines the resolution of your print. For nameplates, I usually go with 0.2mm for a good balance of speed and detail. If you want super smooth results (but a longer print time), you could go down to 0.12mm.
- Infill: This is the internal structure of your print. For something like a nameplate, you don't need it to be super strong. 15-20% infill (I usually use a 'grid' or 'gyroid' pattern) is typically more than enough. Higher infill means more filament and longer print times.
- Supports: If your design has overhangs (parts floating in mid-air that aren't supported by anything below), you'll need supports. For most nameplates, especially if they are flat with embossed letters, you might not need any. But if you have intricate curves or protruding elements, enable them. Just remember, they can be a pain to remove later.
- Brim or Raft: These are extra layers printed on the build plate to help with adhesion. For nameplates with a large flat base, a "brim" (a single layer of plastic around the base) can prevent warping, especially if your printer bed isn't perfectly calibrated.
- Multi-Color Techniques (Filament Change): This is the cool part! If you want your letters to be a different colour from the base, you can tell your slicer to pause the print at a specific layer height. For instance, you print the base (say, 2mm high) in black, then the slicer pauses, you swap to white filament, and it continues printing the letters on top. Most slicers have a "pause at height" or "filament change" script you can insert. It's a game-changer for custom signs!
Once you've tweaked your settings, you'll save the G-code file to an SD card or transfer it directly to your printer (if it has Wi-Fi or USB connectivity). I'm still old-school with my SD card sometimes, honestly!
The Moment of Truth: Printing Your Sign
Alright, the G-code is ready. Time to fire up the printer! This is where the magic really happens, but also where tiny frustrations (and triumphs!) often occur. Don't worry, every 3D printer enthusiast has battled with bed adhesion or stringing.
Printer Setup and Calibration
Before you hit print, make sure your printer is ready:
- Bed Leveling: This is critical, yaar. A perfectly level bed ensures your first layer sticks properly. Many modern printers like the Creality Ender 3 V3 SE come with auto-bed leveling, which makes life so much easier. But even with auto-leveling, a manual check never hurts.
- Bed Adhesion: Clean your build plate! Residue from previous prints or just fingerprints can ruin your first layer. Isopropyl alcohol works wonders. For extra adhesion, I sometimes use a glue stick or hairspray on my glass bed â it's an old trick, but it works like a charm.
- Load Filament: Make sure your chosen filament is loaded correctly and extruding smoothly.
Choosing Your Filament
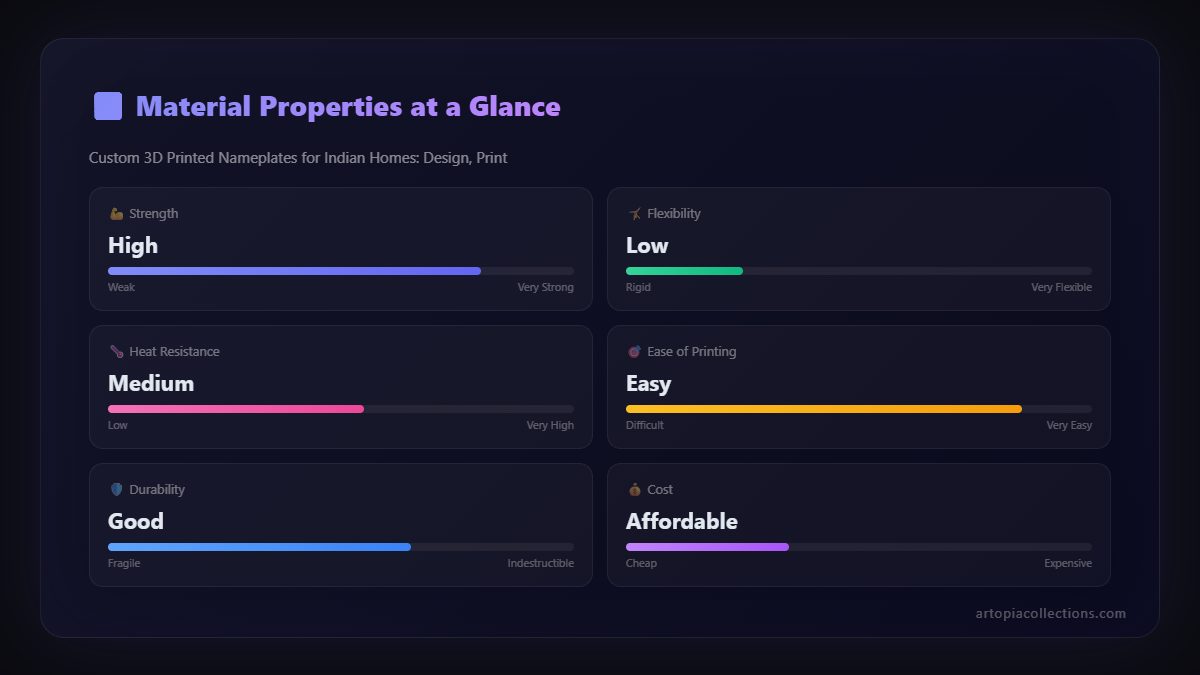
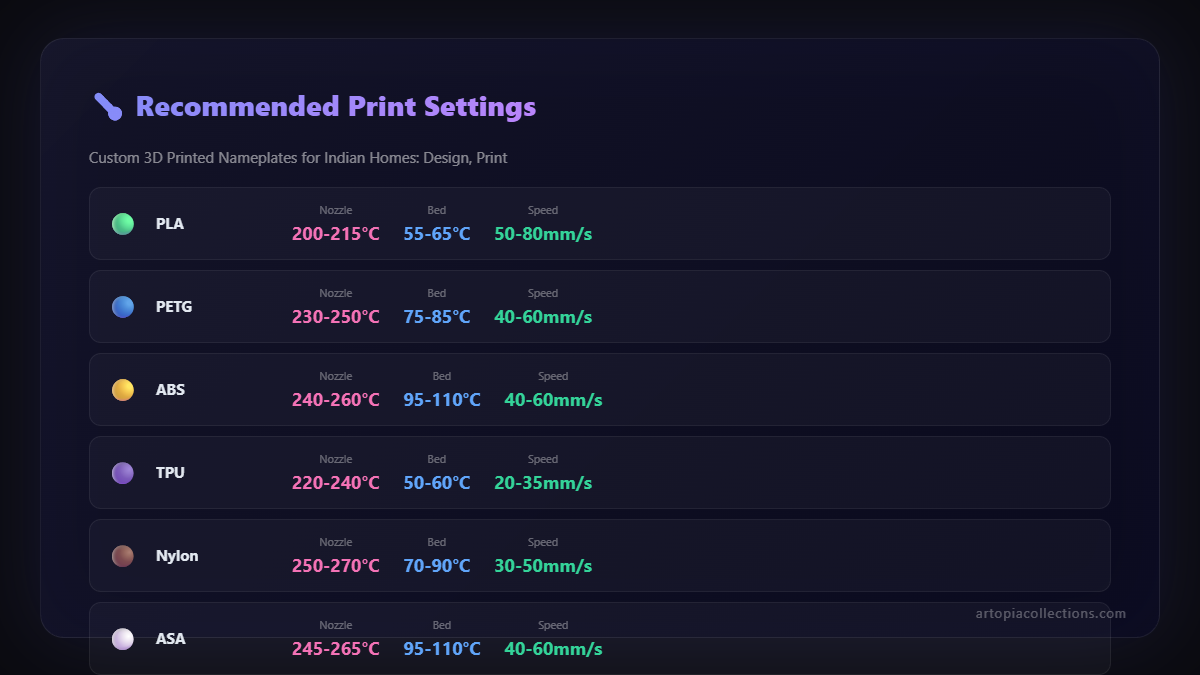
The type of plastic you use matters a lot for nameplates:
- PLA (Polylactic Acid): This is your go-to filament for most nameplates. It's easy to print with, comes in a dazzling array of colours (including shiny metallics, silkmattes, and even wood-filled versions), and is biodegradable. It's strong enough for indoor use but can deform in direct sunlight or extreme heat (like in a car dashboard). For a good variety of colours, check out PLA filament on Amazon.in.
- PETG (Polyethylene Terephthalate Glycol): If your sign will be outdoors and exposed to the elements, PETG is a better choice. It's more durable, UV-resistant, and handles higher temperatures than PLA. It can be a bit trickier to print with, often requiring higher temperatures and sometimes leading to more stringing, but the results are worth it for outdoor applications.
I usually stick to good quality PLA+ from brands like eSun or Overture. They offer consistent quality and a fantastic colour palette.
Troubleshooting Common Print Issues
Even after years of printing, issues pop up. Itâs part of the fun, right? (Or maybe that's just me being an optimist!)
- First Layer Not Sticking: Re-level your bed. Clean your bed. Try a brim. Adjust Z-offset (distance between nozzle and bed).
- Stringing: This looks like fine cobwebs on your print. Increase retraction settings (how much the filament pulls back when the nozzle moves without extruding) in your slicer. Reduce print temperature slightly.
- Warping: Edges of your print lifting off the bed. Usually a bed adhesion issue or cooling too fast. Use a brim, enclosure, or adjust bed temperature.
Patience, my friend, is your best tool here. Sometimes, you just need to try a setting again, or watch a YouTube tutorial. There are tons of resources out there!
Post-Processing: Adding That Finishing Touch
Your sign just popped off the print bed! Itâs still a raw print, but don's worry, a little post-processing can take it from "homemade" to "handmade artisan."
Cleaning Up
- Removing Supports: If you used supports, carefully snip them away with flush cutters. For delicate areas, sometimes pliers or a small hobby knife can help. Take your time, you don't want to break your print now!
- Sanding: For a super smooth finish, especially on the top surfaces, light sanding can make a huge difference. Start with a coarse grit (around 200-400) and move up to finer grits (600-1000).
Painting and Coating (Optional but Recommended!)
Even if you've done a multi-colour print, a little paint can elevate your sign.
- Primer: If you're planning to paint, a coat of spray primer (like a good quality acrylic primer, available for around â¹200-â¹300) will give your paint something to stick to and help it look even.
- Paint: Acrylic paints work great on PLA. You can hand-paint details or use spray paint for a uniform base colour. I love playing with metallic spray paints for a really premium look.
- Clear Coat: To protect your paint job and give it a nice finish (matte, satin, or glossy), a clear spray coat is a must, especially if it's going outdoors. It adds an extra layer of durability.
Mounting Your Masterpiece
How will you display your sign?
- Double-Sided Tape: For lightweight signs on smooth surfaces, a strong heavy-duty double-sided tape (around â¹150-â¹300 for a good roll) is perfect. I use it all the time.
- Screws: If you designed holes into your sign, use appropriate screws and anchors for a secure mount.
- Stands: For desk signs or shelves, you can even 3D print a stand or use off-the-shelf display easels.
Cost-Benefit Analysis: Is It Worth It?
Let's talk money, because that's always a factor, right?
Filament Cost: A typical nameplate probably uses about 50-100 grams of filament. If a 1kg spool of PLA costs you roughly â¹1500 (good quality stuff, mind you), that's â¹1.5 per gram. So, your nameplate could cost anywhere from â¹75 to â¹150 in raw material. Compare that to a custom-made sign from a shop, which could easily run you â¹500-â¹2000, and you're already saving big!
Printer Investment: If you don't own a printer yet, that's the big upfront cost. An entry-level but very capable printer like a Creality Ender 3 V3 SE will set you back around â¹20,000 - â¹28,000. It's an investment, yes, but think of all the amazing things you can print besides just nameplates!
Time Investment: This is where the real value lies. Designing a simple nameplate might take 30 minutes to an hour. Slicing another 10-15 minutes. Printing could take anywhere from 2 to 8 hours depending on size and complexity. Post-processing might add another hour. So, you're looking at a few hours of your time. But for me, that's time well spent creating something unique and personal.
Share Your Creations!
Seriously, there's nothing quite like seeing your own design come to life. The first time I printed a custom sign for my own home, seeing my name perfectly embossed in contrasting colours, I felt a huge sense of accomplishment. It's a fantastic way to personalize your space, to express who you are, or to create a truly thoughtful gift for someone.
If you're feeling inspired but maybe don't have a printer yet, or just want to explore some professional options, remember that businesses like mine exist precisely for this! We take your ideas and turn them into reality. You can check out some of the custom pieces we've done over at Artopia Collections if you're curious.
So, what are you waiting for? Grab an idea, fire up that software, and start making your home truly yours. Happy printing, my friends! And don't forget to show off your creations in the comments below â I'd love to see what you come up with!
India Context: Custom nameplates are hugely popular in India, especially for Diwali gifting and housewarming ceremonies. You can sell personalized 3D printed nameplates on Meesho and Flipkart for INR 299-799. Material cost is just INR 30-80 per piece.