How to Fix Gaps in Top Layers of Your 3D Prints
Are you tired of unsightly gaps appearing on the top layers of your 3D prints? This guide dives deep into common causes and provides actionable solutions to help you achieve perfectly solid and smooth top surfaces every time.
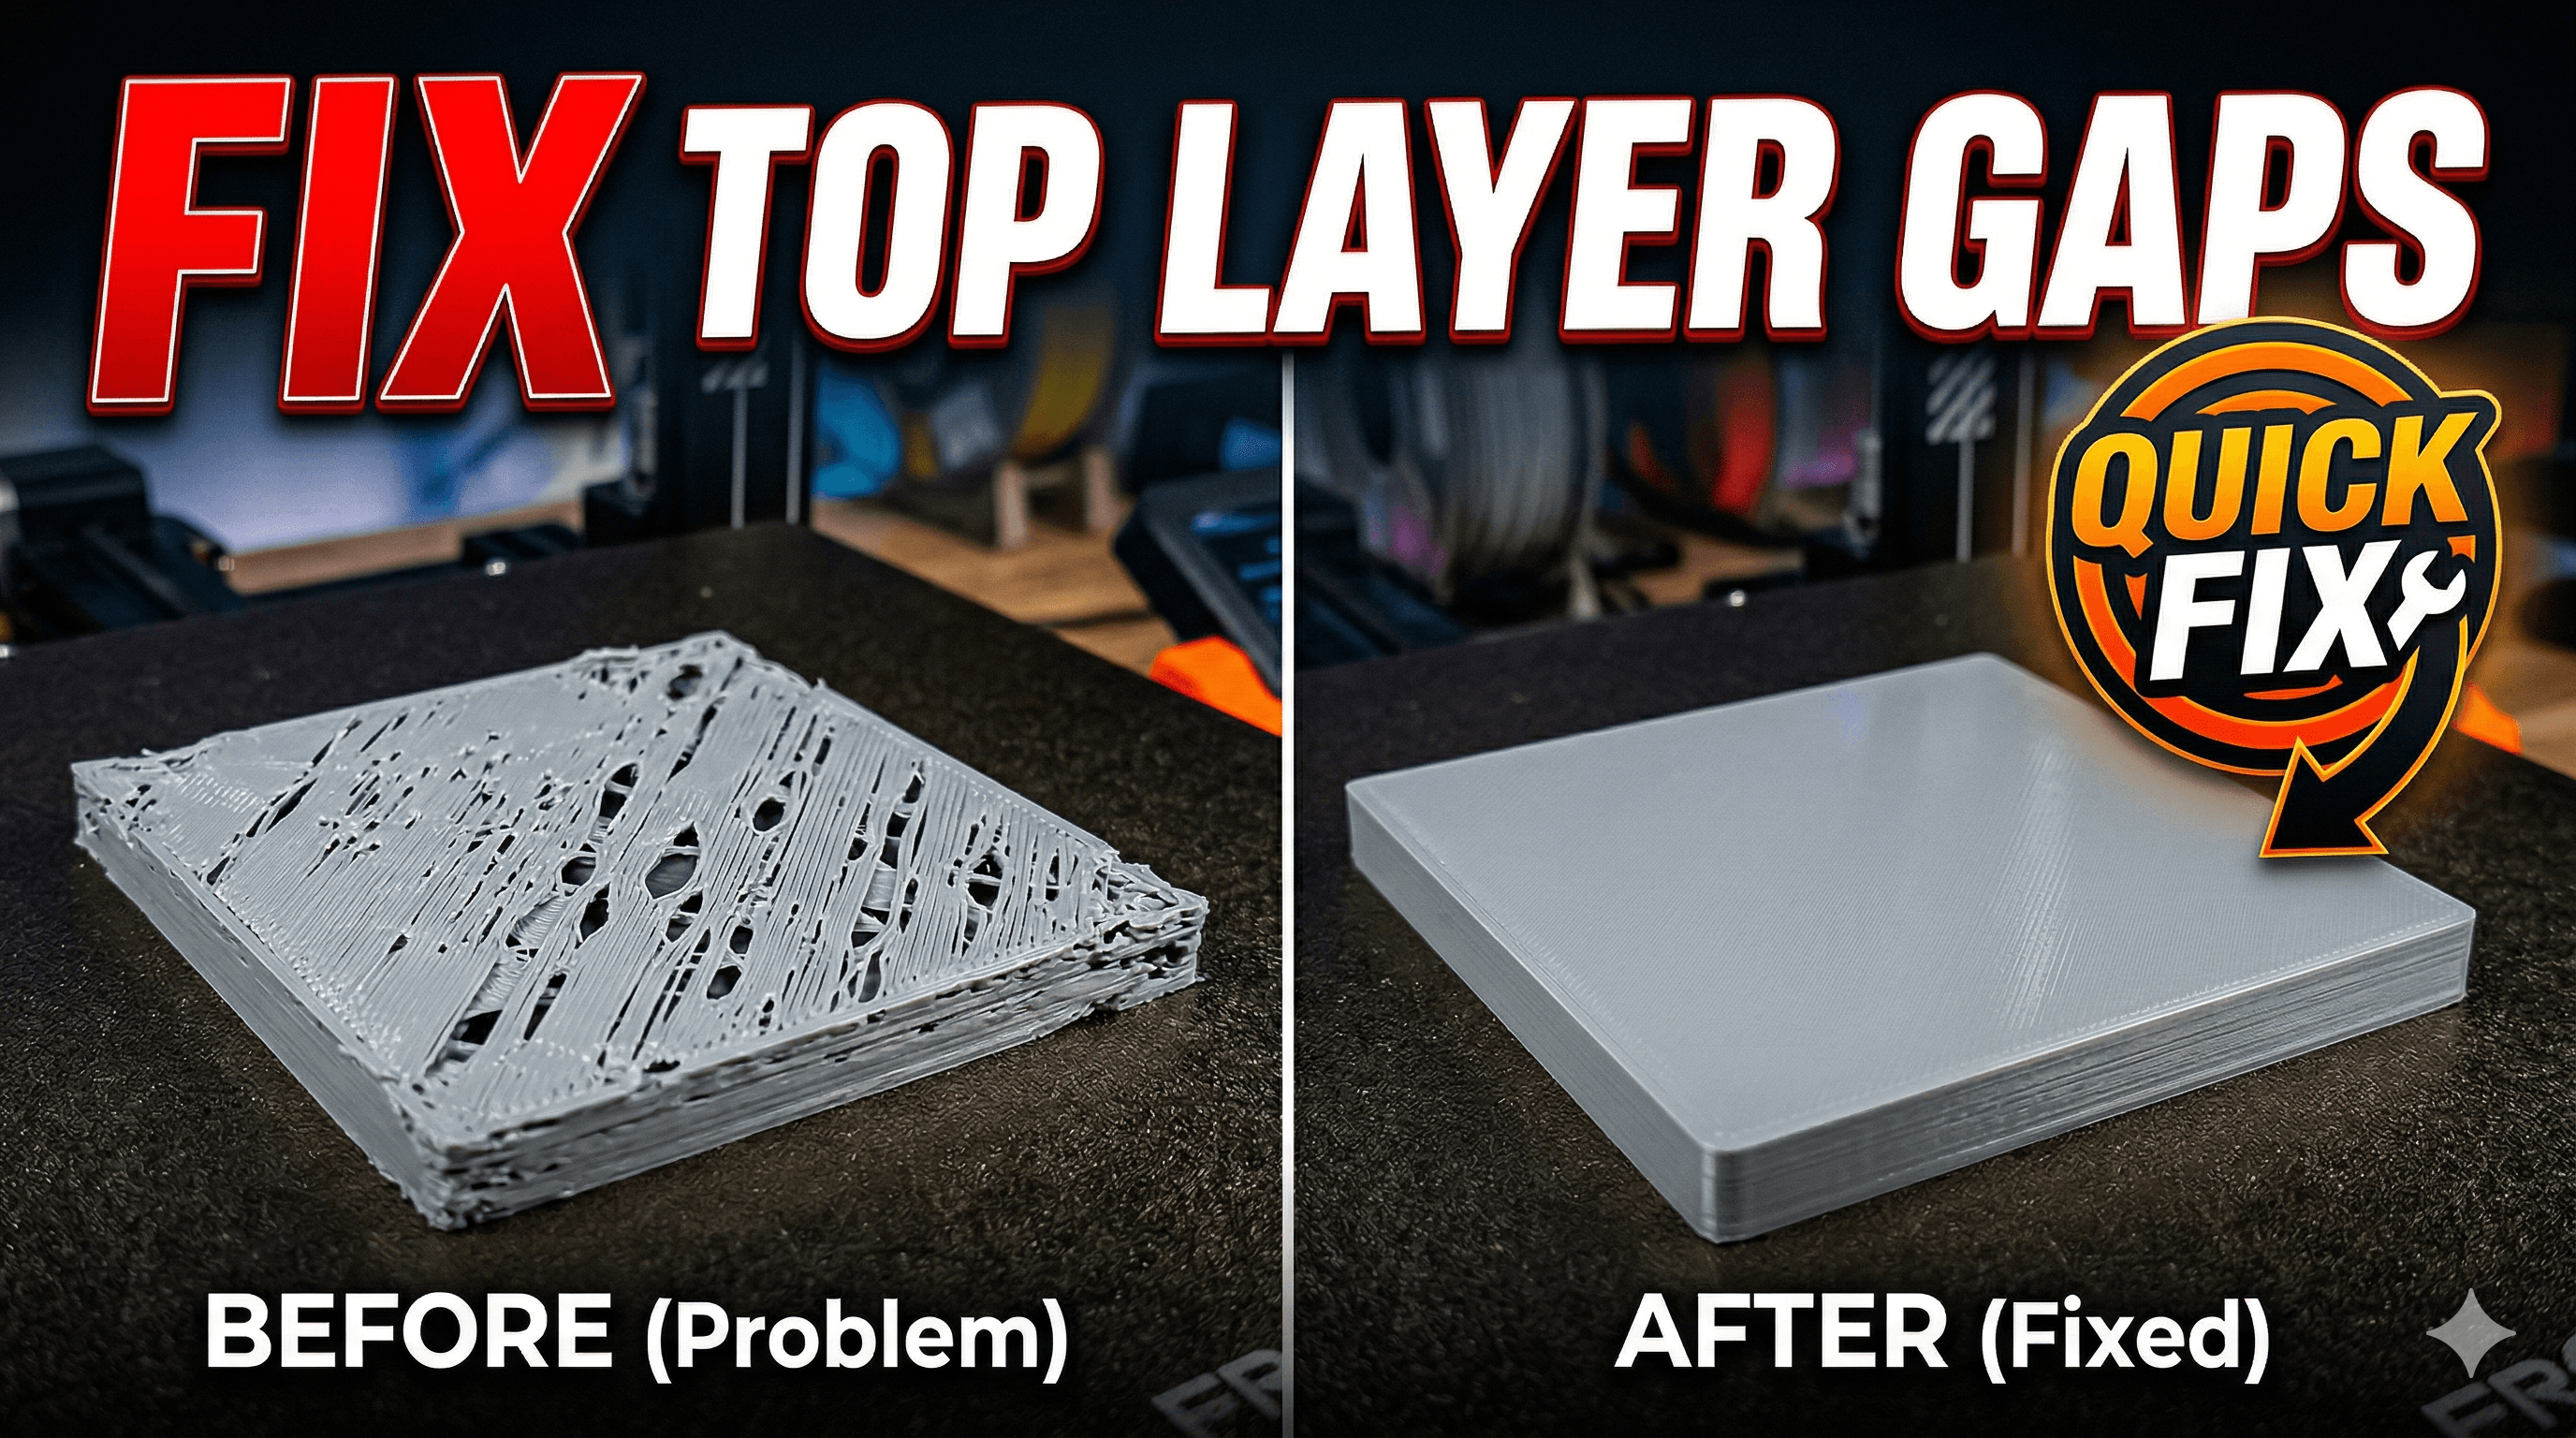
Chalo, hands up if you've ever watched your 3D printer painstakingly lay down layer after layer for hours, maybe even an entire night, dreaming of that perfect final product, only to wake up and see⦠gaps. Yep, those infuriating little lines, sometimes big ugly holes, right there on your print's top surface. Ugh! It's like your printer just decided, "Nah, I'm good, not going to fill that bit in." Honestly, it makes you want to throw the whole thing out the window, especially when itâs a big print that used up half a spool of that fancy eSun PLA you just bought for â¹1,800. Been there, my friend. More times than I care to admit. But don't you worry, because today we're going to dive deep into fixing those pesky gaps in your top layers. It's a super common issue, trust me, and usually, it's not as scary to fix as it looks.
Here at ArtOptia Collections, we print A LOT. From custom prototypes to unique decor pieces (hey, go check out some of our cool stuff here after you've read this, yeah?), we've seen pretty much every print imperfection under the sun. And top layer gaps? Oh, they're practically a rite of passage for every 3D printing enthusiast, whether you're rocking a budget-friendly Creality Ender 3 or a beast like a Prusa MK4. The thing is, this issue boils down to one primary culprit, even if it manifests in various ways: your printer isn't putting down enough material to completely cover the infill underneath. Simple as that. But figuring out why it's not putting down enough material? That's where the detective work begins!
The Usual Suspects: Why You're Seeing Those Gaps
So, where do we start looking? I've found it's best to categorize the problems. Basically, it's either your slicer settings not being quite right, or there's some kind of mechanical issue with your printer. Sometimes, and this is a sneaky one, it could even be your filament itself. Let's break it down, shall we?
1. Slicer Settings â Your Digital Blueprint
This is usually the first place I check, and honestly, it fixes about 70% of the top layer gap issues I encounter. Your slicer (Cura, PrusaSlicer, Simplify3D, etc.) is telling your printer exactly what to do, so if it's giving bad instructions, you're going to get bad results.

Insufficient Top Layers
This is probably the most common mistake, especially for beginners. We're all trying to save filament, right? So we reduce the top layers. But if you have, say, 10% infill and only 2 top layers, the printer just doesn't have enough solid surface to bridge properly. It's like trying to build a roof directly on flimsy scaffolding. In my experience, for most prints, you'll want at least 4-6 top layers. For a really smooth, solid top, especially on larger prints or those with complex top surfaces, I sometimes even go up to 8. It uses a little more filament, yes, but it saves you from reprinting later. And that's priceless, believe me.
Low Infill Density
While low infill (like 5-10%) is great for saving material and print time, it can make it harder for the top layers to bridge across those larger gaps in the infill. If your top layers are struggling even with enough top layers, try bumping up your infill density a bit. Sometimes even jumping from 10% to 15% or 20% can make a huge difference, giving those top layers a more solid foundation to rest on. It's a small change, but boy, can it impact the final look!
Incorrect Extrusion Multiplier / Flow Rate
This is a big one, guys. If your printer isn't extruding enough plastic overall, you'll see gaps everywhere, including your top layers. The extrusion multiplier (or flow rate in some slicers) basically tells your printer to push out more or less plastic for a given volume. I always recommend calibrating your e-steps first (which sets how much filament is pushed per command), and then fine-tuning your flow rate. A good starting point is usually 100%, but depending on your filament and printer, you might need to increase it slightly, say to 102% or 105%. Just be careful not to overdo it, or you'll get blobs and over-extrusion! You can find tons of calibration cube prints on Thingiverse to help with this. Print one, measure the wall thickness, adjust flow. Rinse and repeat. Itâs tedious, but oh so worth it.
Top/Bottom Line Width (or Extrusion Width)
Most slicers automatically set this to your nozzle diameter (e.g., 0.4mm for a 0.4mm nozzle). But did you know you can often get better top layers by slightly increasing this value for your top/bottom layers? If you set the top/bottom line width to, say, 0.44mm or 0.45mm on a 0.4mm nozzle, the printer will lay down slightly thicker lines, ensuring more overlap and better adhesion. It fills those tiny gaps much more effectively. I personally find this a super effective trick when everything else seems fine.
Top/Bottom Infill Pattern
While less critical than the other settings, the infill pattern for your top layers can sometimes play a role. "Lines" or "Concentric" are common default patterns. "Monotonic" (in PrusaSlicer) or "ZigZag" can sometimes give a slightly more even finish, especially on larger, flat top surfaces. Experiment a bit if you're still seeing issues after tweaking the other settings.
2. Mechanical Issues â When Your Hardware Isn't Playing Nice
Alright, so you've tweaked your slicer settings to no end, but those gaps are still mocking you. Now it's time to get a bit hands-on. Mechanical problems are often the silent killers of good prints.
Partial Nozzle Clog
This is a super common and incredibly frustrating issue because it's so sneaky. A full clog means no filament comes out, simple enough. But a partial clog? It means filament is coming out, just not consistently, or not enough. This often leads to under-extrusion and, yep, those annoying top layer gaps. How to spot it? If you hear clicking from your extruder, or if your filament path seems restricted, or if your extruded lines look thin and stringy. To fix it, you can try a "cold pull" (also known as an atomic pull) or simply replace your nozzle. A pack of 10 brass 0.4mm nozzles usually costs around â¹400-â¹600 on Amazon.in, so it's a cheap fix. Always have spares! You can grab a good set here.
Under-Extrusion (General)
Beyond partial clogs, general under-extrusion can be caused by a few things:
- Extruder Gear Slipping: Is your extruder motor skipping steps, or is the filament slipping against the drive gear? Check if the tension arm spring is too loose or too tight. Sometimes the gear itself gets worn out and needs replacing.
- Heat Creep: If your hotend fan isn't doing its job properly, heat can creep up into your cold end, causing the filament to soften prematurely and jam. This is more common in hotter climates like ours here in India, especially during summer!
- Bowden Tube Issues: For Bowden setups (like on an Ender 3), check if your Bowden tube is fully seated in the hotend and extruder. Gaps here can cause retraction issues and inconsistent extrusion.
Print Speed Too High
Look, we all want faster prints, right? Time is money, especially for a small business like mine. But pushing your print speed too high, especially for the top layers, can prevent the hotend from melting the filament sufficiently, leading to under-extrusion and gaps. If you're printing at 80mm/s or more and seeing gaps, try reducing your top layer speed to 40-50mm/s. It's a small sacrifice in time for a much cleaner finish.
Printing Temperature Too Low
Each filament has an optimal printing temperature range. If your temperature is too low, the plastic won't melt consistently, leading to poor flow and adhesion. For PLA, I generally start around 200-210°C, but some brands, like say Overture PLA or even some local Indian brands, might prefer 215°C. PETG usually needs higher, around 230-245°C. Always check the filament manufacturer's recommendations on the spool, and don't be afraid to do a temperature tower test if you're unsure. A small increase of 5°C can sometimes fix the issue instantly.
3. Filament Issues â The Material Matters
This is often overlooked, but it's crucial. Your filament isn't just a string of plastic; its quality and condition can heavily impact your prints.
Moisture-Laden Filament
Oh, this is a killer, especially in our humid Indian climate. Wet filament causes popping and crackling sounds during printing (that's the water boiling off!), leading to poor layer adhesion, stringing, and, you guessed it, gaps in your top layers. If your filament has been sitting out for a while, especially in monsoon season, it's probably absorbed moisture. Iâve had spools of PLA that looked fine but printed terribly, only to realize after drying them they were perfect. Get a filament dryer box â itâs a game-changer. They start from around â¹4,000-â¹6,000 on Amazon.in. Check out some options here. Trust me, itâs an investment that pays for itself in saved filament and avoided headaches.
Inconsistent Filament Diameter
Not all filaments are created equal. Cheaper, lower-quality filaments might have inconsistent diameters along the spool. If the diameter suddenly drops, the printer extrudes less material, causing gaps. This is harder to fix directly other than buying better quality filament. Iâve generally had good luck with brands like eSun, Overture, and even some specific Protoprint spools here in India. They might be a bit pricier, but the consistency is usually worth the extra â¹200-â¹300 per spool.
My Personal Troubleshooting Workflow (The "Vidyut's Varmala" Method, ha!)
Okay, so that's a lot of potential problems. How do you tackle them without losing your mind? Here's my typical workflow:
- Check Slicer Settings First:
- Are my top layers at least 4-6?
- Is my infill reasonable (15-25% usually)?
- Have I calibrated my flow rate recently? (This one gets me sometimes, I forget!)
- What's my top/bottom line width set to?
- Listen and Look for Mechanical Clues:
- Any clicking from the extruder? (Possible clog or slipping)
- Are the extruded lines consistent?
- Is the hotend fan spinning correctly?
- Any unusual sounds like popping/crackling? (Wet filament)
- Temperature and Speed:
- Is my printing temperature appropriate for the filament?
- Is my top layer speed too high?
- Filament Inspection:
- How old is this spool? Has it been exposed to humidity?
- Try a different, known-good spool of filament if all else fails.
I usually print a small calibration cube (a 20x20x20mm cube) after each significant change to quickly see the results. It saves time and filament compared to printing a large, complex model repeatedly.
Wrapping Up (Pun Intended, kinda)
Gaps in your top layers are a super annoying problem, but they're definitely fixable. It's all about systematically going through the potential causes. Don't get discouraged! Every experienced printer, from the hobbyist in a small apartment to a professional running a print farm, has faced this. Itâs part of the journey, honestly. Each time you troubleshoot and fix something like this, you're not just fixing a print; you're learning more about your machine and becoming a better 3D printing wizard.
So, the next time you see those dreaded gaps, take a deep breath, grab a cup of chai, and calmly go through this checklist. You've got this! And hey, if you try any of these tips, drop a comment below and let me know how it worked out for you. Your experiences help us all learn and grow in this awesome 3D printing community!