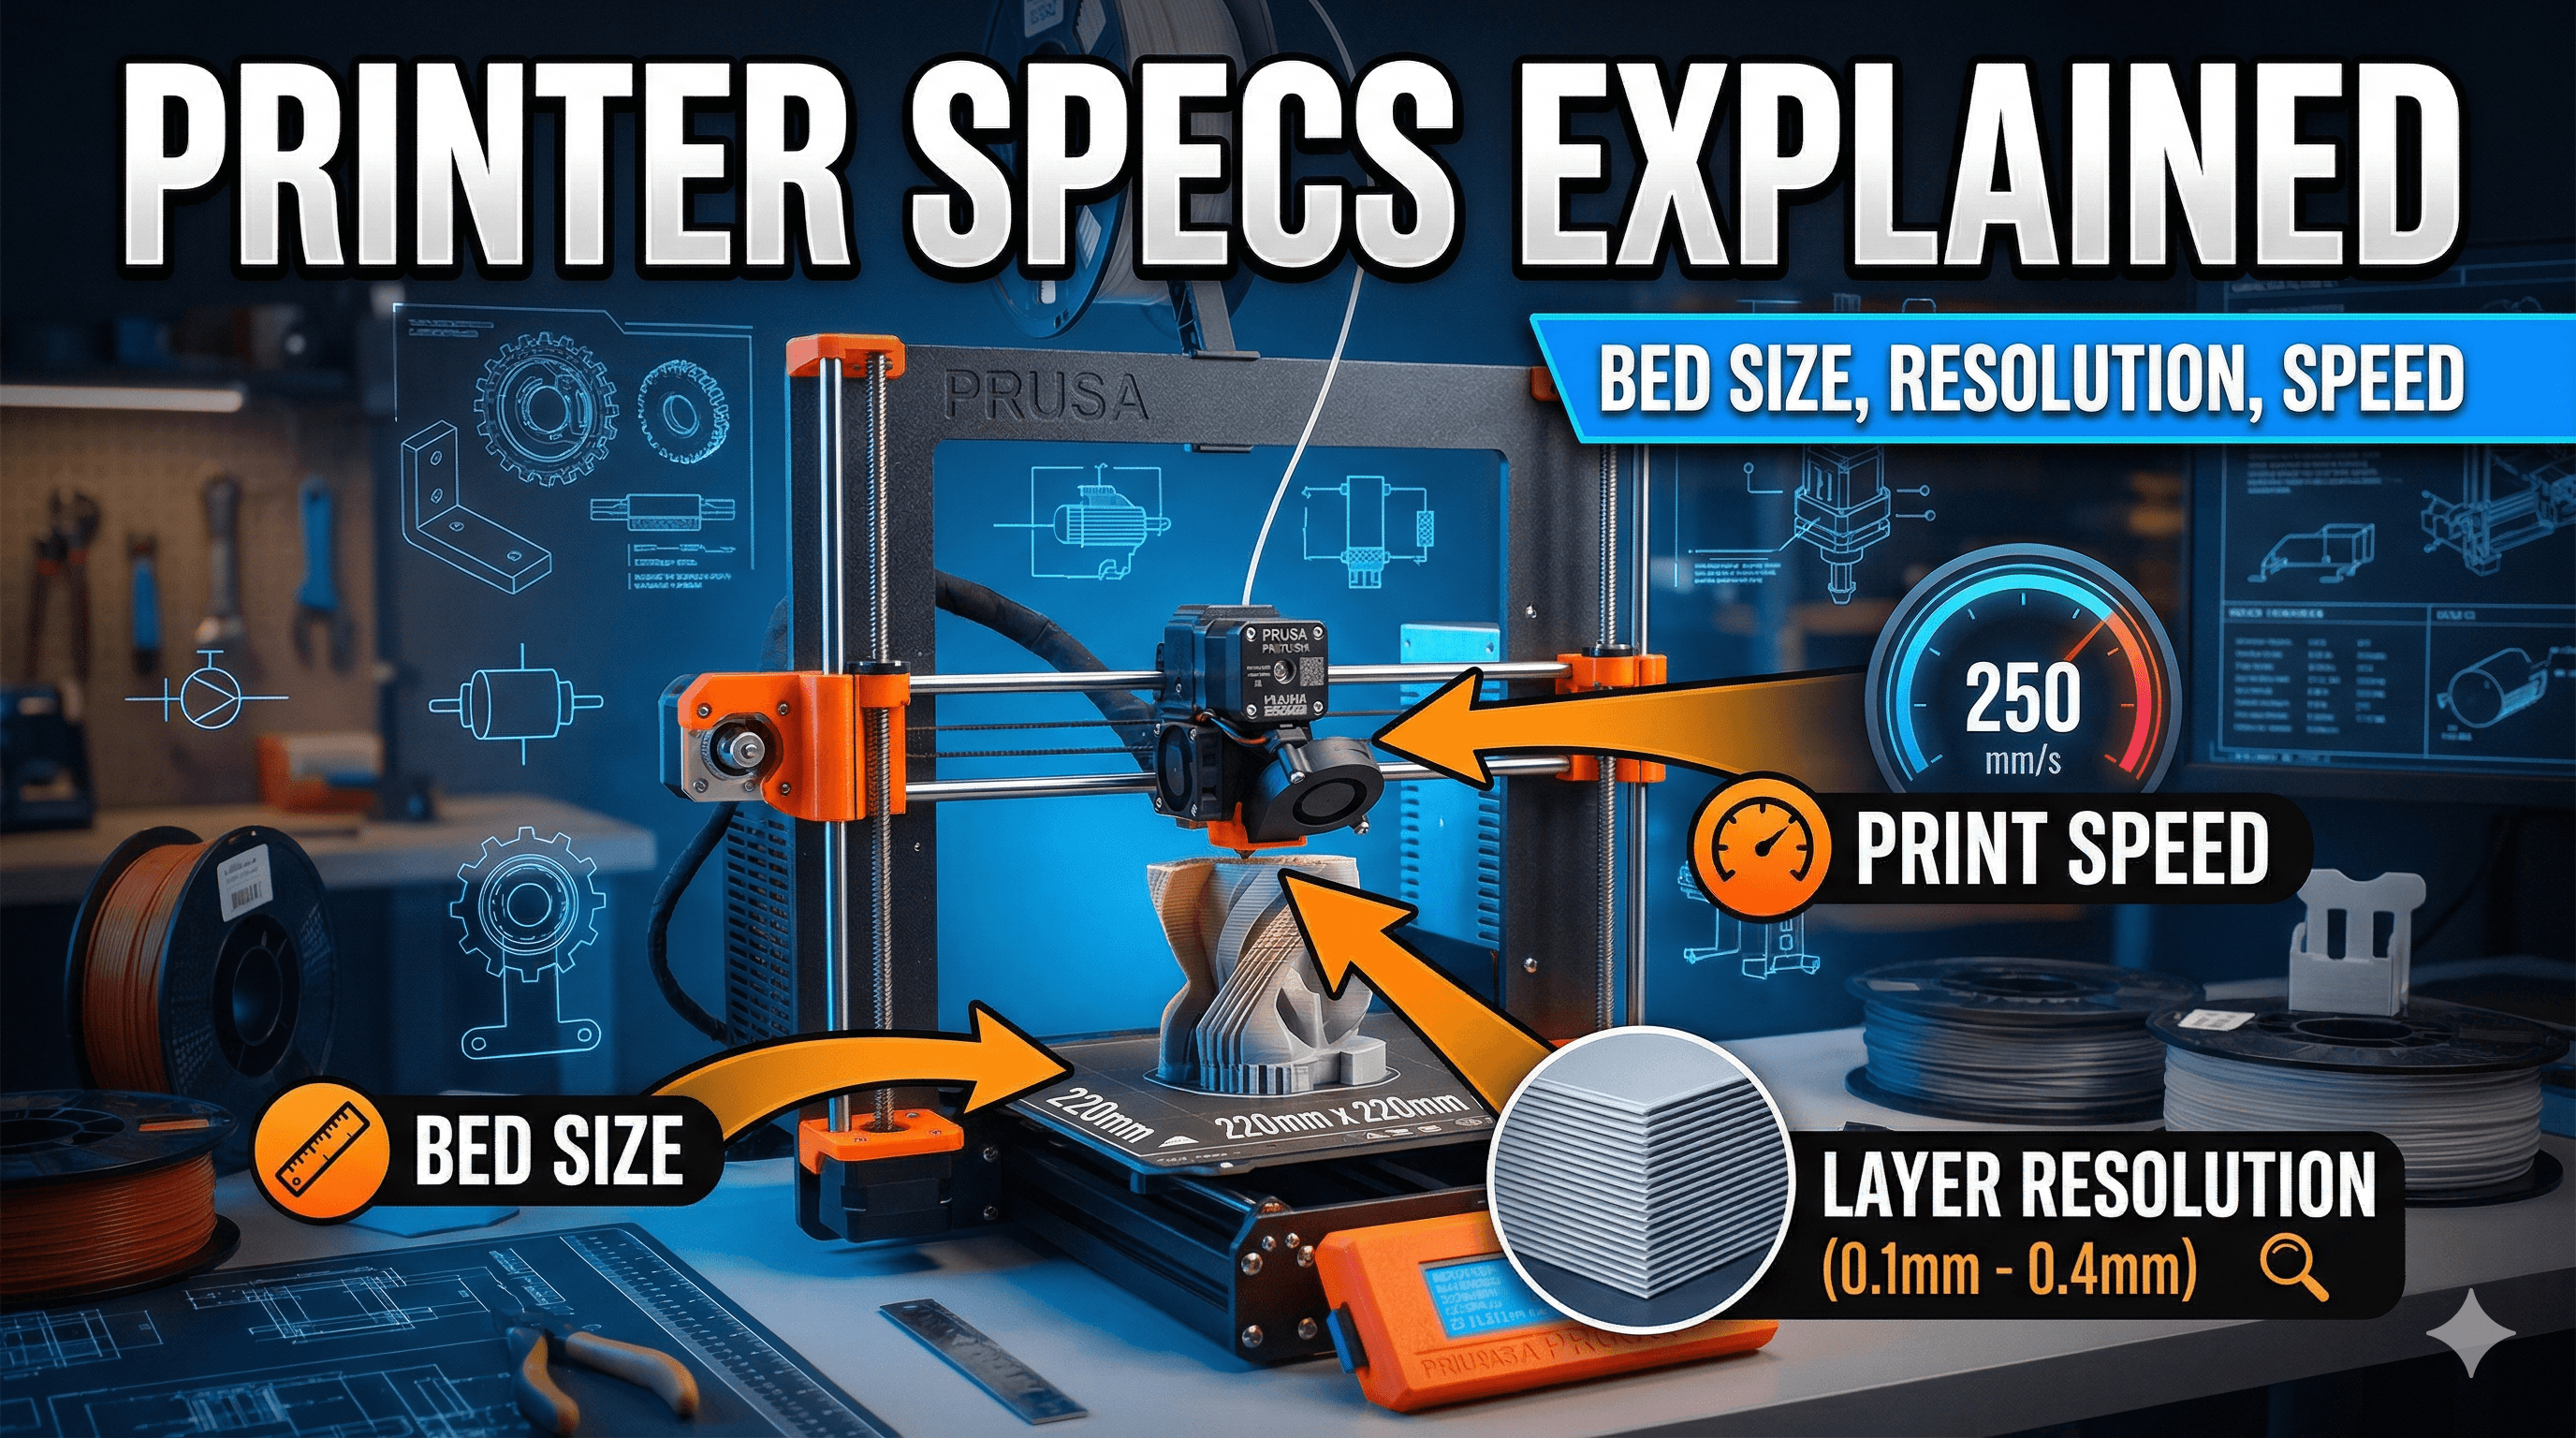
Understanding 3D Printer Specs: Bed Size, Resolution, Speed Explained
Decoding 3D printer specifications can be tricky, but understanding bed size, resolution, and speed is key. This post breaks down each spec, explaining its importance for your projects and helping you choose the perfect printer.
Chalo, let's be real for a sec. When you first dive into the wild, wonderful world of 3D printing, it's like opening a whole new dimension of possibilities, right? You're seeing all these amazing things people are making online, from intricate miniatures to functional prototypes, and you're thinking, "Boss, I need me some of that!" But then, you hit the market, and suddenly, you're drowning in a sea of acronyms and numbers â bed size, resolution, speed, layer height, kinematics, direct drive, Bowden, Marlin, Klipper... it's enough to make your head spin faster than a high-speed print head! Trust me, IâÂÂve been there. My first printer, a trusty old Anet A8 (don't ask, it was a learning curve, let's just say), felt like a black box for ages. And now, running ArtOpia Collections, my small 3D printing business right here in India, I get calls every single day from folks utterly confused about what printer to buy, or why their prints aren't looking like the ones on YouTube. So, letâÂÂs peel back the layers, literally, and talk about the three big ones: bed size, resolution, and speed. These are the specs thatâÂÂll genuinely make or break your 3D printing experience, whether you're a hobbyist or dreaming of starting your own little venture like mine.
Understanding Bed Size: How Big Can You Go?
Okay, first up, bed size. This is probably the easiest one to grasp, but also one of the most crucial. Basically, itâÂÂs the maximum dimensions (X, Y, and Z axes) that your printer can physically print. Think of it as your printerâÂÂs canvas. Most entry-level FDM (Fused Deposition Modeling) printers, like the ever-popular Creality Ender 3 series, typically offer a build volume of around 220x220x250mm. That's 220mm in width, 220mm in depth, and 250mm in height. Pretty standard, and honestly, itâÂÂs more than enough for most hobby projects â making game pieces, phone stands, small organisers, even some cool action figures. I started with something similar, and it taught me a lot about slicing larger models into smaller, manageable parts.
But what if you want to print something bigger? Like a full-size helmet for a cosplay, or a functional part for your washing machine? ThatâÂÂs where larger bed sizes come in. You'll find printers like the Creality K1 Max offering a generous 300x300x300mm, or even bigger industrial machines. The thing is, going bigger usually means a significantly higher price tag. An Ender 3 V3 SE, which is a fantastic starter machine, will set you back around â¹23,000-â¹25,000 (and trust me, itâÂÂs worth every rupee â you can check it out here on Amazon: Creality Ender 3 V3 SE). A K1 Max, with its larger build volume and blazing speed, could easily be upwards of â¹80,000-â¹90,000. It's a jump, for sure.
For my business, having a variety of bed sizes is absolutely key. Sometimes a client needs a tiny, intricate part for a drone, and sometimes they want a custom display stand thatâÂÂs nearly half a meter tall. If you're planning on printing large cosplay props or furniture prototypes, you'll obviously want to invest in a machine with a larger build volume from the get-go. Otherwise, you'll spend hours, days even, slicing huge models into dozens of smaller pieces, printing them all, and then painstakingly gluing and finishing them together. ItâÂÂs doable, but itâÂÂs a lot of extra effort, and sometimes the seams are just too visible. So, think about what youâÂÂll primarily be printing. Don't overspend on a massive printer if all you're making are little trinkets. But also, don't limit yourself if you know you have big plans!
Resolution: The Devil (and Beauty) is in the Detail
Okay, this one is a bit more nuanced, but oh-so-important for print quality. When we talk about "resolution" in 3D printing, we're mostly talking about two things: layer height and to some extent, nozzle size. Basically, itâÂÂs how fine the individual layers of plastic are, and how small of a detail your printer can actually squeeze out.
Layer Height: How Smooth is Your Finish?
Imagine building a wall with bricks. A high-resolution print is like a wall made of super thin tiles â you'll hardly see the individual lines, and the surface will be incredibly smooth. A low-resolution print is like a wall made of fat, chunky bricks â you can clearly see each layer. In 3D printing, layer height refers to the thickness of each individual layer of filament extruded by your nozzle. It's usually measured in millimeters (mm).
- 0.2mm (200 microns): This is sort of the standard, go-to layer height for most FDM printing. It offers a good balance between print speed and acceptable detail. Most everyday prints, functional parts, or toys are perfectly fine at 0.2mm.
- 0.12mm - 0.16mm (120-160 microns): This is where you start getting into finer detail. The layers become less visible, and curved surfaces look much smoother. Great for display pieces, figures, or anything where aesthetics matter a bit more.
- 0.08mm or even 0.04mm (80-40 microns): Now we're talking high-resolution! At these layer heights, the individual layers are almost invisible to the naked eye. This is what you'd use for highly detailed miniatures, prototypes with very fine features, or jewelry masters. But here's the kicker: it takes ages to print. A model that might take 4 hours at 0.2mm could easily take 10-12 hours or more at 0.08mm, because the printer has to lay down so many more layers.
- 0.28mm - 0.32mm (280-320 microns): On the other end, if you're just prototyping, testing a fit, or don't care about aesthetics, you can go with thicker layers for speed. It'll be rough, but it'll print much faster.
In my experience, when a client comes to ArtOpia Collections asking for a super detailed miniature or a replica with intricate textures, I know I'm setting up for a 0.08mm or 0.12mm layer height on one of my more precise machines. And I always make sure to communicate the increased print time (and thus, cost!) to them beforehand. It's a trade-off, yaar â speed versus beauty.
Nozzle Size: The Pen Tip of Your Printer
While layer height defines vertical resolution, nozzle size impacts horizontal detail and overall extrusion width. The standard nozzle size for most FDM printers is 0.4mm. ItâÂÂs versatile, letting you print decent details and still get good print speeds. But just like layer height, you can change your nozzle for different purposes:
- 0.2mm - 0.25mm: For truly microscopic details, really tiny features, or miniature painting masters. Again, prints will be incredibly slow, and you might encounter more clogs with standard filaments. Not for the faint of heart!
- 0.4mm: The all-rounder. Good balance of speed, detail, and reliability. Most of my day-to-day prints at ArtOpia Collections use a 0.4mm nozzle.
- 0.6mm - 0.8mm (or even 1.0mm+): These are "fat" nozzles. They lay down a wider, thicker line of filament. This is fantastic for structural parts, large prints where speed is paramount and detail isn't, or for printing with abrasive, filled filaments (like carbon fiber composites) because they wear down smaller nozzles quickly. The prints will be noticeably rougher, but they'll be stronger and finish much faster.
So, a printer's true resolution capability is a combination of its mechanical precision (how accurately it can move) and your chosen layer height and nozzle size. A very cheap printer might struggle to consistently hit fine layer heights due to mechanical slop, no matter what you set in your slicer.
Speed: How Fast Can You Go Without Breaking the Bank (or the Print)?
Ah, speed! Everyone wants their prints done yesterday, right? And honestly, seeing a printer whiz around at 500mm/s is just plain cool. But "speed" in 3D printing isn't just about how fast the print head moves; it's a complex interplay of several factors, and pushing it too hard without the right machine can lead to disastrous results.
Print Speed (mm/s): The Raw Number
This is the most commonly cited speed spec. It tells you how fast the nozzle is traveling when it's actively extruding plastic. Older machines like an Ender 3 V2 might comfortably do 50-60mm/s for quality prints. Push it to 100mm/s, and you start seeing issues like ringing (ghosting patterns on your print), poor layer adhesion, or blobs. But then you have the new breed of high-speed CoreXY printers, like the Creality K1, Bambu Lab P1P, or X1C. These machines are engineered from the ground up to handle incredible speeds, hitting 300-500mm/s, sometimes even more, with ease! And they do it while maintaining fantastic print quality. It's a game-changer, truly.
For my business, speed is king, especially for production runs where I'm printing multiple copies of the same thing. Getting a print done in 2 hours instead of 6 hours means I can fulfill more orders and keep clients happy. But never, ever at the cost of unacceptable quality. ItâÂÂs a delicate balancing act, and I've spent countless hours calibrating my machines to find that sweet spot.
Acceleration (mm/sò): Getting Up to Speed
This is just as important as print speed, if not more so. Acceleration dictates how quickly the print head can reach its target speed and decelerate. Imagine a car: a sports car might have a lower top speed than a bullet train, but it accelerates much faster, making it feel "zippier." Higher acceleration means less time spent ramping up and down, which saves a lot of time on prints with many small movements. Modern high-speed printers boast accelerations well into the thousands (e.g., 8,000-20,000mm/sò), while older, budget machines might be limited to a few hundred or a thousand.
Hotend Flow Rate (mmó/s): Can It Melt Fast Enough?
This is often overlooked. It's not just about how fast the nozzle moves, but how quickly the hotend can melt and push out plastic. If your hotend can only melt, say, 12mmó of plastic per second, and you try to print at a speed and layer height that demands 20mmó/s, you'll get under-extrusion â basically, not enough plastic coming out, leading to weak, gappy prints. High-flow hotends are a must for truly high-speed printing. The Creality K1, for example, boasts a hotend capable of up to 32mmó/s flow rate, which is why it can maintain quality at insane speeds.
Cooling: Taming the Heat
Printing fast means hot plastic is laid down rapidly. If you don't cool it down quickly enough, especially on overhangs or small features, the plastic won't solidify before the next layer is printed, leading to droopy, messy prints. High-speed printers often have incredibly powerful part cooling fans, sometimes even multiple fans, directed at the nozzle to solidify the plastic almost instantly.
So, when you see a printer advertising "500mm/s print speed!", understand that it's not just that number. It means the printer has a rigid frame (often CoreXY kinematics), powerful stepper motors, high acceleration values, a high-flow hotend, and robust cooling â all working in harmony. This is why a high-speed machine like a Bambu Lab P1P (which is truly excellent, by the way) costs significantly more, around â¹50,000-â¹60,000 (if you can get it in India without crazy import duties, that is), compared to an Ender 3 at â¹23,000.
Bringing It All Together: What Should You Look For?
Honestly, choosing a 3D printer isn't about finding the "best" specs, it's about finding the best specs for you and your budget. HereâÂÂs a quick rundown of what I tell my friends and clients:
- What are you printing? Small, highly detailed models? Go for good resolution capabilities (precise mechanics, ability to print low layer heights). Large functional prototypes? Focus on bed size and robust construction. Quick turnaround prototypes? Prioritize speed.
- What's your budget? Be realistic. A â¹25,000 printer like the Ender 3 V3 SE will give you an amazing experience for the price, but it won't be as fast or as refined as a â¹60,000 Bambu Lab.
- How much patience do you have? Cheaper printers often require more tinkering, calibrating, and troubleshooting. More expensive machines tend to be more "plug and play."
Don't just chase the biggest numbers. A printer with a massive bed but poor resolution won't help you print detailed figures. A super-fast printer that can't cool its prints effectively will just give you blobs. It's about balance.
And hey, if you're ever in doubt, or want to see some cool custom prints that use all these specs to their advantage, you should definitely check out my business's product page right here: ArtOpia Collections - Our Products. We make all sorts of custom stuff, from prototypes to unique home decor, and we've learned a ton about what works and what doesn't when it comes to getting the perfect print.
The world of 3D printing is constantly evolving, with new innovations coming out all the time. But understanding these fundamental specs â bed size, resolution, and speed â will give you a solid foundation to make informed decisions and truly unlock the potential of this incredible technology. So go on, dive in, experiment, and most importantly, have fun creating! And grab some good filament while you're at it â it makes a huge difference. You can find some decent PLA+ here: Amazon.in PLA Filament. Happy printing, my friends!